

GOOMI application allows a strong segregation of duties for the users by defining access rights for different users.
Using “Organization – (Masters) Roles, Access Rights” view, user can create different roles, assign users to the roles, and set different Data Access Controls and the Document Process Controls for the roles.
Access Controls define the view level access control the user is granted : View Documents, Create Documents, Delete Documents
Document Controls define what the user is allowed to do with a document that he has access to : Close, Confirm, Re-Open, Approve, Undo – Approve
Below is an example of process flow on how to set an “Invoicing Clerk” role and define which access and document controls this role can do, for example in processing a sales order:
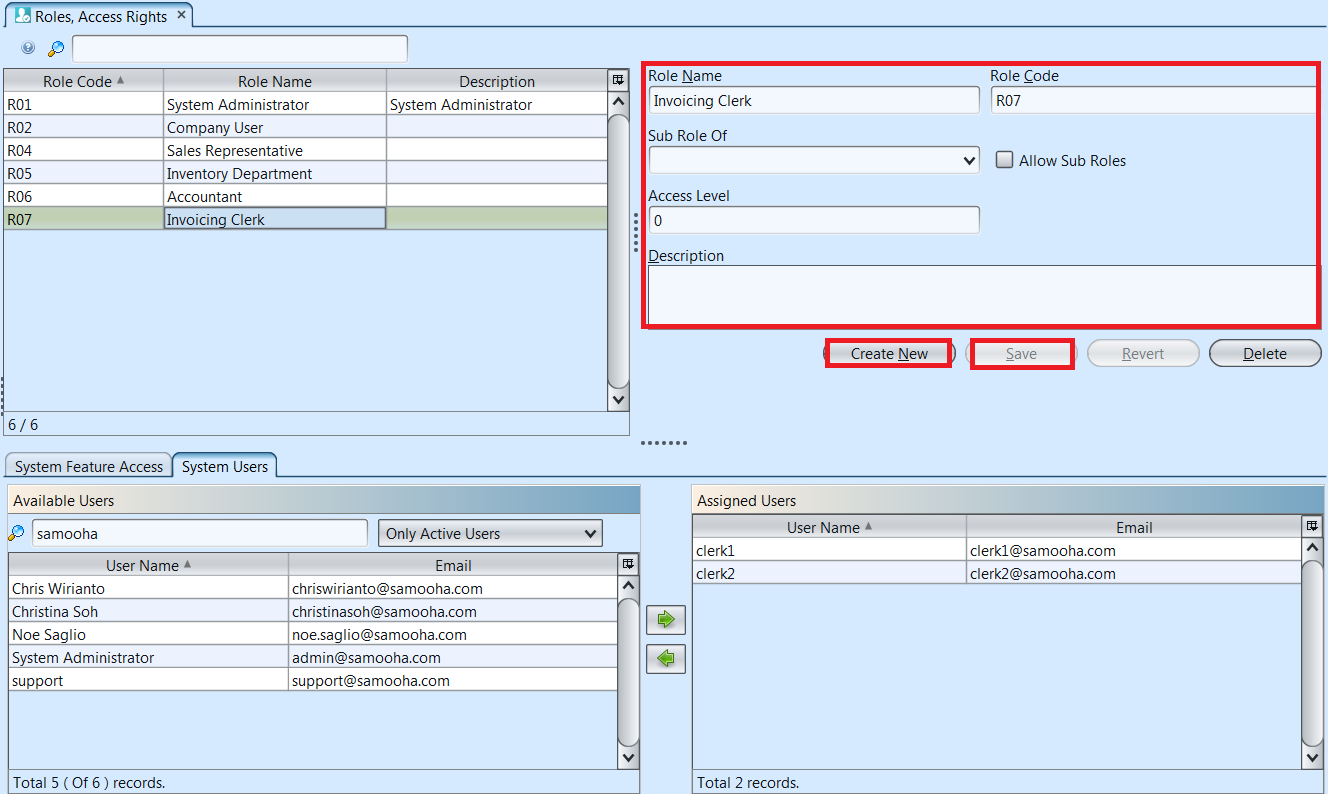
![]() Admin create new user role
Admin create new user role
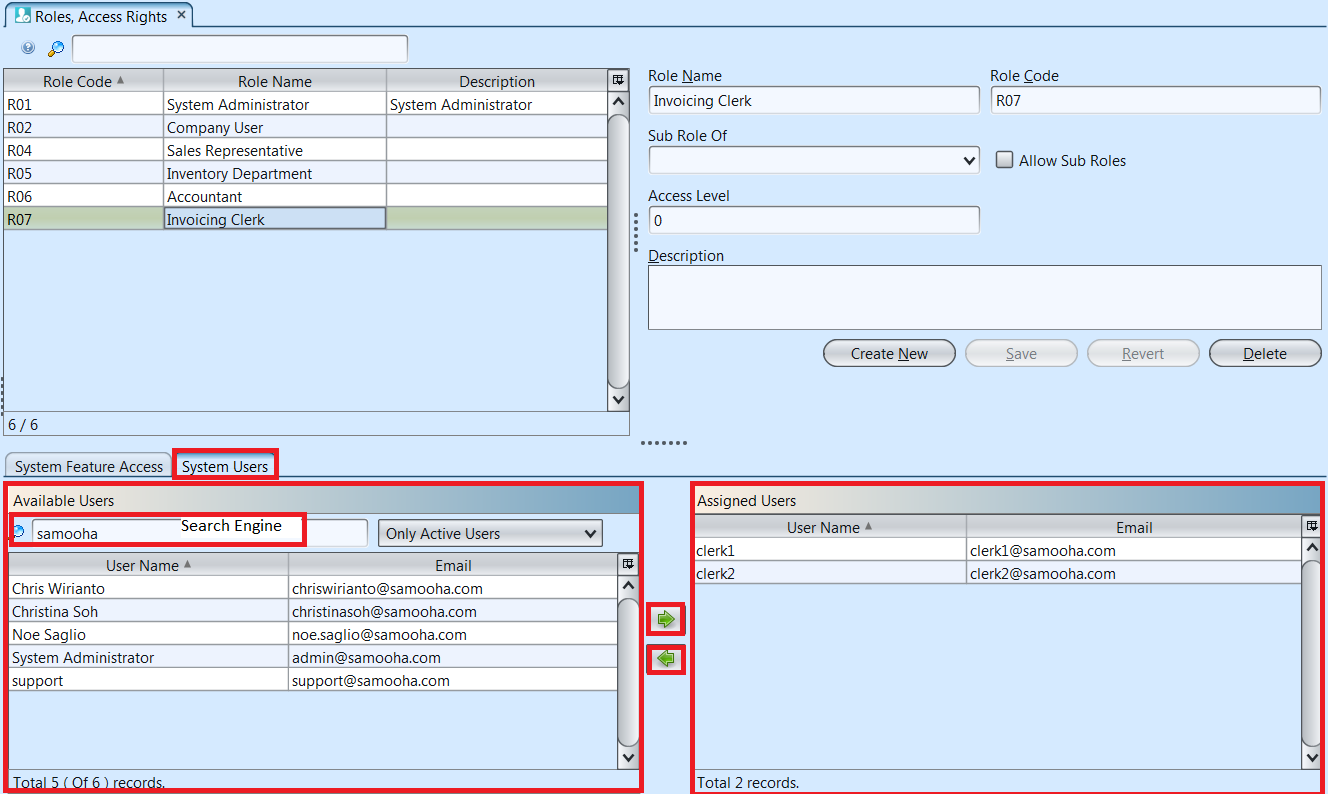
![]() Admin assign users to the user role.
Admin assign users to the user role.
![]() Admin set system features access level for the user role
Admin set system features access level for the user role
![]() User create new sales order and confirm the document
User create new sales order and confirm the document
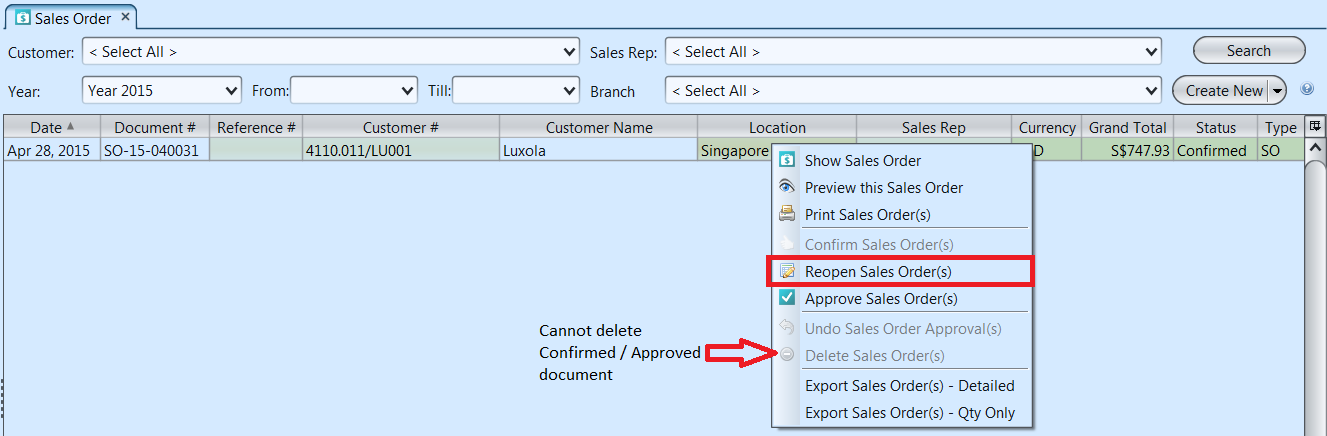
![]() User re-open a (confirmed) sales order and try to delete the sales order
User re-open a (confirmed) sales order and try to delete the sales order
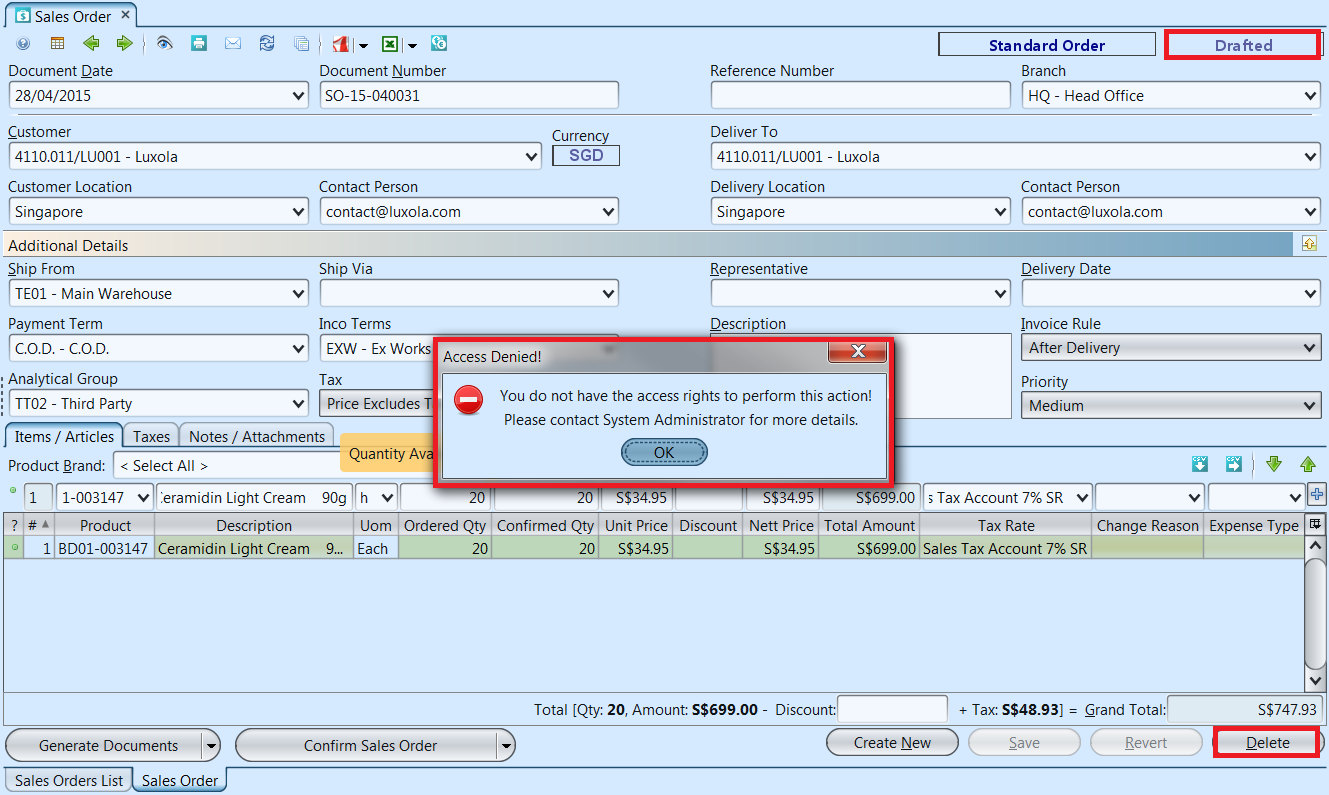
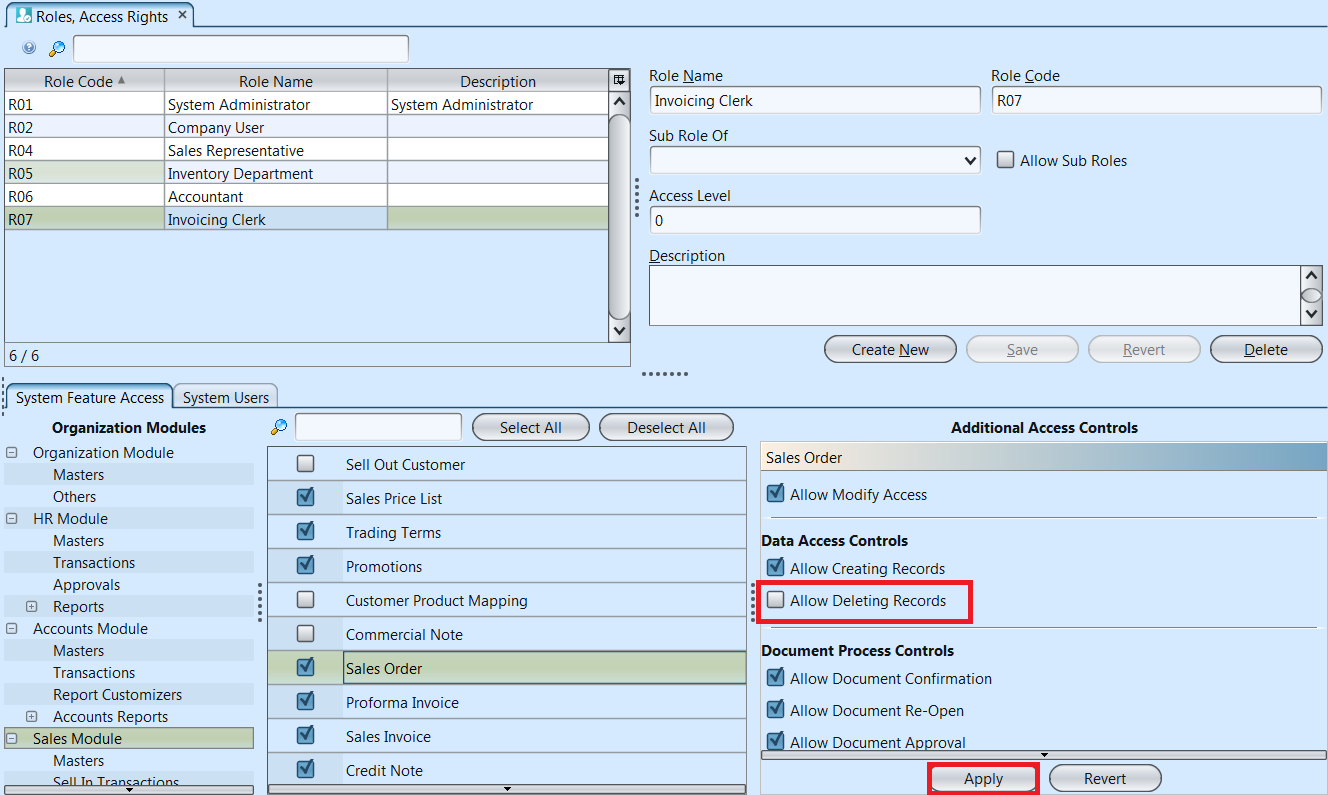
![]() Admin remove delete access for user, User try to delete the sales order and fail
Admin remove delete access for user, User try to delete the sales order and fail
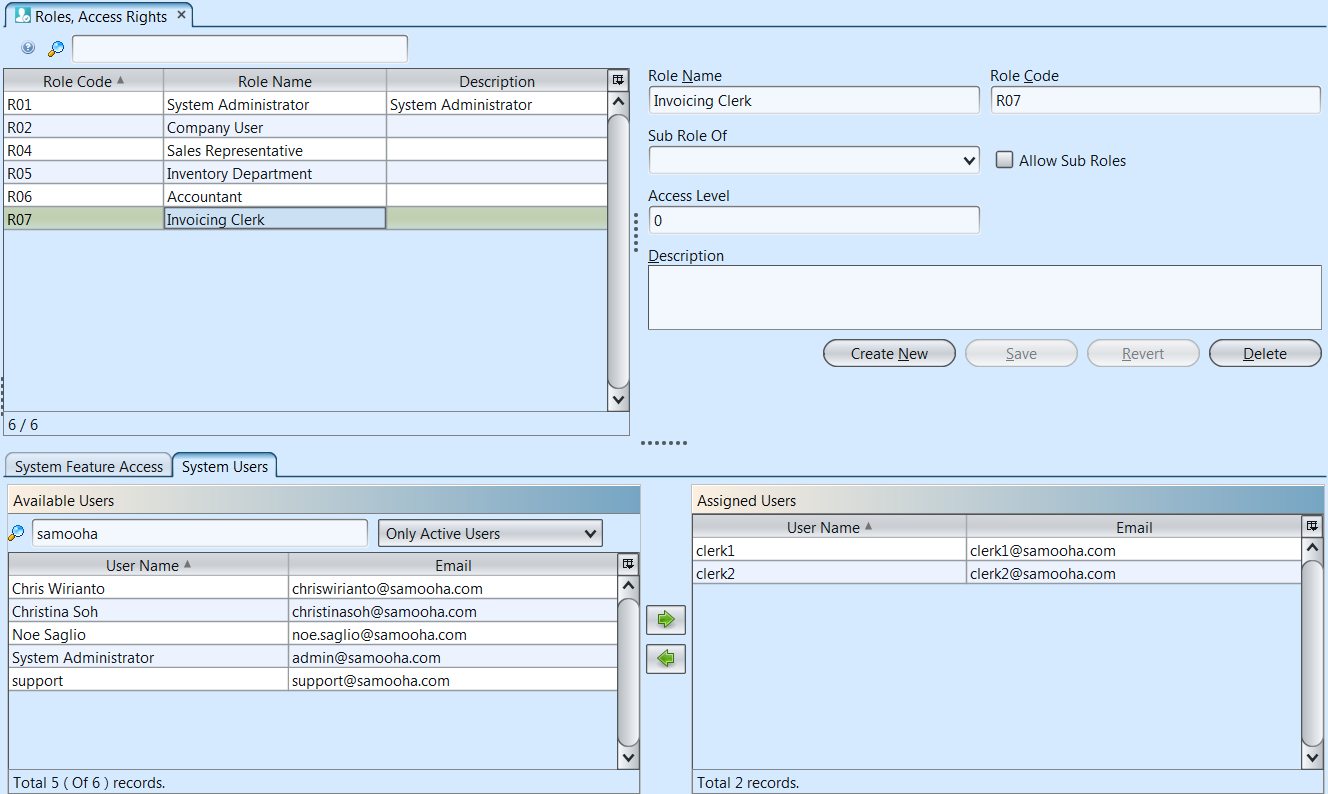
Admin Create New User Roles:
1. In “Organization – (Masters) Roles, Access Rights” view, click on “Create New” button at the middle of the screen
2. Fill up the information on top right of screen, , e.g. for “Invoicing Clerk” role.
3. Optional: Tick the “Allow Sub Roles” box to set the role as (parent) grouping role
4. Optional: User may select a parent role from “Sub Role Of” drop down list, if the role is a grouping role (see steps #3 above).
5. Click on “Save” button to save
Admin Assign Users to The User Role:
1. In “Organization – (Masters) Roles, Access Rights” view, click on a role in the list on top left of screen, e.g. “Invoicing Clerk” role.
2. Click on “System Users” tab in middle of screen.
3. Filter user names in the “Available Users” list using the search engine.
4. Select a user name from the “Available Users” list and click on the “ ![]() ” button to assign the user for the selected role.
” button to assign the user for the selected role.
5. Select a user name from the “Assigned Users” list and click on “ ![]() ” to un-assign the user.
” to un-assign the user.

Admin Set System Features Access Level for The User Role:
1. In “Organization – (Masters) Roles, Access Rights” view, select the role to modify system features access level from the list on top left of screen, e.g. “Invoicing Clerk” role.
2. Select a module from list of “Organization Modules” in the “System Feature Access” tab, e.g. “Sales Module”
3. Select a transaction from list of the selected module’s transactions to make changes, e.g. “Sales Order” transaction
4. Tick a transaction checkbox to give access to role, or untick a transaction checkbox to remove access to role
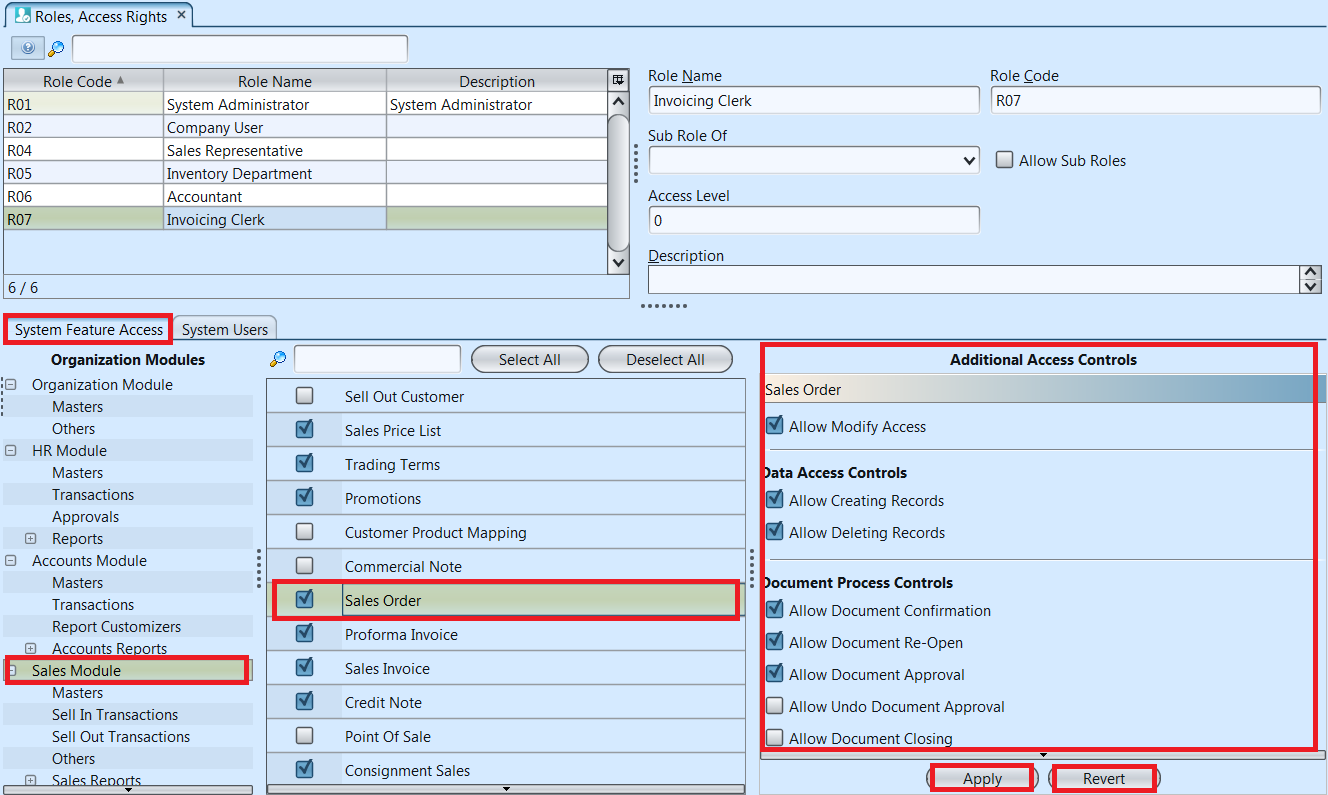
5. Tick an access control checkbox to give access to role, or untick an access control checkbox to remove access to role
6. Click on “Apply” button at the bottom of screen to apply the changes to the system feature access level
7. Click on “Revert” button at the bottom of screen to undo changes to the system feature access level
Below is an example of how user with different access rights able / unable to perform certain actions:
A. User Re-open a (Confirmed) Sales Order and Try to Delete The Document
1. In “Sales – (Sell In Transactions) Sales Order” view, click on “Sales Orders List” tab at the bottom of screen
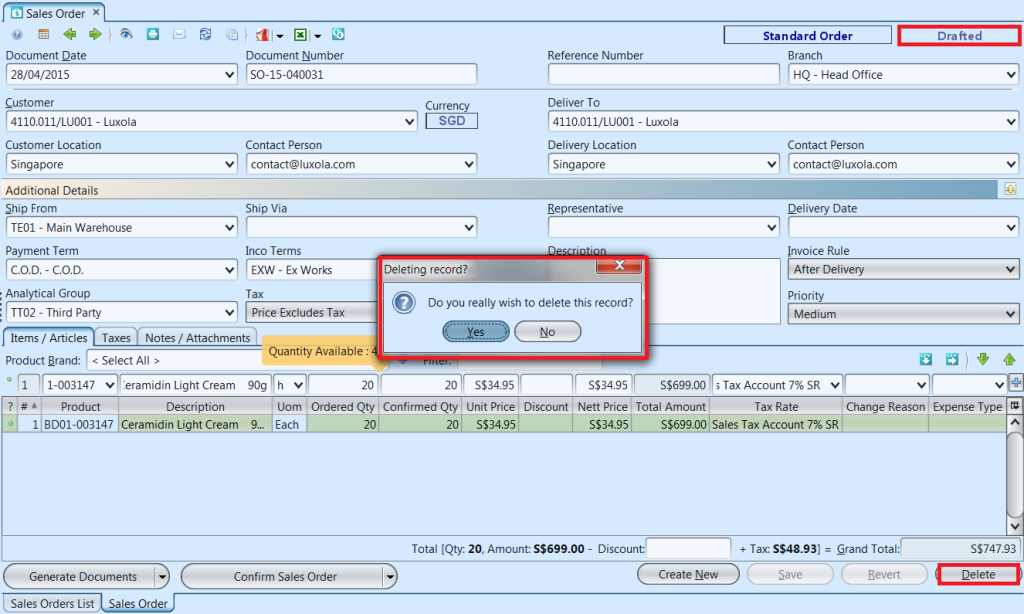
2. If a sales order’s status is “Confirmed” or “Approved” it cannot be deleted, “Delete Sale Order(s)” option is not available as shown in the picture below. Right click on the sales order and reopen / undo approval of the document first. It will change the document status to “Drafted“. Double click on the (drafted) sales order to be deleted, it will bring up the details on “Sales Order” tab for the selected order.
3. Click on “Delete” button at the bottom right side of screen. The system will prompt user for confirmation to delete the document. Click on “Yes” button on the pop-up window to confirm sales order deletion
B. Admin Remove Delete Access for User, User Try to Delete Sales Order and Fail:
1. In “Organization – (Masters) Roles, Access Rights” view, Admin select “Invoicing Clerk” role to modify system features access level from the list on top left of screen
2. Admin select “Sales Module” from list of “Organization Modules” in the “System Feature Access” tab
3. Admin select “Sales Order” transaction from list of the sales module’s transactions to make changes
4. Admin un-tick “Allow Deleting Records” checkbox to remove delete access from “Invoicing Clerk” role
5. Admin click on “Apply” button at the bottom of screen to apply the changes to the system feature access level
6. In “Sales – (Sell In Transactions) Sales Order” view, User click on “Delete” button at the bottom right side of screen of (drafted) sale order details document. The system will now prompt user that they do not have access right to perform the action.