Product Disassembly
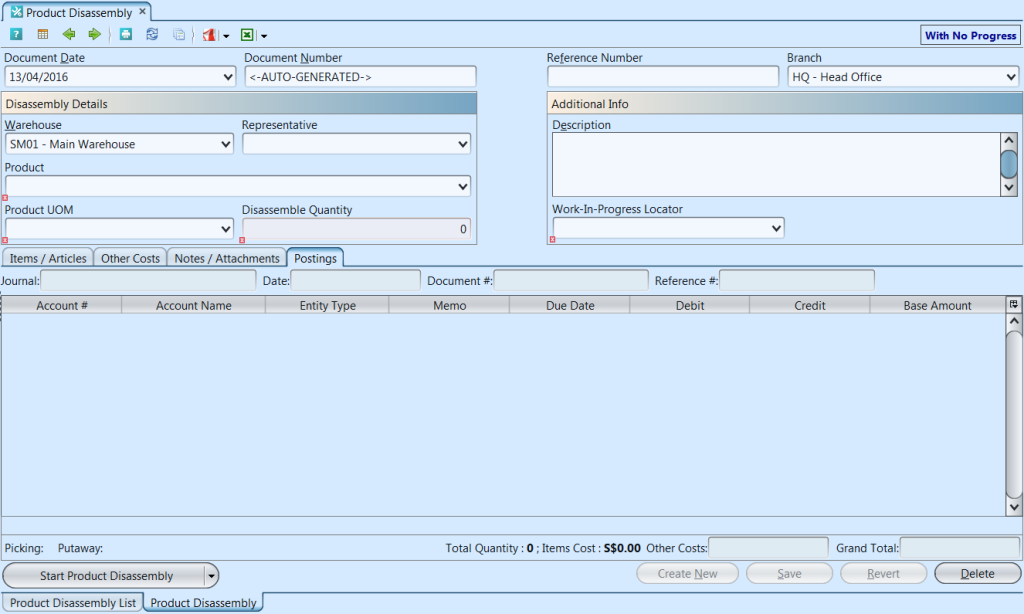
The Product Disassembly view allows user to process dis-assembling of product into its parts at the warehouse. Below are available actions for the user from “Product Disassembly” view:
![]() Start new product disassembly
Start new product disassembly
![]() Update product disassembly details
Update product disassembly details
![]() Delete product disassembly
Delete product disassembly
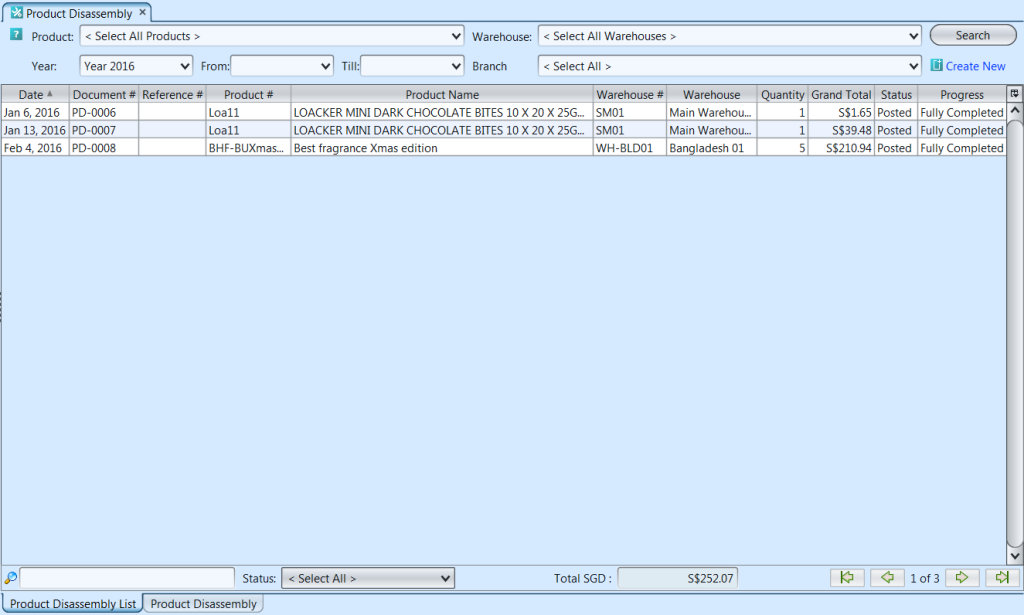
![]() View and search for product disassembly details
View and search for product disassembly details
Field Name |
Description |
Mandatory Information |
| Document Date | Creation date of the document | Y |
| Document Number | Document number of the product disassembly | Y |
| Reference Number | Code for easy reference search of the document | N |
| Branch | Name of company’s branch | Y |
| Warehouse | The warehouse of which to disassemble product | Y |
| Representative | Name of staff assigned to do the product disassembly | N |
| Product | Select an assembled product from the list | Y |
| Product UOM | Unit of Measurement of the product | Y |
| Disassemble Quantity | Quantity of the product to be disassembled | Y |
| Description | Additional information in regard to the product disassembly document | N |
| Work-in-Progress Locator | Locator of product disassembly | Y |
| Items / Articles | ||
| Product Brand | Select product brand(s) to filter products | N |
| Filter | Enter keyword(s) to filter / search for products | N |
| Product | Product code of the item to be disassembled | Y |
| Description | Description of the item | N |
| UOM | Type of the item (Unit of Measure) | Y |
| Quantity | Amount of item required for the product disassembly | Y |
| Batch # | Batch # for the product after disassembly | Y |
| Mfg Date | Manufacturing date for the product after disassembly | Y |
| Expiry Date | Expiry Date for the product after disassembly | Y |
| Unit Cost | Cost per item | Y |
| Total Amount | Total value for the quantity of the item for the product disassembly | Y |
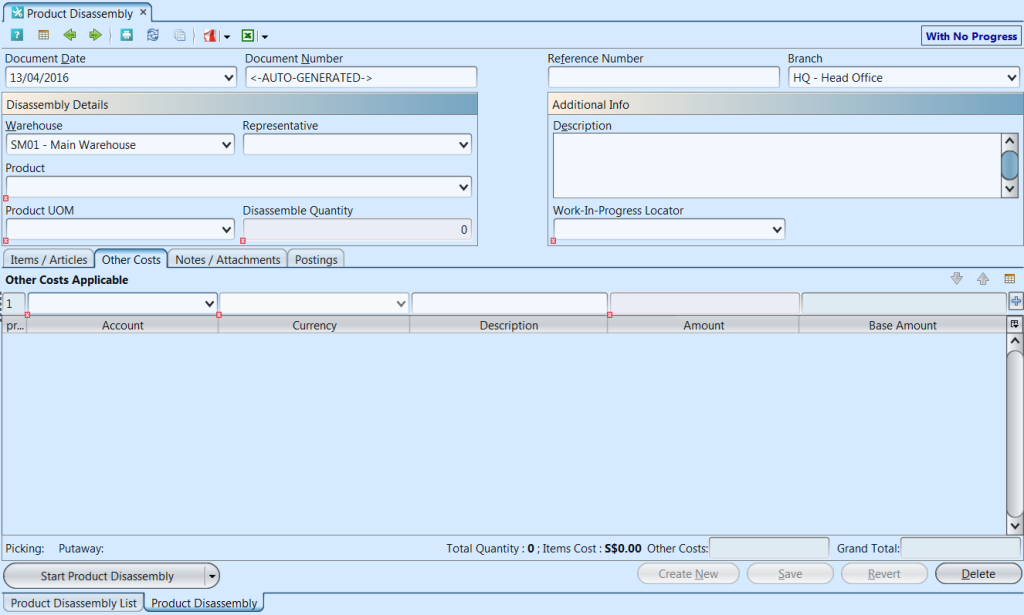
| Other Costs | ||
| Account | Select account to charge applicable cost | Y – if there is other cost |
| Currency | Currency of account | Y – if there is other cost |
| Description | Description of other costs | Y – if there is other cost |
| Amount | Amount of other costs in account’s currency | Y – if there is other cost |
| Base Amount | Amount of other costs in company’s base currency | Y – if there is other cost |
| Other Costs | Total of other costs for the product disassembly document | Y |
| Grand Total | Total cost for all the items on the product disassembly document | Y |
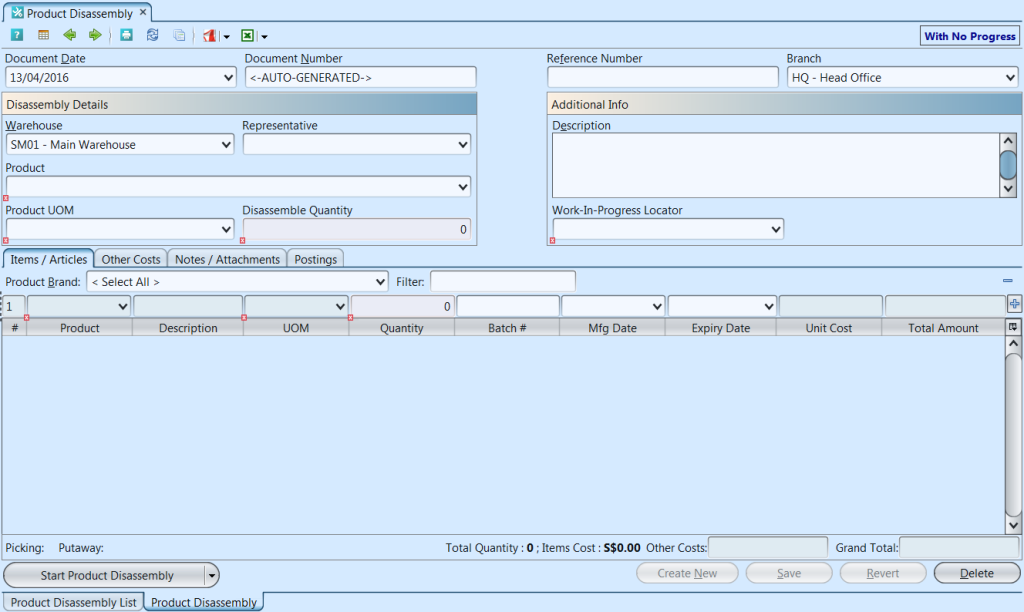
Start New Product Disassembly:
1. Click on “Create New” at the top right of screen of “Product Disassembly List” tab, it will open “Product Disassembly” tab with empty form
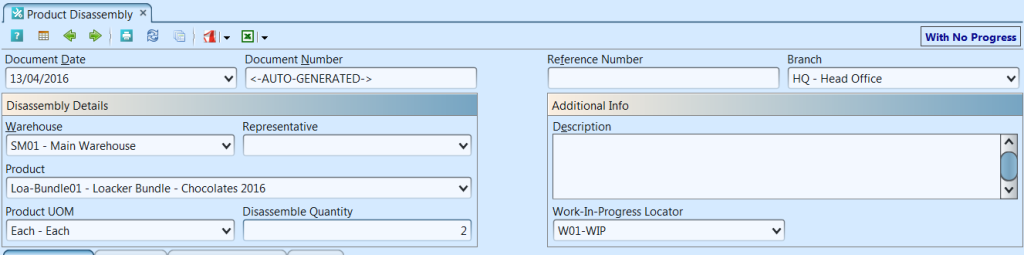
2. Fill up product disassembly’s information on the top half of screen
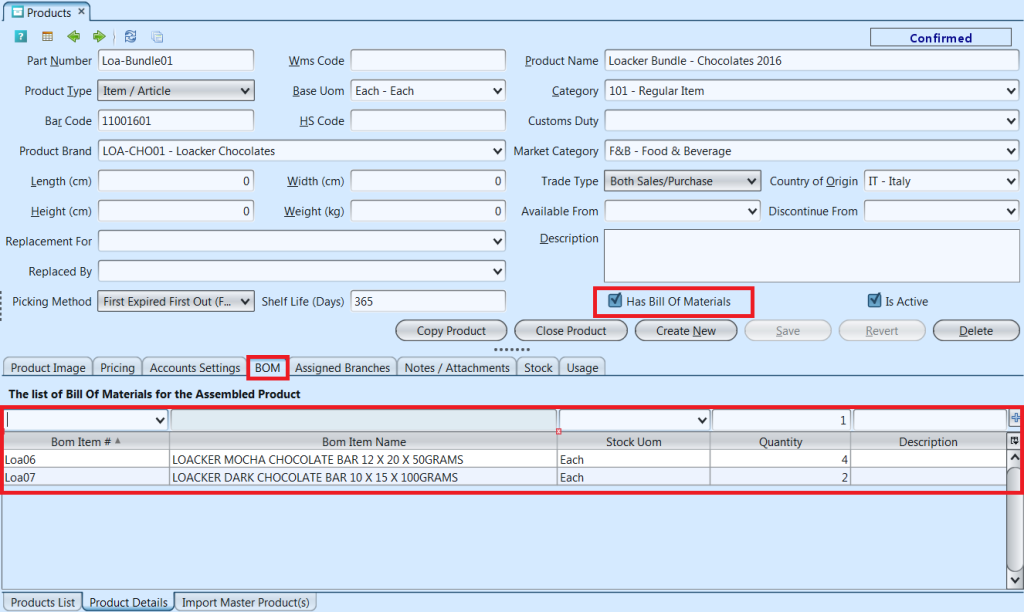
Note: Product disassembly type requires user to tick “Has Bill of Materials” checkbox for the product in “Inventory- (Masters) Products” view and the product’s parts defined under “BOM” tab. The product will then be available for product disassembly’s selection in the product disassembly’s “Product” drop-down list
3. Click “Save” button at the bottom right side of screen
4. Click on “Other Costs” tab at the middle of screen to add other applicable cost for the product disassembly
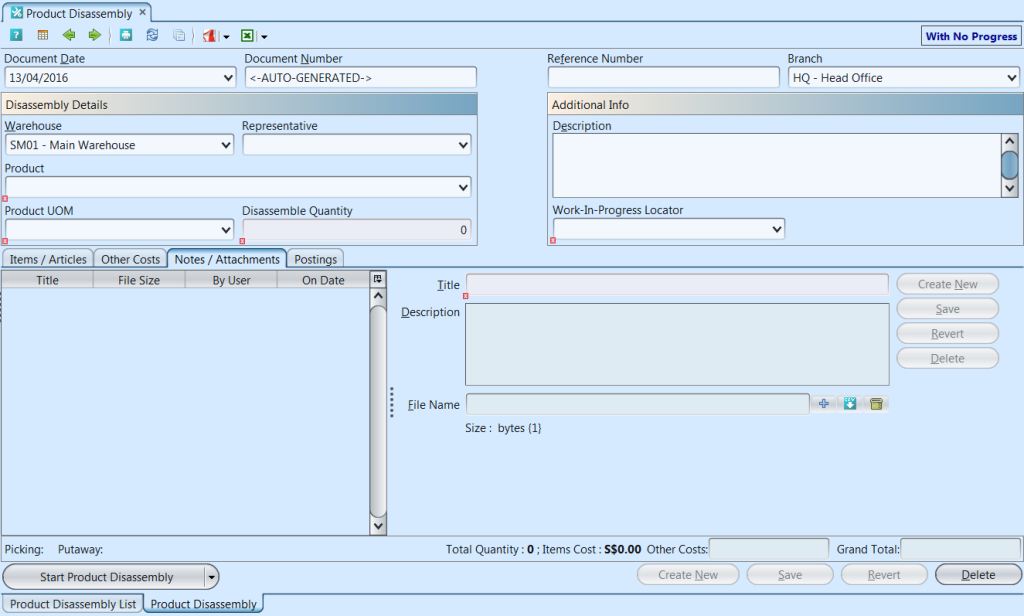
5. Click on “Notes / Attachments” tab at the middle of screen to add notes or files attachment for the product disassembly
6. Click on “Save” button at the bottom right of screen to save
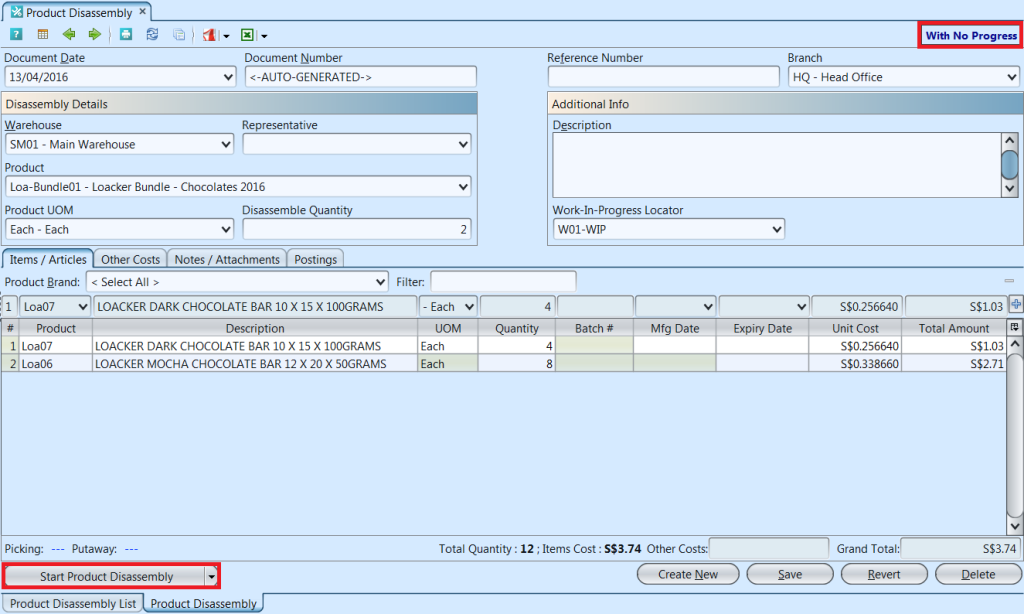
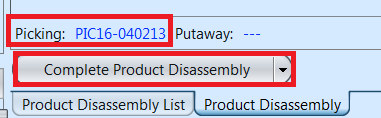
7. Click on “Start Product Disassembly” button at the bottom of screen to start the product disassembly. A link to picking document will show up above “Complete Product Disassembly” button at bottom left of screen. Picking process must be completed before user can complete the product disassembly process. Click on the Picking link to process it and pick the required items
8. User may change the batch information after started the product disassembly process. Select a product line item on the table in the “Items / Articles” tab. Enter “Batch #“, “Manufacturing Date” and / or “Expiry Date”. Click ENTER or ![]() button to save the information. Repeat for the other line items.
button to save the information. Repeat for the other line items.

9. Click on “Complete Product Disassembly” button at the bottom of screen when the product disassembly is completed to confirm the document
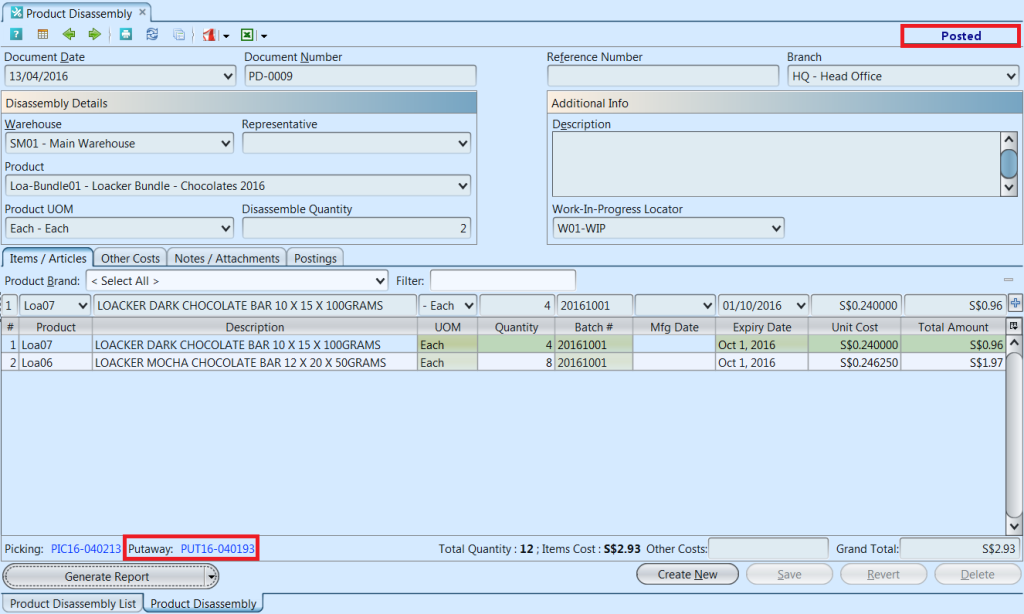
10. Click on “Post Product Disassembly” button at the bottom of screen to post the product disassembly to accounts. Journal entries for the product disassembly will be automatically created under “Posting” tab. A link to Putaway document will show up above “Generate Report” button at bottom left of screen. Click on the Putaway link to process it and to complete the Product Disassembly process

Update Product Disassembly Details:
1. Click on “Product Disassembly List” tab at the bottom of screen
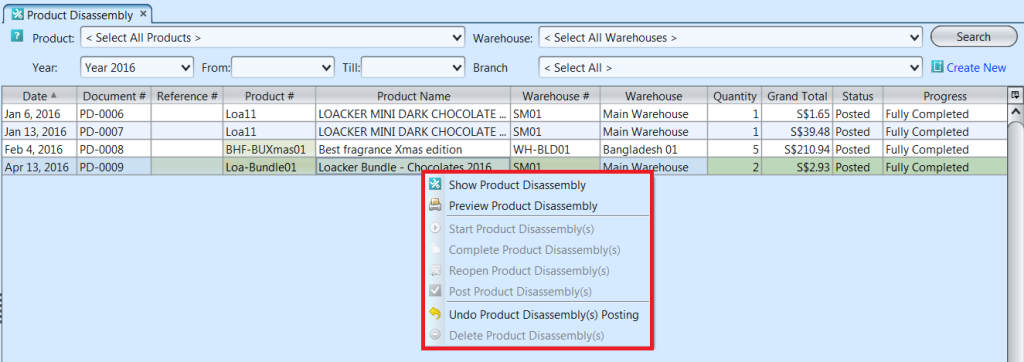
2. Double click on product disassembly to be updated, it will bring up the details on “Product Disassembly” tab for the selected disassembly. If a product disassembly’s status is “Partially Completed” or “Fully Completed”, right click on the order and reopen / undo posting of the document first.
Alternatively user can reopen / undo posting of the document from the list view. Right-click on the document to show options available for the selected document.
Note: Picking and / or Putaway process for the product disassembly document need to be reversed first before user able to modify the document
3. Make change(s) on the product disassembly information
4. Click on “Save” button at the bottom right of screen to save
5. Click on “Revert” button at the bottom right of screen or refresh icon at the top of the screen to roll back the changes
6. Click on “Start Product Disassembly” button at the bottom of screen to start the product disassembly. A link to picking document will show up above “Complete Product Disassembly” button at bottom left of screen. Picking process must be completed before user can complete the product disassembly process. Click on the picking link to process it
7. Click on “Complete Product Disassembly” button at the bottom of screen when the product disassembly is completed
8. Click on “Post Product Disassembly” button at the bottom of screen to post the product disassembly to accounts. Journal entries for the product disassembly will be automatically created under “Posting” tab. A link to putaway document will show up above “Generate Report” button at bottom left of screen. Click on the putaway link to process it
Delete Product Disassembly:
1. Click on “Product Disassembly List” tab at the bottom of screen
2. Double click on product disassembly to be deleted, it will bring up the details on “Product Disassembly” tab for the selected document. If a product disassembly’s status is “Partially Completed” or “Fully Completed, right click on the order and reopen / undo posting of the document first.
Alternatively user can reopen / undo posting of the document from the list view. Right-click on the document to show options available for the selected document.
Note: Picking and / or putaway process for the product disassembly document need to be reversed first before user able to delete the document
3. Click on “Delete” button at the bottom right side of screen
4. Click on “Yes” button on the pop-up window to confirm product disassembly deletion
View and Search for Product Disassembly Details:
1. Click on “Product Disassembly List” tab at the bottom of screen
2. Enter search parameter to filter the result, i.e. type in which warehouse to search for in the“Warehouse” text field box or select from drop-down list
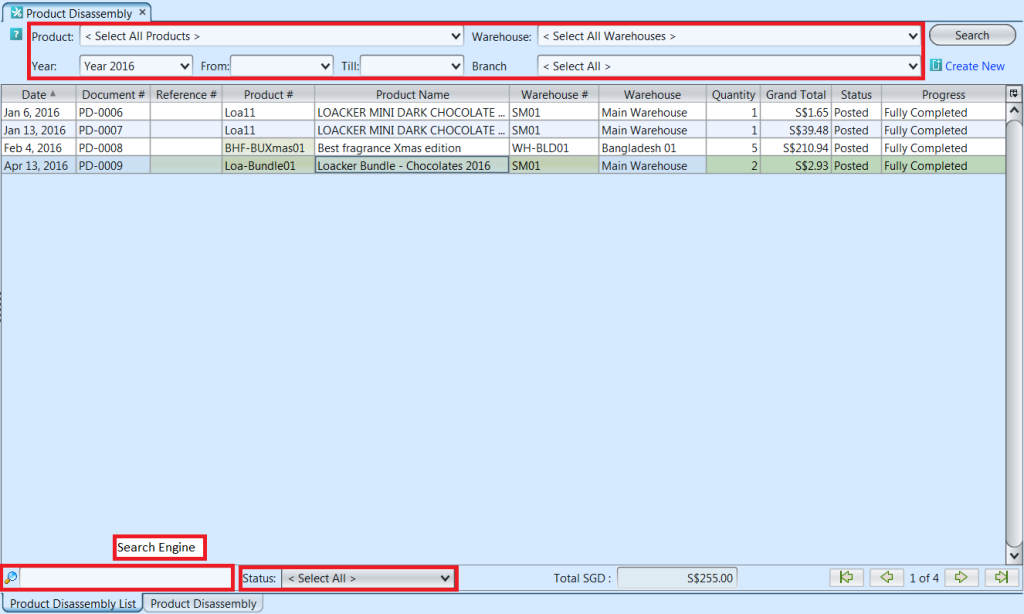
3. Result can be sorted alphabetically by clicking the fields’ columns
4. Double click on product disassembly to view full details of the document, it will bring up the details on “Product Disassembly” tab for the selected document