Roles, Access Rights
This view allows user to define access rights for different users. Below actions are available under “Roles, Access Rights”:
![]() Create the role, modify, search and delete
Create the role, modify, search and delete
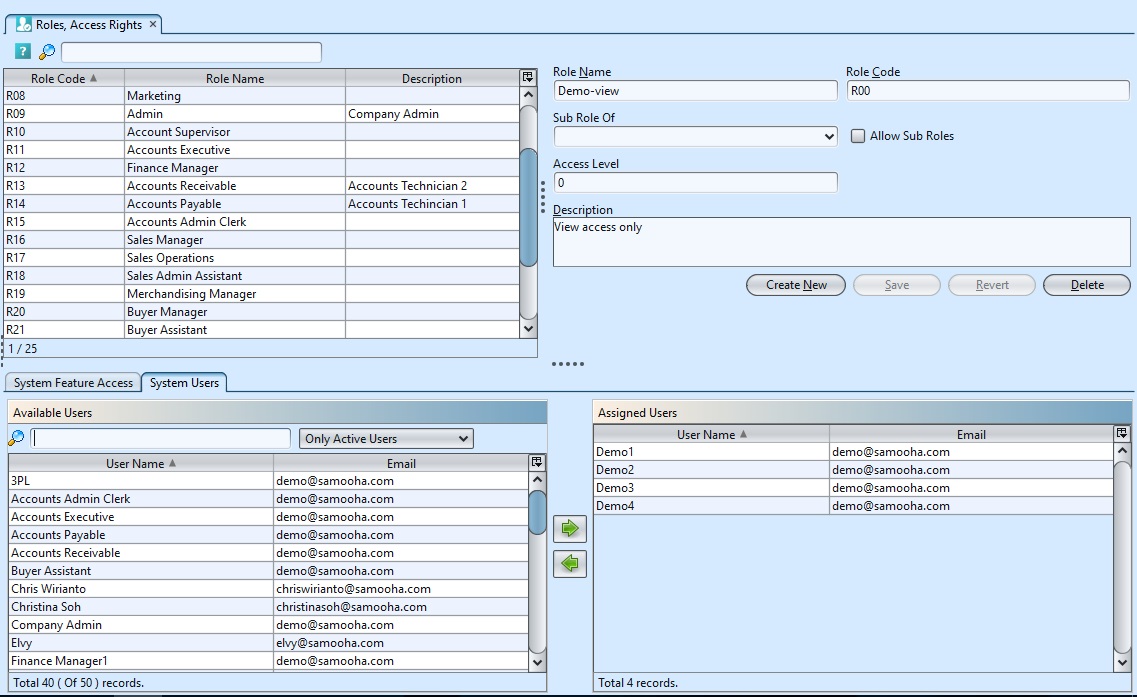
![]() Assign & un-assign user to/from the role.
Assign & un-assign user to/from the role.
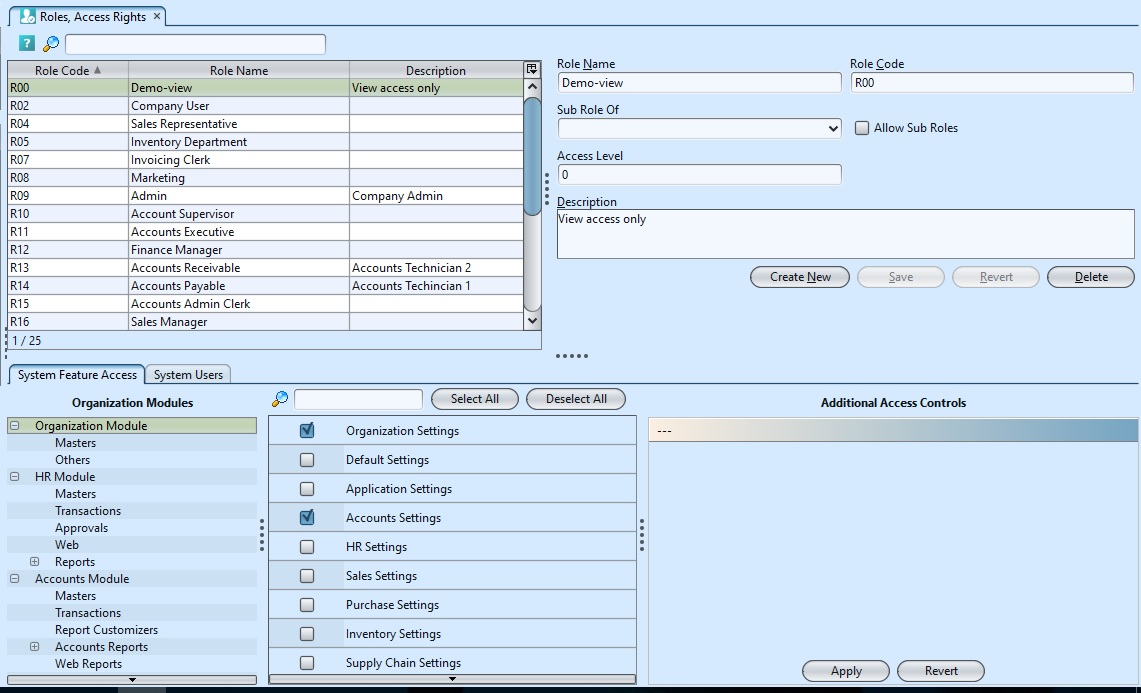
![]() Apply system features access level for the role.
Apply system features access level for the role.
Field Name |
Description |
Mandatory Information |
| Role Name | Name of role |
Y |
| Role Code | Custom code for the role |
Y |
| Sub Role of | Select the main role, for grouping purpose |
N |
| Access Level | Access level in the system |
Y |
| Description | Description |
N |
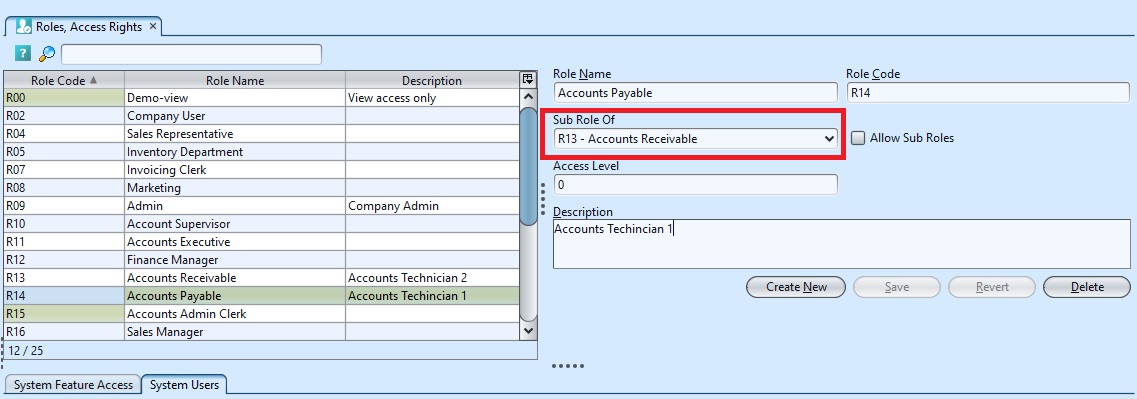
Create New Roles, Access Rights:
1. Click on “Create New” button at the middle of the screen
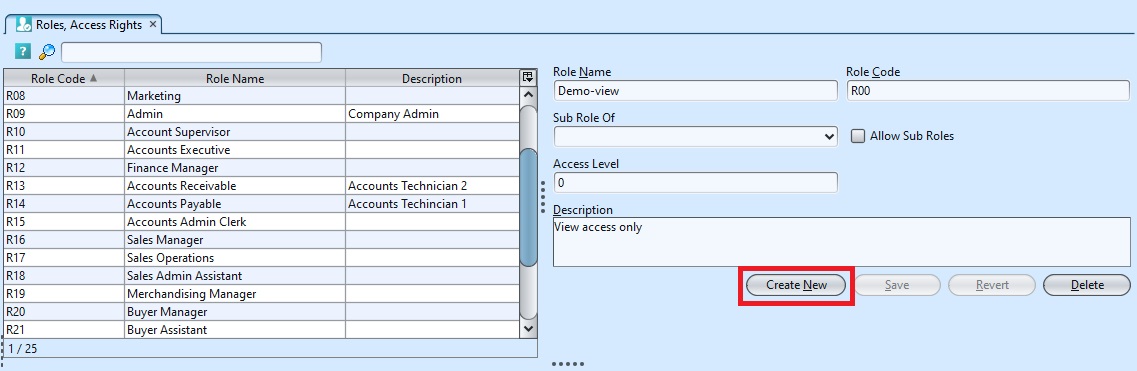
2. Fill up the information on top right of screen.
3. Optional: Tick the “Allow Sub Roles” box to set the role as (parent) grouping role
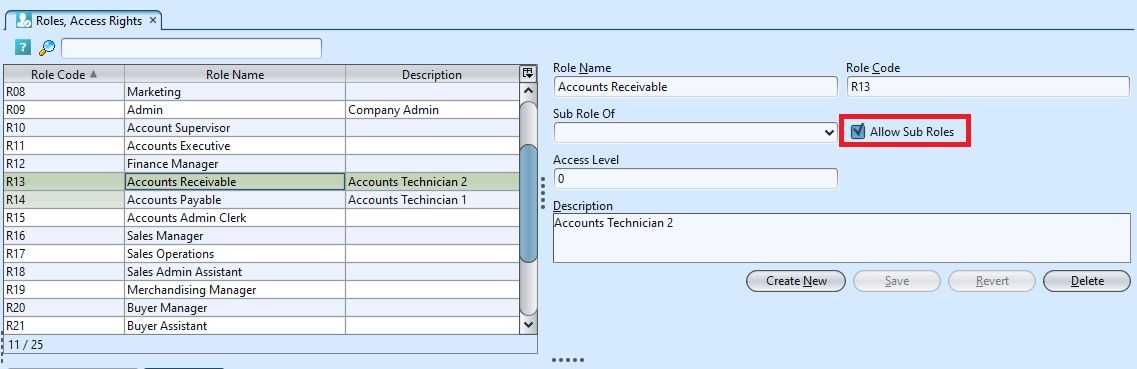
4. Optional: User may select a parent role from “Sub Role Of” drop down list, if the role is a grouping role (see steps #3 above).
5. Click on “Save” button to save
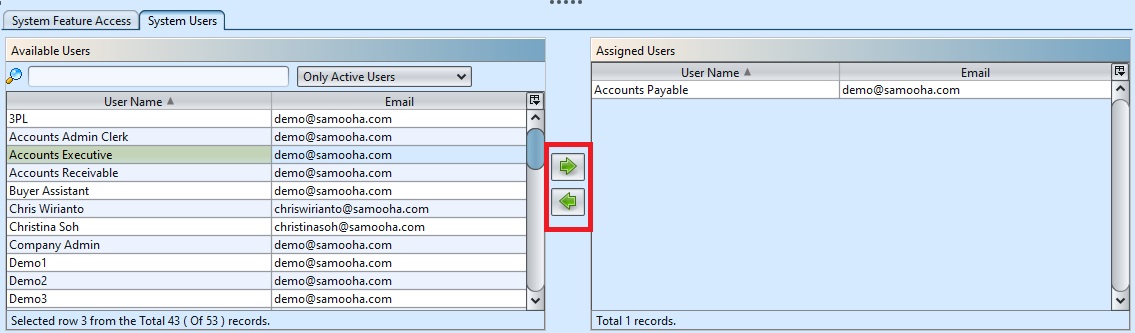
Assign & Un-Assign User to/from Roles
1. Click on a role in the list on top left of screen.
2. On “System Users” tab, select a user name from the “Available Users” list and click on the “ ![]() ” button to assign the user for the role.
” button to assign the user for the role.
3. Select a user name from the “Assigned Users” list and click on “ ![]() ” to unassign the user.
” to unassign the user.
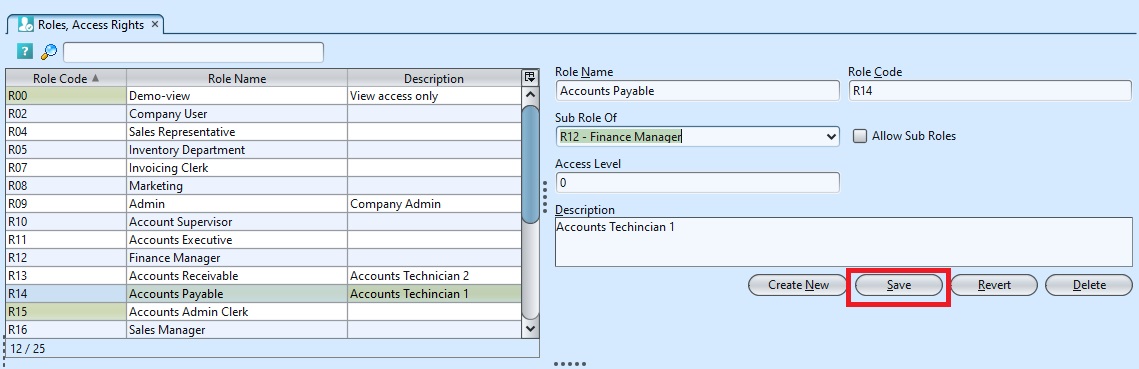
Modify Roles, Access Rights:
1. Select the role to modify from the list on top left of screen.
2. Update the information required
3. Click on the “Revert” button to undo changes.
4. Click on the “Save” button to save the changes
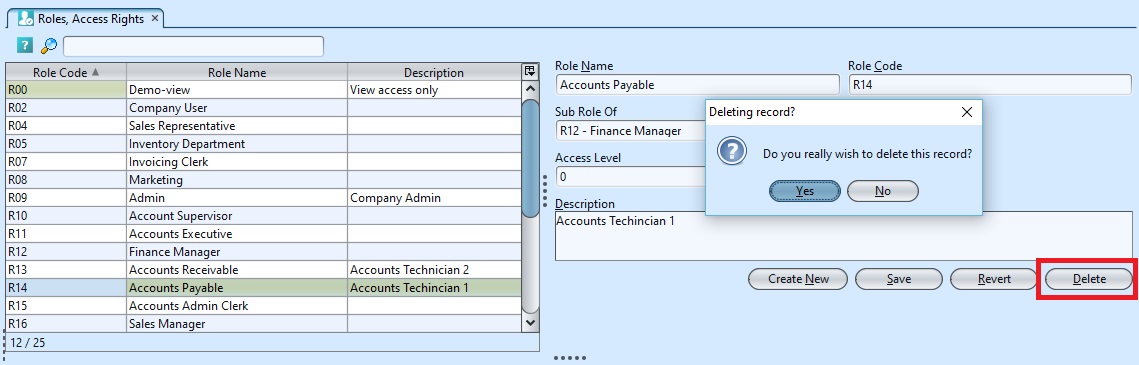
Delete Roles, Access Rights:
1. Select the role to delete from the list on top left of screen.
2. Click on “Delete” button at the bottom of screen
3. Click on “Yes” button on the pop-up window to confirm record deletion.
Apply System Features Access Level for Roles:
1. Select the role to modify system features access level from the list on top left of screen.
2. Select a module from list of “Organization Modules” in the “System Feature Access” tab
3. Select a transaction from list of the selected module’s transactions to make changes
4. Tick a transaction checkbox to give “VIEW” access to role. Or untick a transaction checkbox to remove “VIEW” access to role
5. Tick an access control checkbox to give “Create“, “Modify“, “Approve“, or “Delete” access to role. Untick an access control checkbox to remove specific access to role
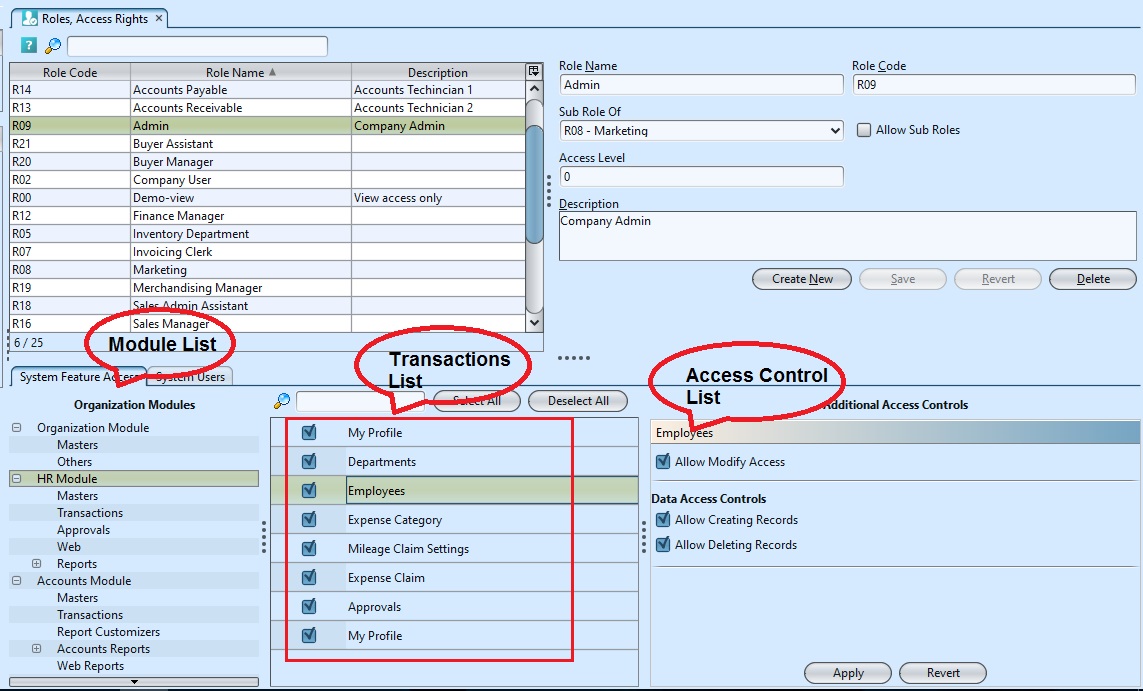
6. Click on “Apply” button at the bottom of screen to apply the changes to the system feature access level