

Invoices view allows user to view and manage projects’ invoices for service rendered. Issuing of the invoices itself is to be done from “Projects” application.
Below are available actions for the user from “Invoices”:
![]() View and search for invoice details
View and search for invoice details
![]() Issue proforma invoice: see “Projects” application
Issue proforma invoice: see “Projects” application
![]() Track and issue Retention Claim Invoice
Track and issue Retention Claim Invoice
View and Search for Invoice Details:
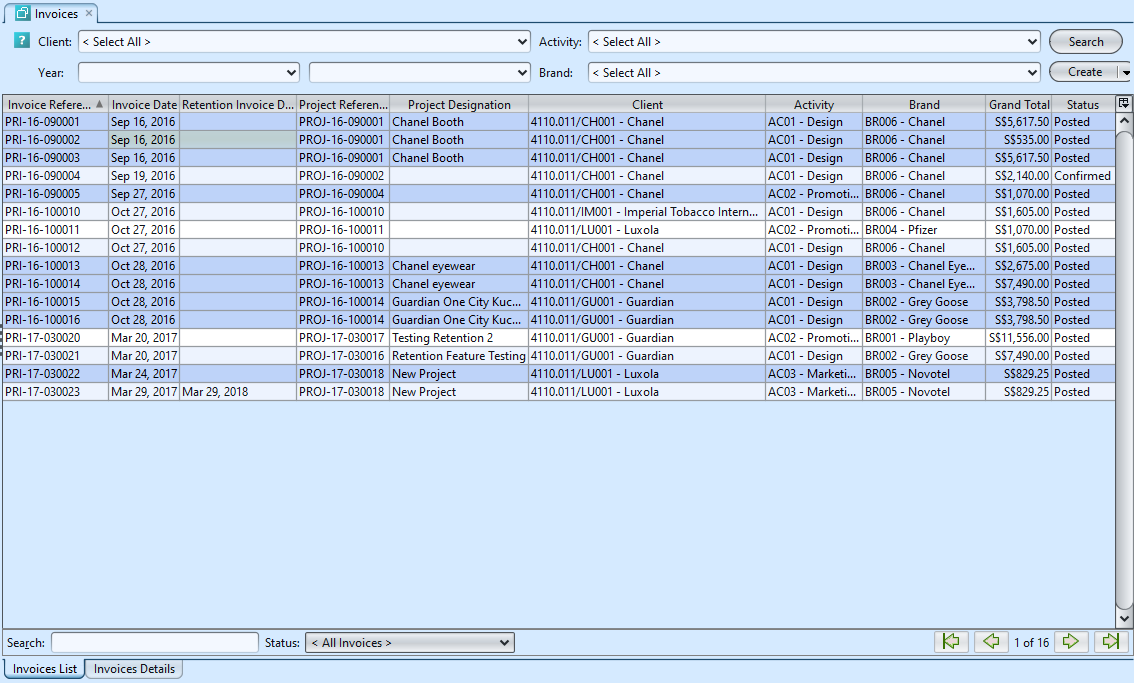
1. Click on “Invoices List” tab at the bottom of screen
2. Enter search parameter to filter the result, i.e. type in which client to search for in the “Client” text field box or select from drop-down list
3. Result can be sorted alphabetically by clicking the fields’ columns
4. Double click on invoice document to view full details of the document, it will bring up the details on “Invoice Details” tab for the selected document
Track Retention Claim Invoice:
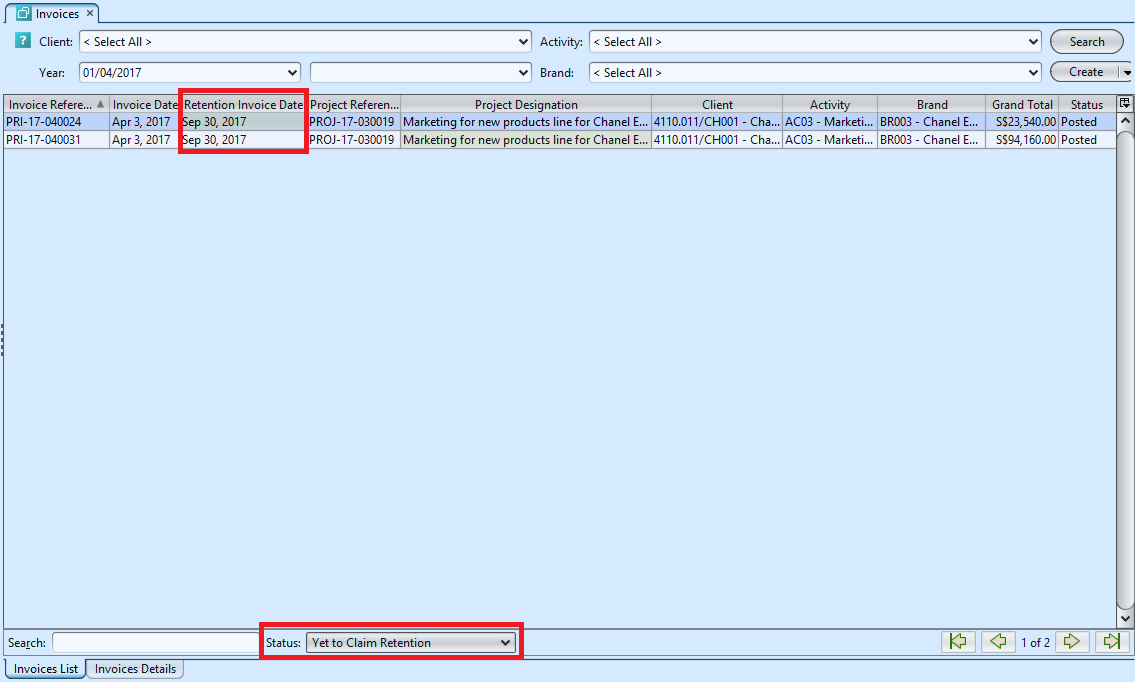
1. Open “Invoices” in Project module. Click on “Invoices List” tab at the bottom of screen
2. User can sort to view the list invoices with retention invoice (due) date, by clicking on the “Retention Invoice Date” column.
3. Select “Yet to Claim Retention” status in the “Status” drop-down list. it will filter the list view to show only invoices where Retention Claim Invoices have not been created.
Issue Retention Claim Invoice:
1. Open “Invoices” in Project module. Click on “Invoices List” tab at the bottom of screen
2. Select “Yet to Claim Retention” status in the “Status” drop-down list. it will filter the list view to show only invoices where Retention Claim Invoices have not been created.
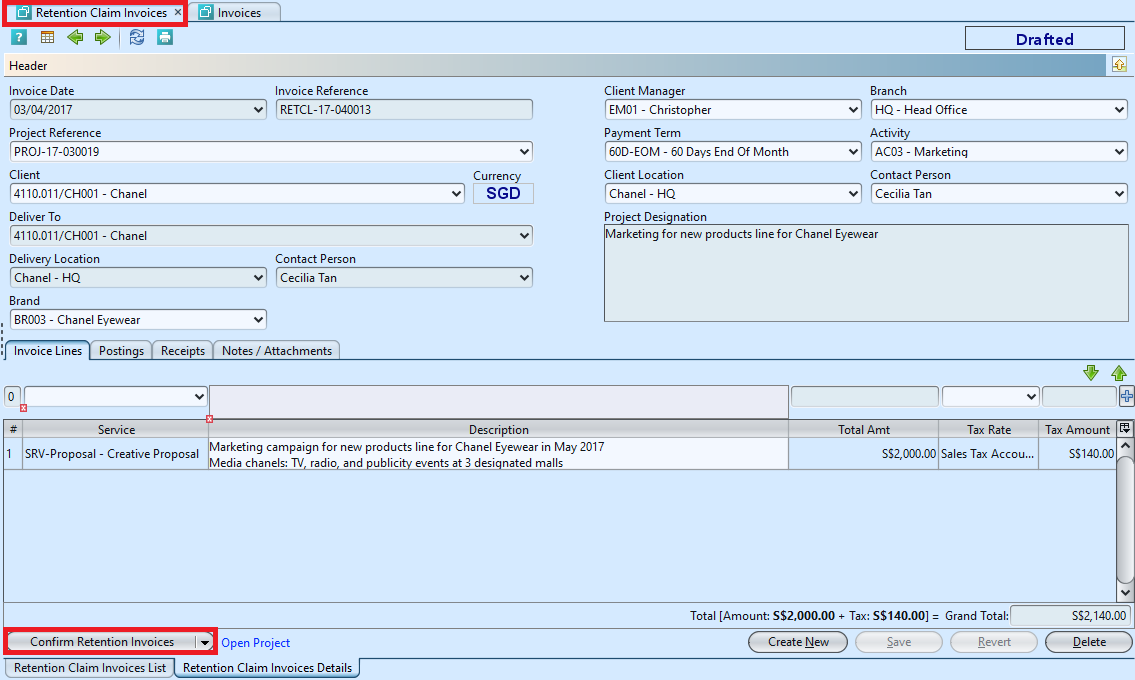
3. Select an invoice and double-click to open the document.
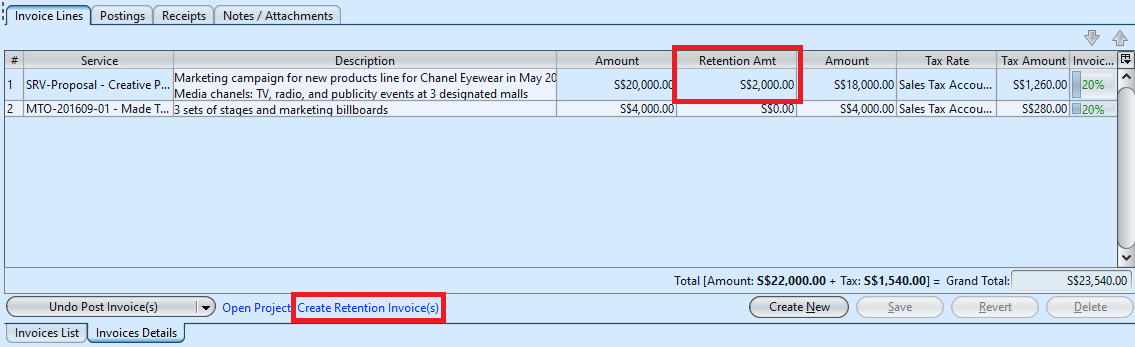
4. If there is retention for the service, user can create Retention Invoice for the Retention Amount by clicking on the “Create Retention Invoice(s)” link at the bottom of screen of the invoice. Click “Yes” to proceed.
This will create and open a new “Retention Claim Invoice” document, amount = “Retention Amount” as indicated on the (source) invoice. This is based on the agreed retention % of the project of the invoice.
5. Click “Confirm Retention Invoices” to confirm the invoice
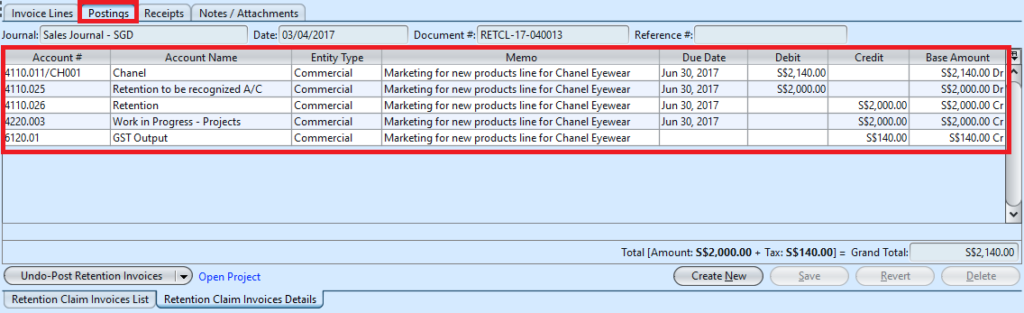
6. Click “Post Retention Invoices” button at the bottom left of screen to post the Retention Claim Invoice. Journal entries applicable for the invoice will be automatically created under “Postings” tab

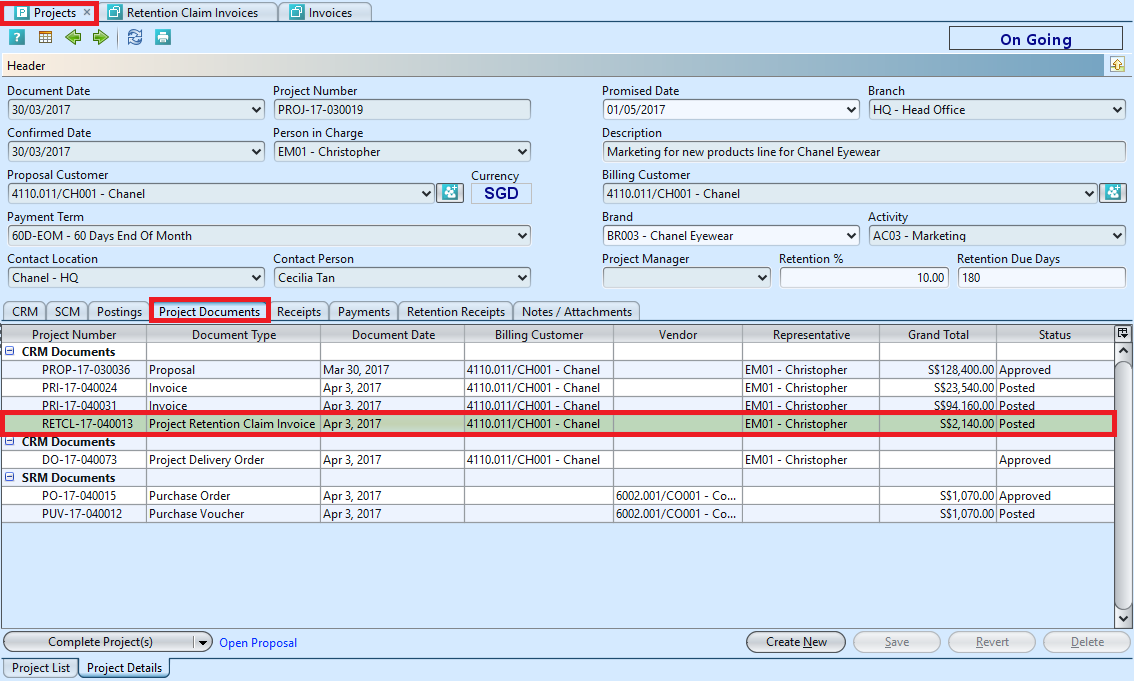
7. User able to see the Retention Claim Invoice related to the project in the project’s “Project Documents” tab