Item Requisition
Item Requisition view allows the user to make request for item purchase requisition of inventorized items. After the Item Requisition is reviewed and approved, user can then create Purchase Order from it. Below are available actions for the user from Item Requisition view:
![]() Create new item requisition
Create new item requisition
![]() Update item requisition details
Update item requisition details
![]() Delete item requisition
Delete item requisition
![]() View and search item requisition details
View and search item requisition details
Field Name |
Explanations |
Mandatory Information |
| Document Date | Creation date of the document | Y |
| Document Number | Document number of the item requisition | Y |
| Reference Number | Code for easy reference search of the document | N |
| Branch | Name of company’s branch which make the item requisition | Y |
| Vendor | The vendor of whom to make the purchase from | Y |
| Currency | Currency used by the vendor | Y |
| Vendor Location | The location of vendor | Y |
| Vendor Contact | The contact person of vendor | N |
| Payment Terms | Payment terms for the item requisition | Y |
| Representative | Name of staff to process the item requisition | Y |
| Warehouse | Receiving warehouse | Y |
| Required Date | Date to deliver the item requisition | Y |
| Document Note | Additional information in regard to the item requisition document | N |
| Product | Which product to purchase | Y |
| Description | Description of the product | N |
| Uom | Type of the product | Y |
| Quantity | Number of quantity of the product | Y |
| Estimated Unit Cost | Estimated cost per item | Y |
| Total Amount | Total cost for the item requisition | Y |
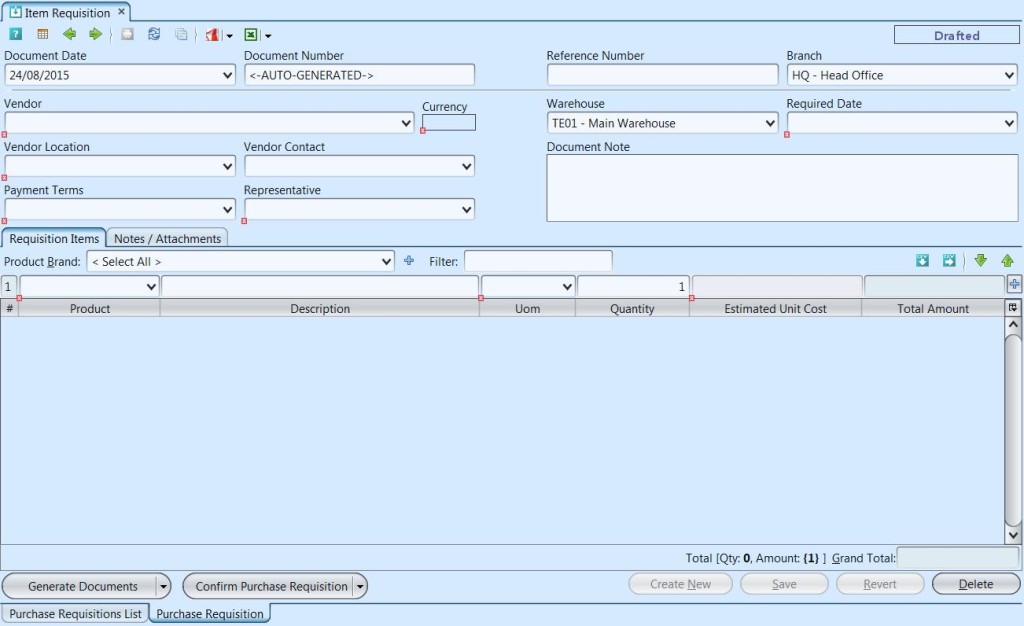
Create New Item Requisition:
1. Click on “Create New” at the top right of screen of “Purchase Requisitions List” tab, it will open “Purchase Requisition” tab with empty form

2. Select a vendor from the “Vendor” drop-down list on top left side of screen. It will fill up the form with the vendor’s info
3. Fill up item requisition’s information on the top half of screen

4. Click “Save” button at the bottom right side of screen
5. Add an item into the item requisition by selecting a product from the “Product” drop-down list in the table on “Requisition Items” tab, user can filter the list by selecting a brand from “Product Brand” list
6. Enter the product’s info and click ” ![]() ” button to add the product into the item requisition
” button to add the product into the item requisition

7. Repeat steps 5-6 to add more products into the item requisition
8. Click on “Notes / Attachments” tab at the middle of screen to add notes or files attachment for the item requisition.
9. Click on “Save” button at the bottom right of screen when completed
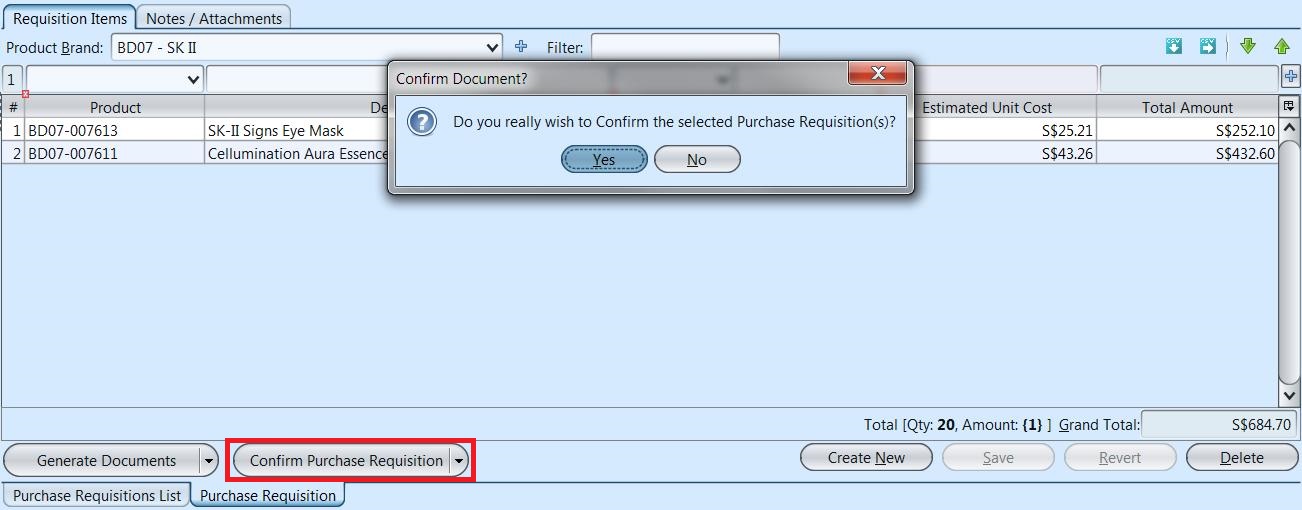
10. Click on “Confirm Purchase Requisition” button at the bottom of screen to confirm the item requisition
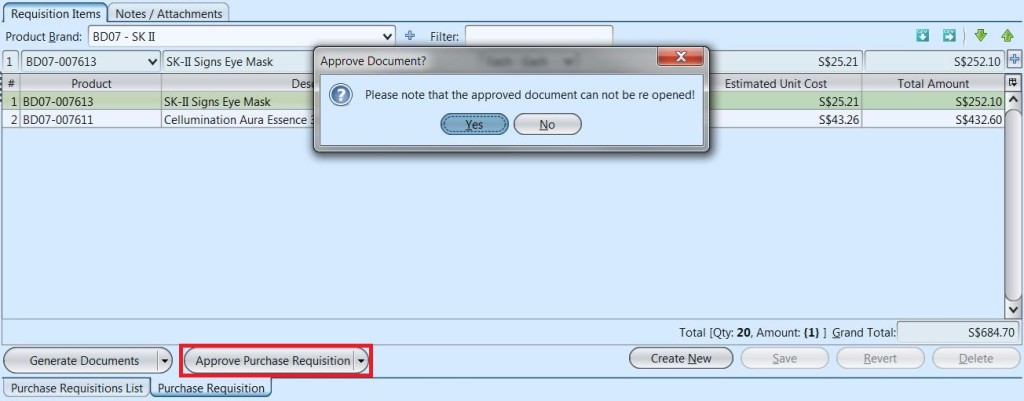
11. Click on “Approve Requisition” button at the bottom of screen to approve the item requisition
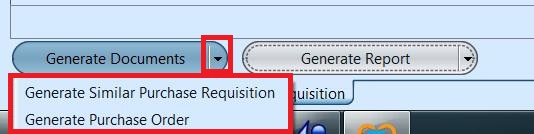
12. Click arrow on ![]() button at the bottom left of screen and select “Generate Purchase Order” option to generate a new Purchase Order.
button at the bottom left of screen and select “Generate Purchase Order” option to generate a new Purchase Order.
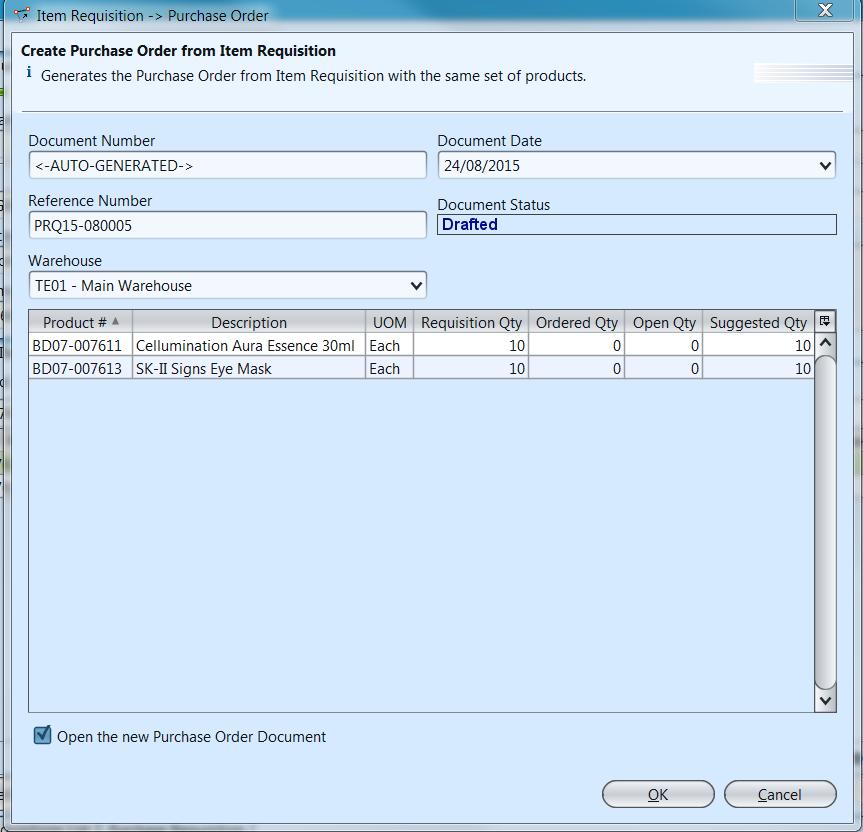
13. Click “OK” button on the pop-up window to create the Purchase Order document. It will generate and open up the Purchase Order document with the Item Requisition details.
14. Click arrow on ![]() button and select “Generate Similar Purchase Requisition” option to generate a new copy of the item requisition form
button and select “Generate Similar Purchase Requisition” option to generate a new copy of the item requisition form
Update Item Requisition Details:
1. Click on “Purchase Requisitions List” tab at the bottom of screen
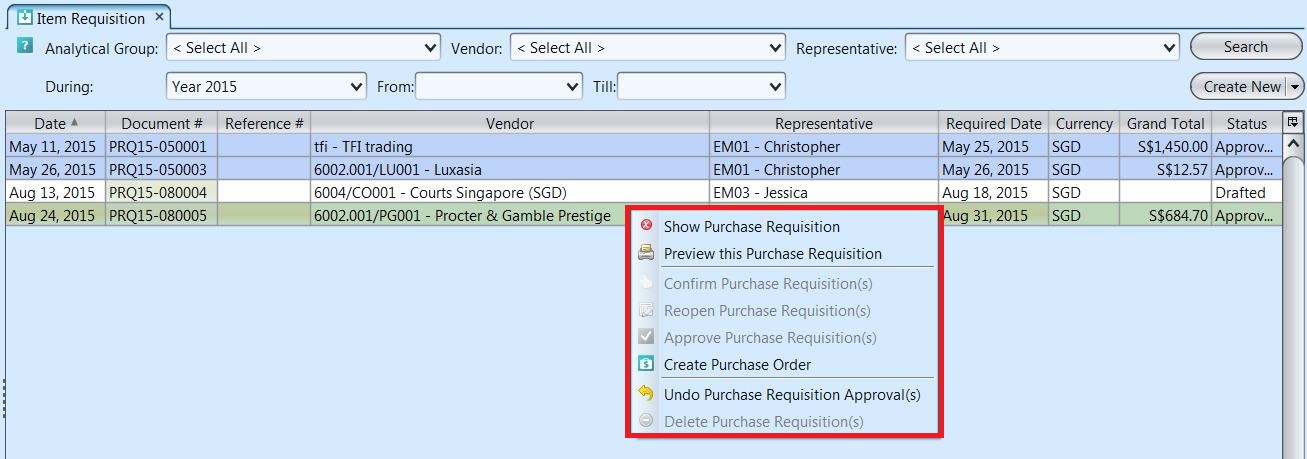
2. Double click on item requisition to be updated, it will bring up the details on “Purchase Requisition” tab for the selected order. If an item requisition’s status is “Confirmed” or “Approved”, right click on the order and reopen / undo approval of the order first. User can do so from the document as well by clicking the arrow on “Generate Report” button at the bottom left of the document screen

3. Make change(s) on the item requisition information
4. Click on “Save” button at the bottom right of screen when done
5. Click on “Revert” button at the bottom right of screen or refresh icon at the top of the screen to roll back the changes
6. Click on “Confirm Requisition” button at the bottom of screen to confirm the item requisition
7. Click on “Approve Requisition” button at the bottom of screen to approve the item requisition
Delete Item Requisition:
1. Click on “Purchase Requisitions List” tab at the bottom of screen
2. Double click on item requisition to be deleted, it will bring up the details on “Purchase Requisition” tab for the selected order. If an item requisition’s status is “Confirmed” or “Approved”, right click on the order and reopen / undo approval of the order first
3. Click on “Delete” button at the bottom right side of screen
4. Click on “Yes” button on the pop-up window to confirm item requisition deletion.
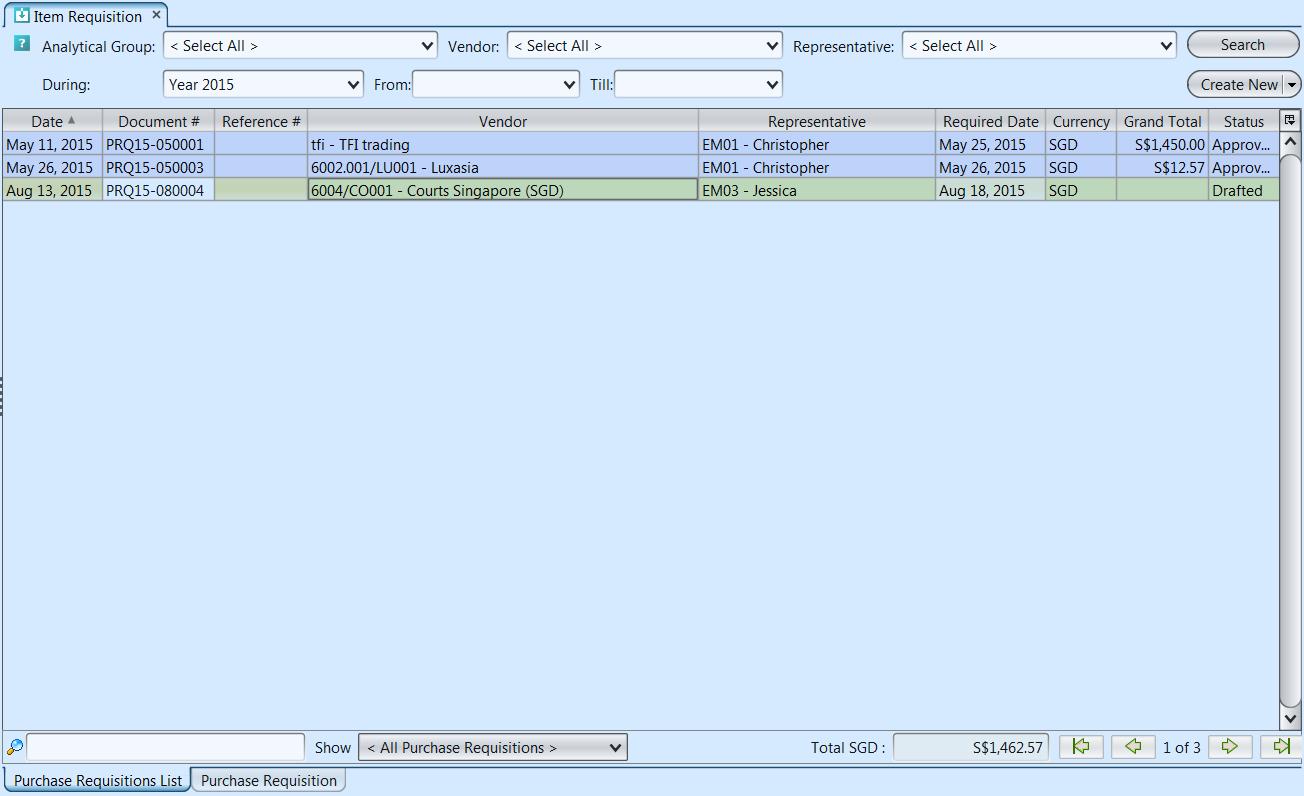
View and Search for Item Requisition Details:
1. Click on “Purchase Requisitions List” tab at the bottom of screen
2. Enter search parameter to filter the result, i.e. type in which vendor to search for in the “Vendor” text field box or select from drop-down list
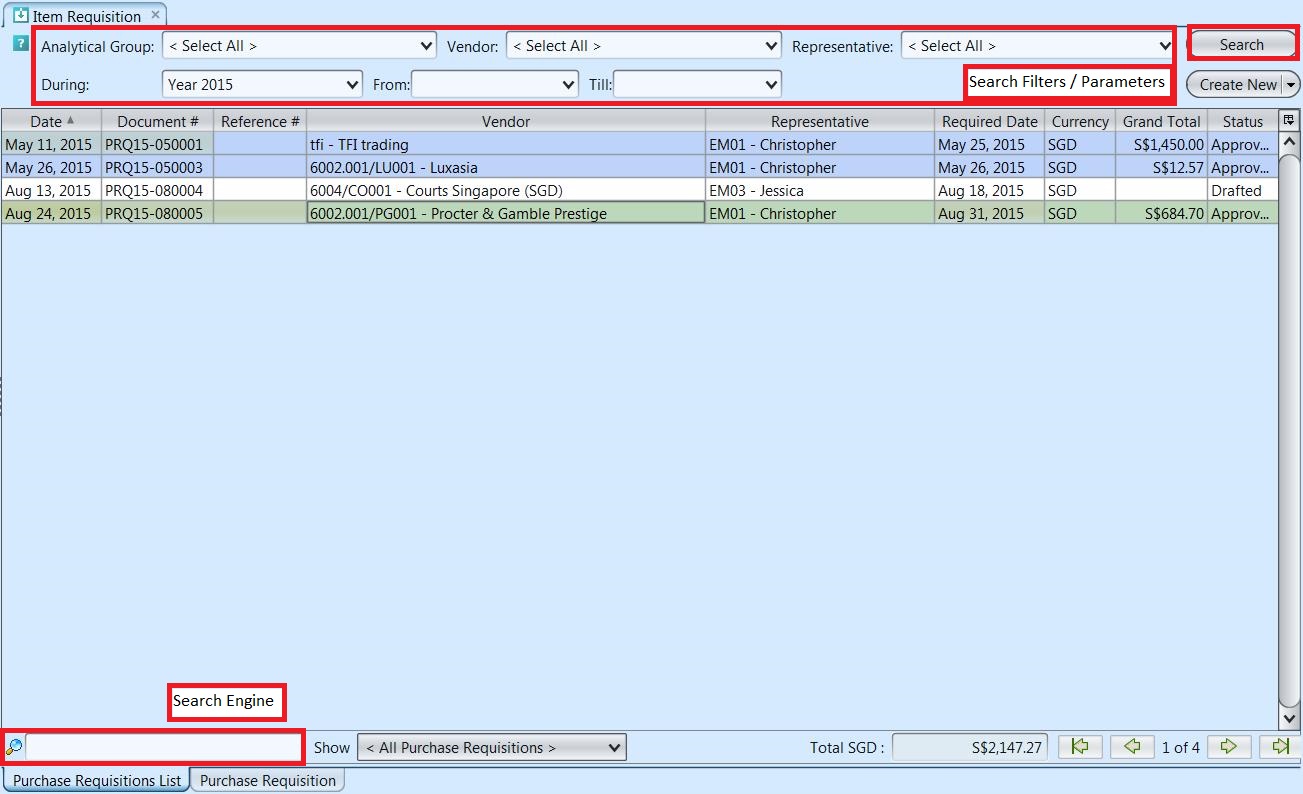
3. Result can be sorted alphabetically by clicking the fields’ columns
4. Double click on item requisition to view full details of the order, it will bring up the details on “Purchase Requisition” tab for the selected order