Employees
Below actions are available under “Employees”:
![]() Create new employee; update, delete, view and search for employee details
Create new employee; update, delete, view and search for employee details
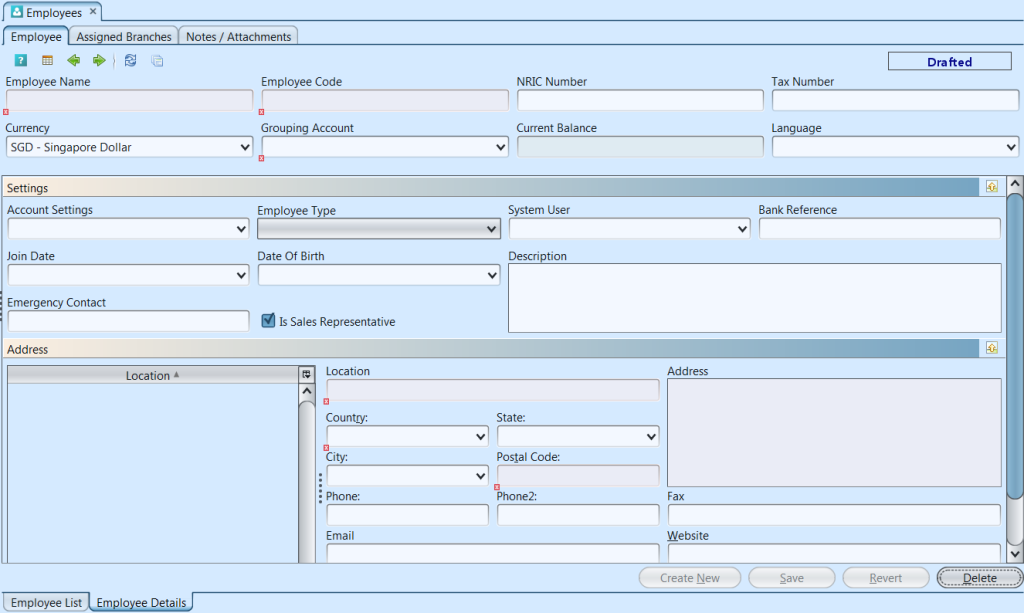
Field Name |
Description |
Mandatory Information |
| Employee Name | Name of the employee |
Y |
| Employee Code | Code of the employee. |
Y |
| NRIC Number | The National Registration Identity Card number of the employee |
N |
| Tax Number | Taxpayer Identification Number of the employee |
N |
| Currency | Salary currency for the employee |
Y |
| Grouping Account | Account for employee’s payables and receivables |
Y |
| Current Balance | Balance owed to/by the employee |
N |
| Language | Language used by the employee |
N |
| Account Setting | Defines journal entry to be used in transaction, usually for Finance/Account/HR department |
N |
| Employee Type | Type of employee |
N |
| System User | User Name of the employee |
N |
| Bank Reference | Name of the bank or bank account number |
N |
| Join Date | Date of employee joined the company |
N |
| Date of Birth | Date of Birth of employee |
N |
| Emergency Contact | Emergency contact person or number of employee |
N |
| Description | Description |
N |
| Address | Address of the employee |
N |
| Phone/Phone 2 | Contact number |
N |
| E-mail address |
N |
|
| Fax | Fax number |
N |
| Website | Website URL address |
N |
Create New Employee:
1. Click on “Create Employee” at the top of screen of “Employee List” tab, it will open “Employee Details” tab with empty form
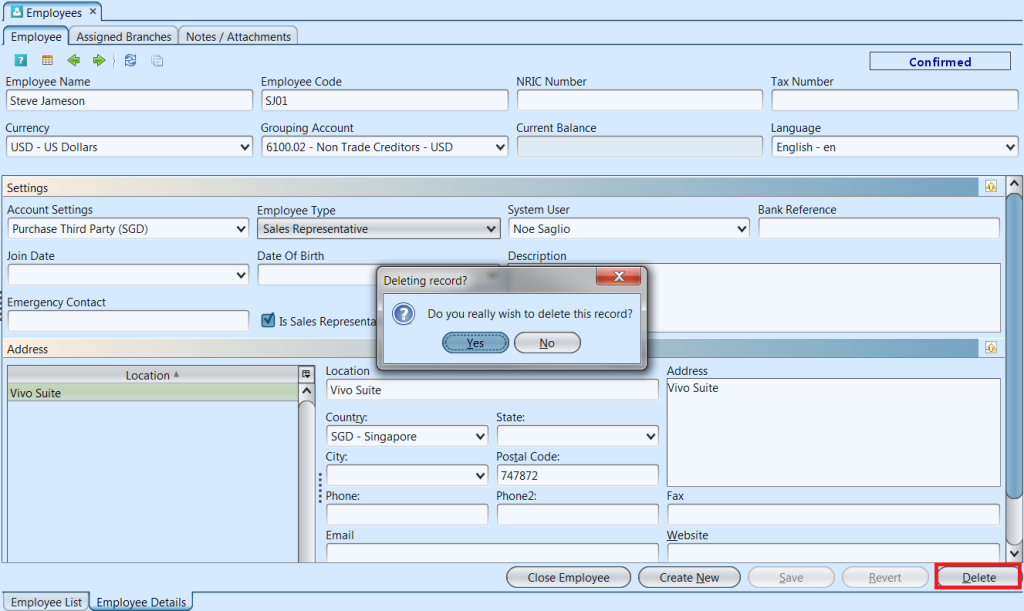
2. Fill up employee’s information, select a username if employee is a (Samooha) system user with login access
“Sales Representative” Employee Type (list) indicates that the employee is also a retail employee type (for POS module). This will allow company to set them as POS Manager / Cashier.

“Is Sales Representative” checkbox when ticked, allows the user to select the employee as sales representative in transaction documents like Purchase Order, Sales Order, etc.

3. Enter Employee’s location address and click “Add” button to save and create new one

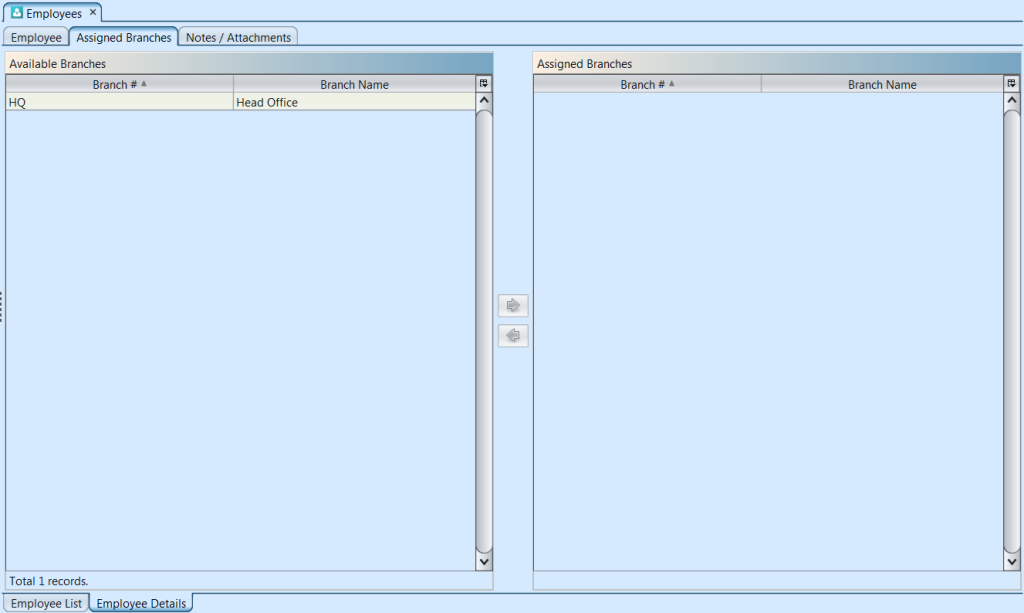
4. Click on “Assigned Branches” tab at the top of screen to assign branch for the employee
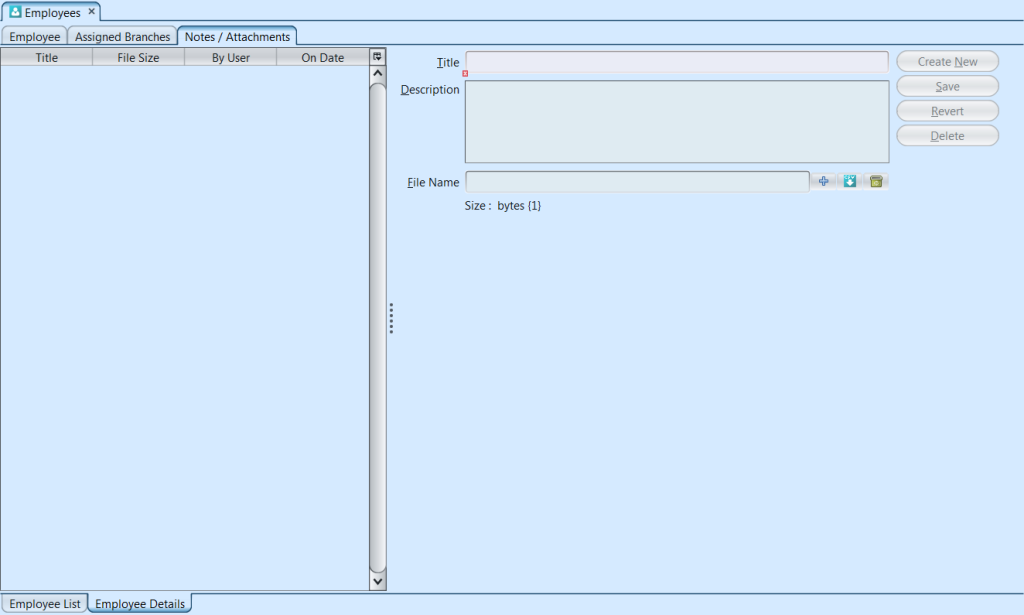
5. Optional: Click on “Notes / Attachments” tab at the top of screen to add notes or files attachment for the employee
6. Click on “Save” button at the bottom of screen when completed
7. Click on “Confirm Employee” button at the bottom of screen to confirm new employee entry
8. Click on “Close Employee” button at the bottom of screen to close employee record from further transaction / changes (e.g. in the case an employee resign)
9. Click on “Reopen Employee” button at the bottom of screen to reopen employee record
10. Click on “Create New” button at the bottom of screen to create another new employee
Update Employee Details:
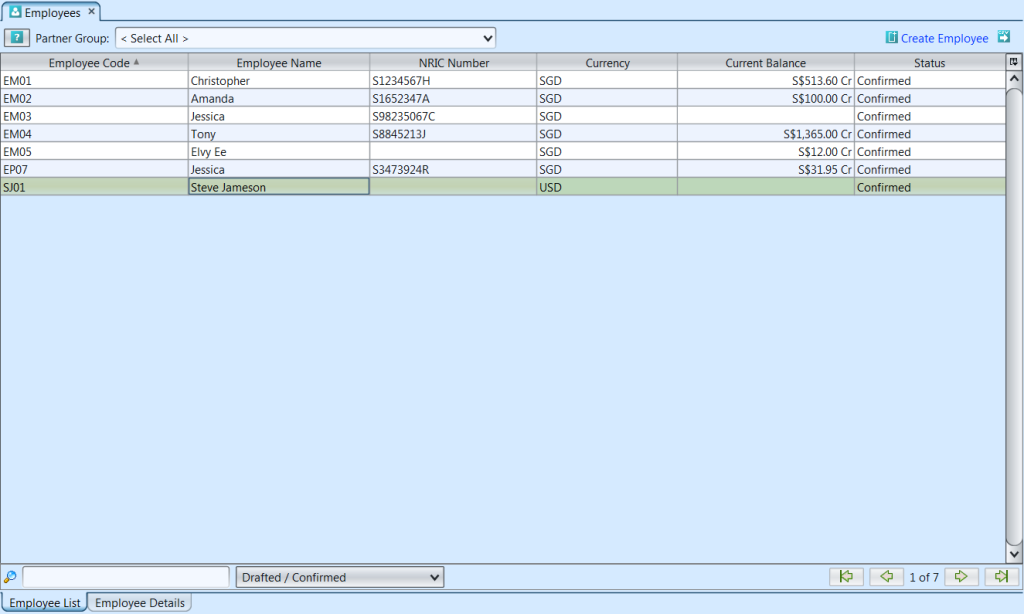
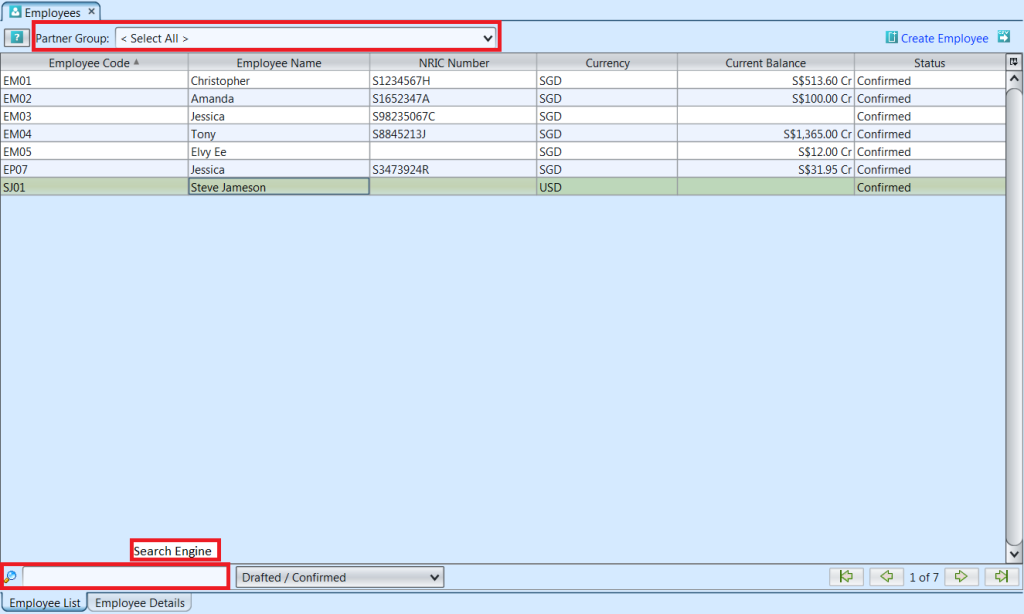
1. Click on “Employee List” tab at the bottom of screen
2. Double click on employee to be updated, it will bring up “Employee Details” tab for the selected employee
3. Make change(s) on the employee information
4. Click on “Save” button at the bottom of screen when done
5. Click on “Revert” button at the bottom of screen.
6. Click on “Close Employee” button at the bottom of screen to close employee record from further transaction / changes (e.g. in the case an employee has resigned)
7. Click on “Reopen Employee” button at the bottom of screen to reopen employee record
Delete Employee:
1. Click on “Employee List” tab at the bottom of screen
2. Double click on employee to be deleted, it will bring up “Employee Details” tab for the selected employee
3. Click on “Delete” button at the bottom of screen
4. Click on “Yes” button on the pop-up window to confirm record deletion
View and Search for Employee Details
1. Click on “Employee List” tab at the bottom of screen
2. Enter search parameter to filter the result, i.e. type in group type for the employee in the “Partner Group” text field box or select from drop-down list. Partner Group is defined in the Accounts module
3. Result can be sorted alphabetically by clicking the fields’ columns
4. Double click on employee to view full details of the employee, it will bring up the details on “Employee Detail” tab for the selected employee
