Work Order
The work order is only enabled when the scanner application is enabled in the company/inventory settings. It will then change the picking and packing workflow to introduce work orders. Work Orders can be generated as one to one or as one to many for picking. They then can be assigned and released for processing by the warehouse operators.
Application Setting (Inventory Setting)
1. Setting need to be completed by admin or Samooha before user is able to use the features.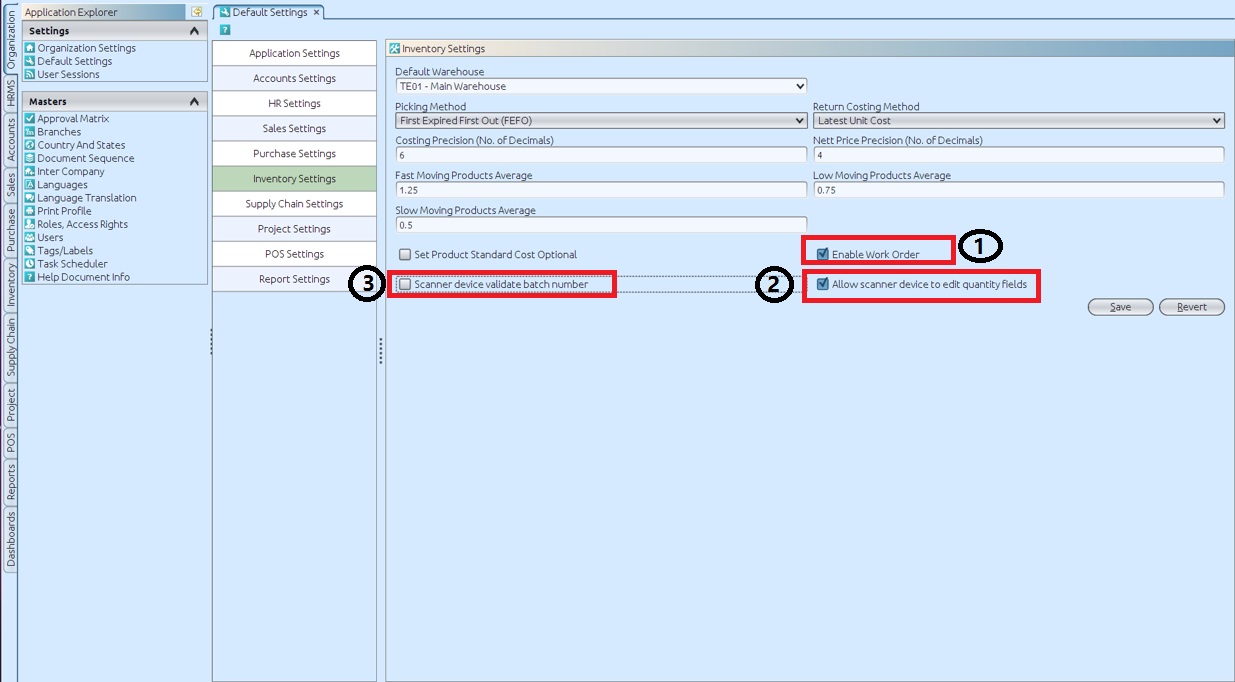
1. “Enable Work Order” , to enable Work Order and mobile scanner for Warehouse Outbound operation* (enabled / ticked)
2. “Allow scanner device to edit quantity fields”, to allow user to manually enter / edit quantity in the scanner work order (enabled / ticked)
3. “Scanner device to validate batch number”, to allow user to manually enter / scan batch number in the scanner work order (as validation process). The batch number entered by user cannot be different from the set batch number (disabled / not ticked)
*NB: Picking and Packing must be done using warehouse scanner when “Enable Work Order” checkbox is ticked in the Inventory Settings.
Application Setting (Employer Setting)
1. Open “HRMS (Masters) – Employees”
2. Click on the selected employees and change the Employee Type to “Warehouse Operator”
3. Click on “Save” button
 * Only “Warehouse Operator” type of Employees are able to operate the warehouse scanner
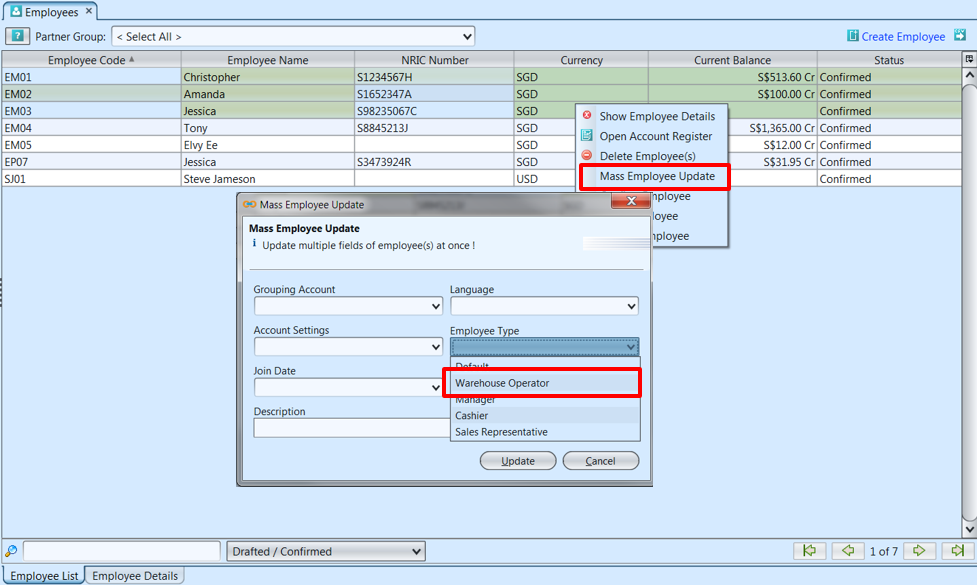
4. User may update multiple Employees records from the list view
5. Select multiple lines, right-click to show options and select “Mass Employee Update”
6. Select “Warehouse Operator” for Employee Type and click “Update”
Create and Released the Work Order
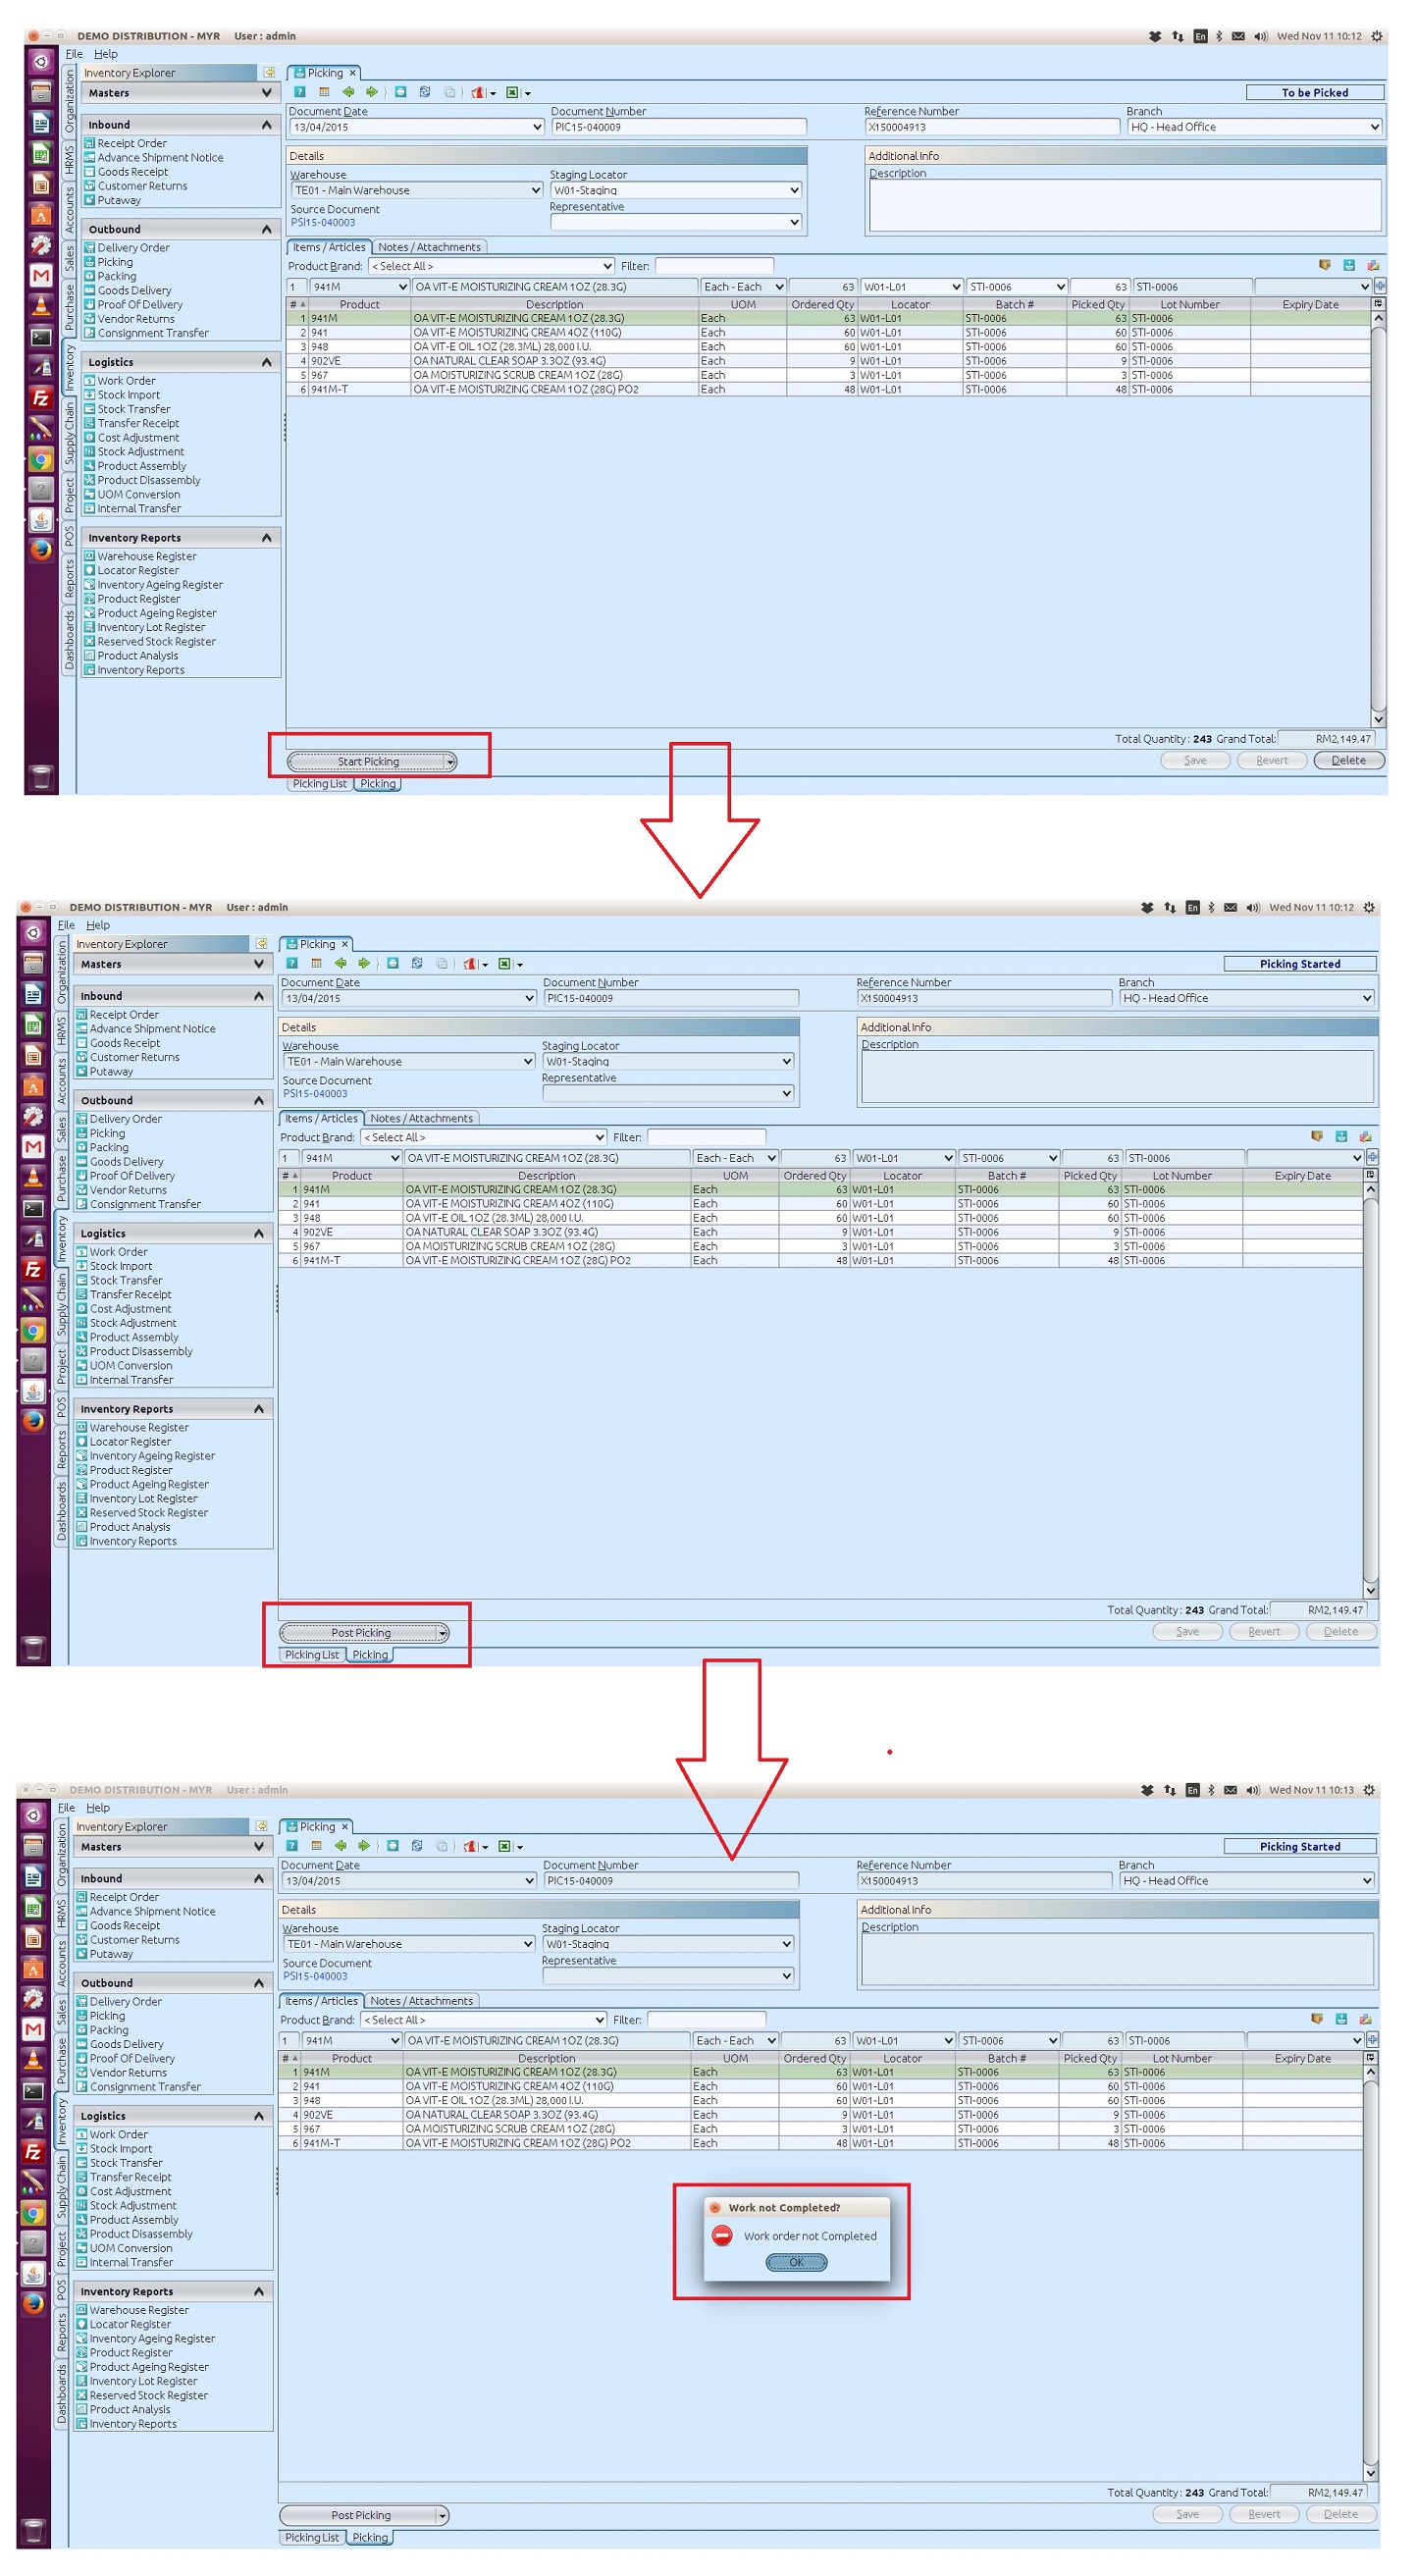
1. Before start picking, please ensure the work order is created otherwise the system will prompt user that the Work Order is not completed (from warehouse scanner)
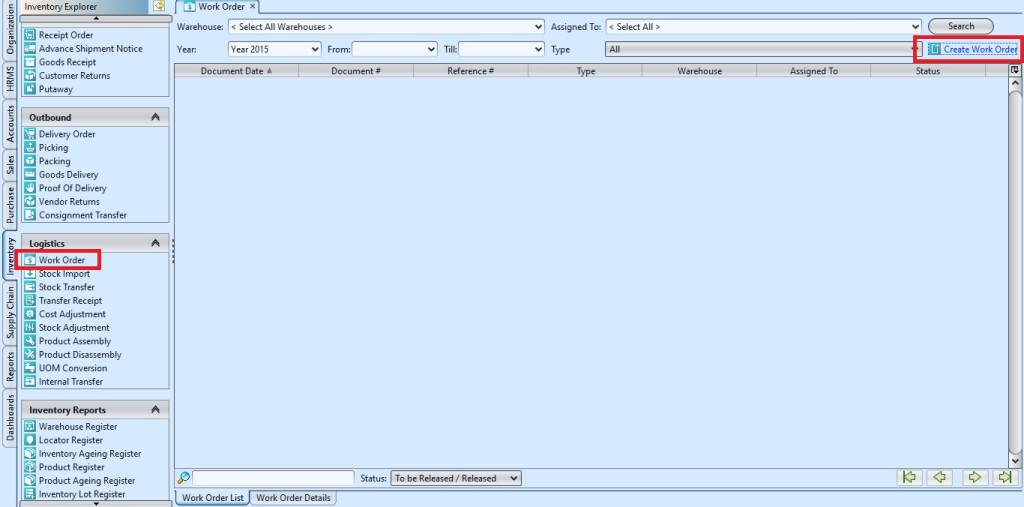
2. Open “Inventory Module (Logistics) – Work Order” and click “Create Work Order” link
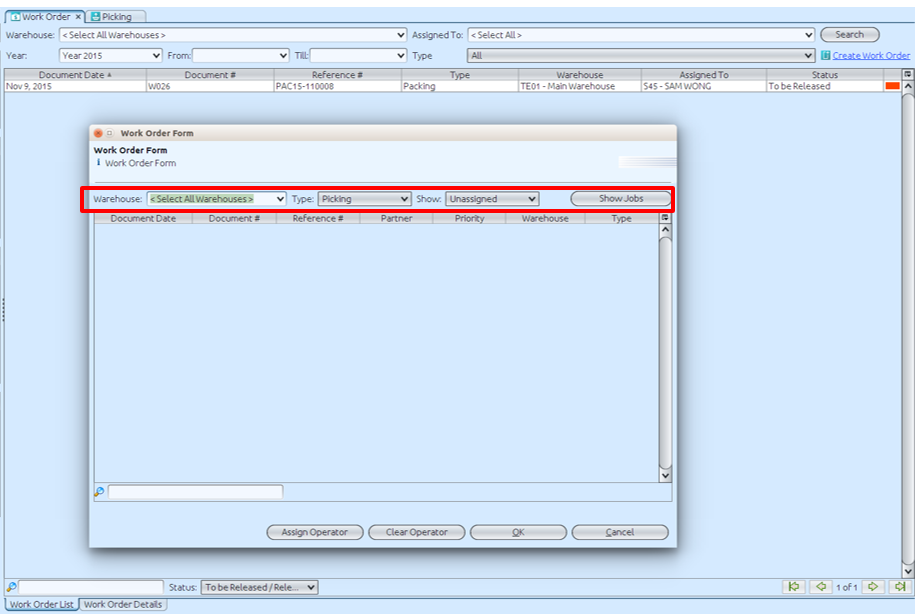
3. In the Work Order form select a “Warehouse”, choose type “Picking” and show “Unassigned” filters
4. Click “Show Jobs” button, this will show list of unassigned Picking documents to be process
5. Select an “Unassigned Work Order” from the list in the Work Order Form and double-click to open the document
6. Select item lines to be assigned using any of these methods:
a. hold mouse left button and drag
b. hold keyboard Ctrl button and click on the item lines
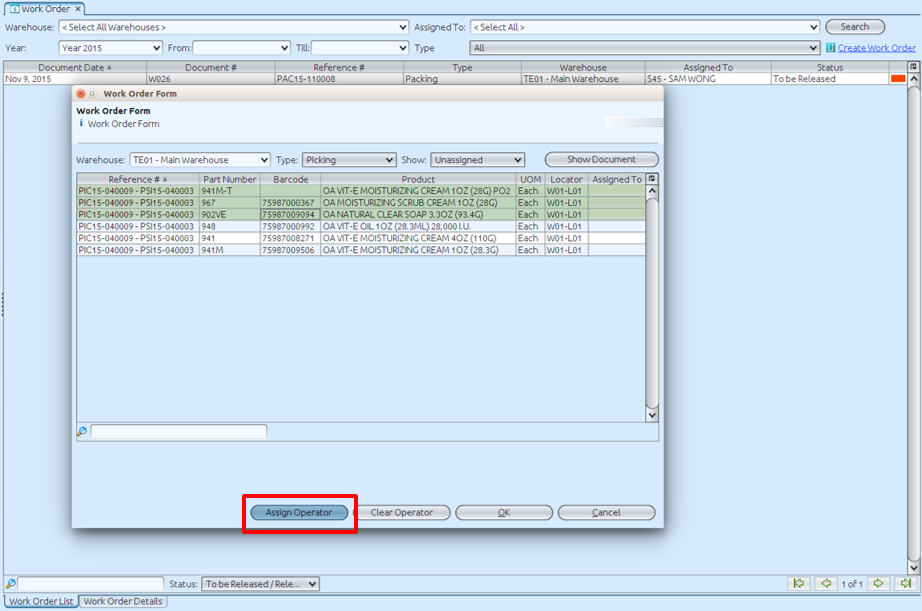
7. Click “Assign Operator” button
8. Select an “Employee” from the list to assign the Work Order lines to and click “OK”. The Work Order lines is now created as a new Work Order document in the Work Order list, and assigned to the selected employee
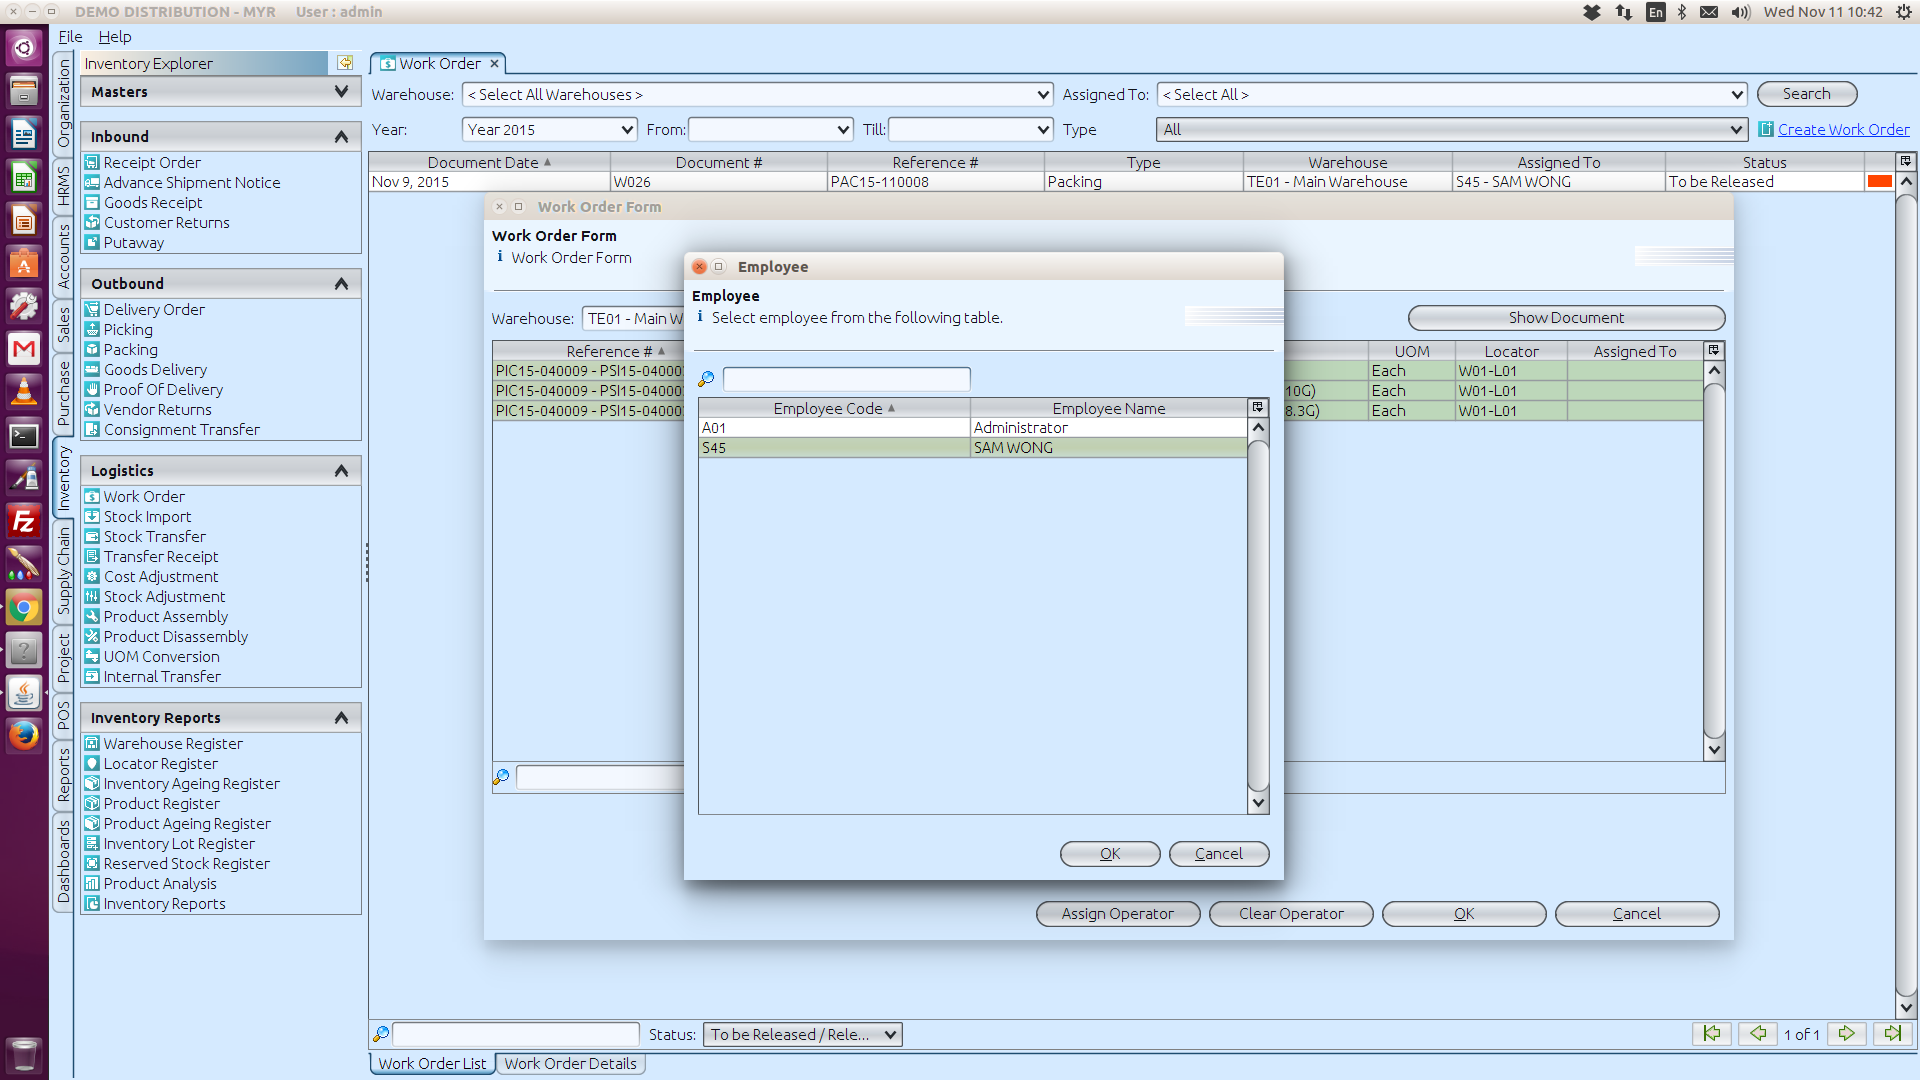
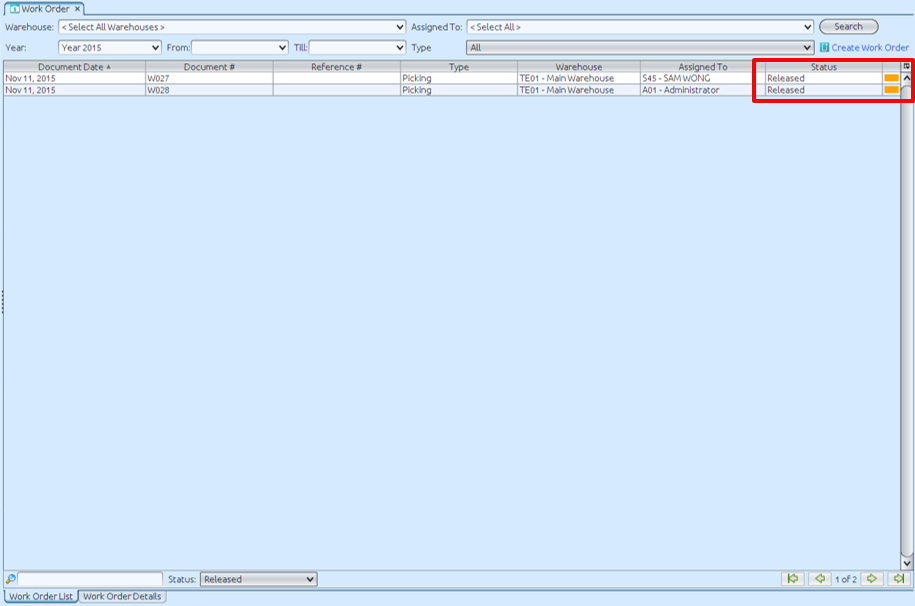
9. Right-click on the selected work order and select “Release Work Order” in order to release the selected Work Order for warehouse staff to process. The status will show “Released” from the selected work document/s.
View the Work Order
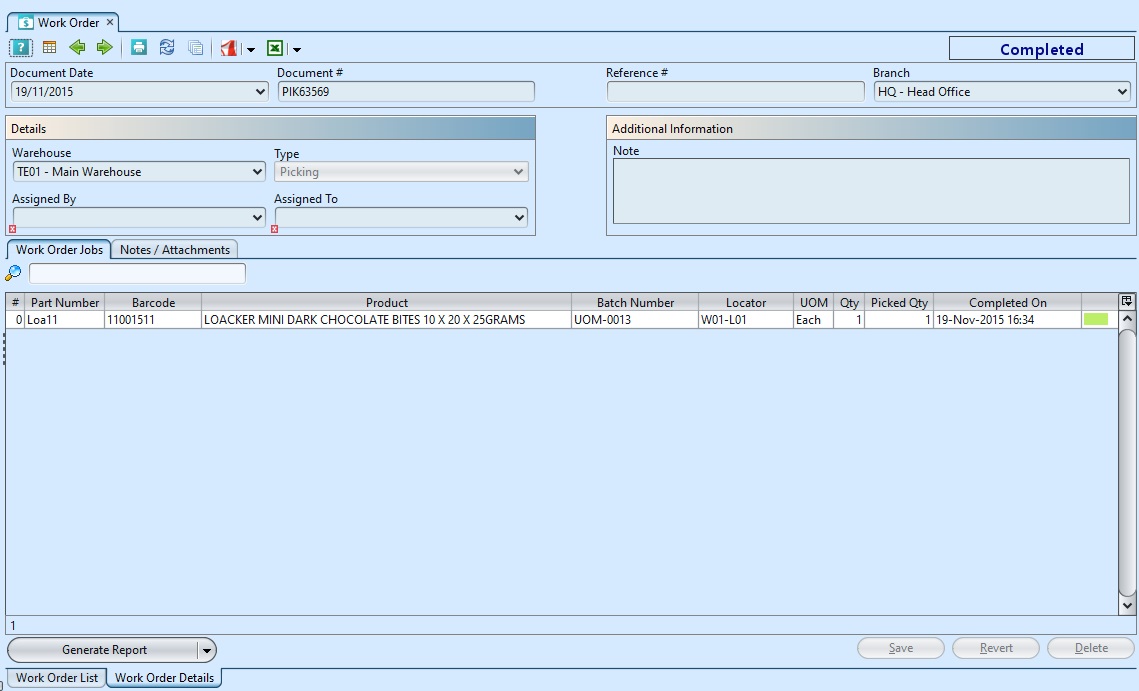
1. Double click a work order document to view the details.
*NB: Picking and Packing must be done through warehouse scanner when “Enable Work Order” checkbox is ticked in the Organization – Default Setting – Inventory Settings.
Completed Picking Work Order
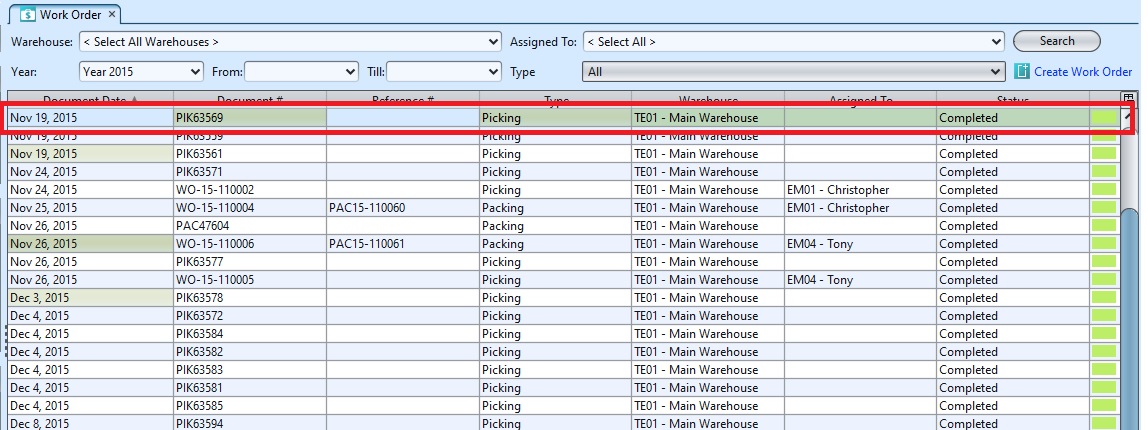
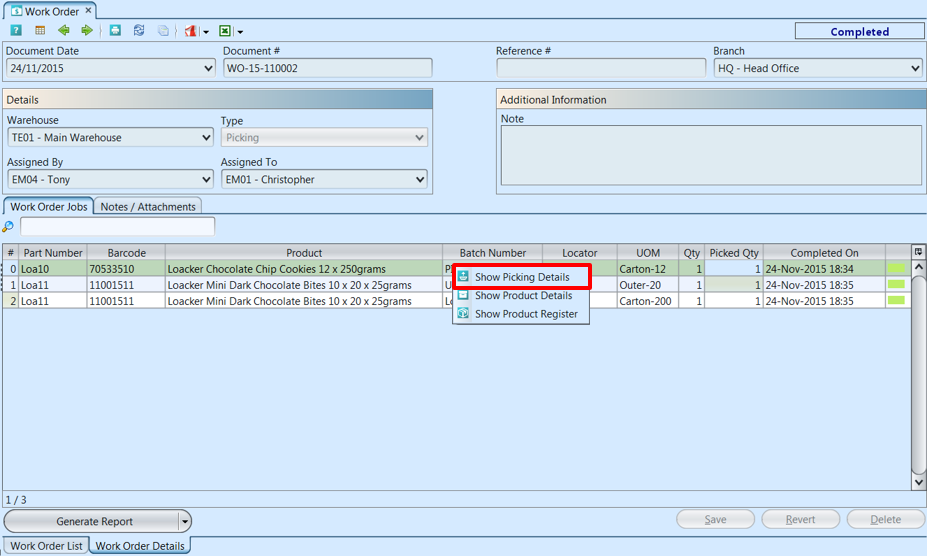
1. After Picker completed the Picking Work Order in the warehouse scanner, user will see the completed Work Order in the main Samooha application
2. Right-click on a product line and select “Show Picking Details” to open the corresponding Picking document
Picking > Packing
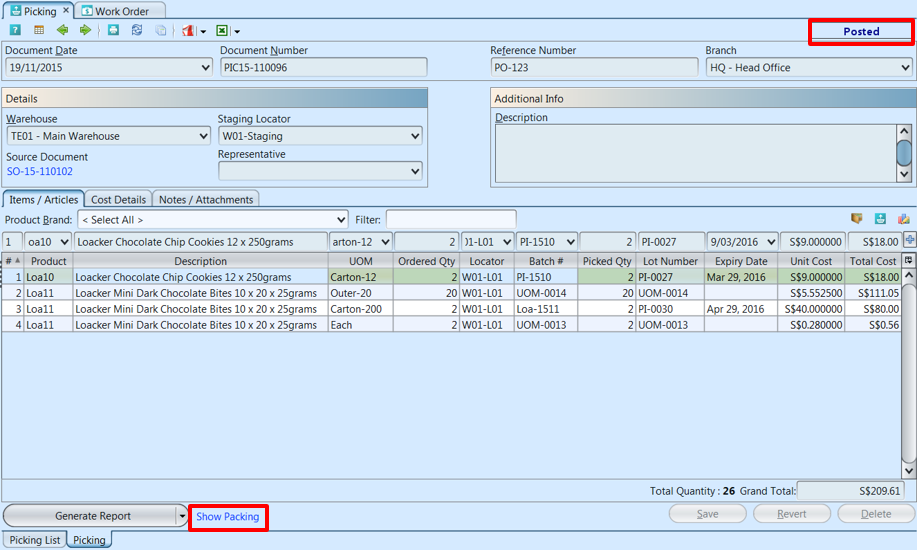
1. The Completed Picking Work Order in the warehouse scanner , will automatically post the Picking document in the main Samooha application. The status of the picking document will showed “Posted”.
2. Click on “Show Packing” to open the corresponding Packing document
Packing Process
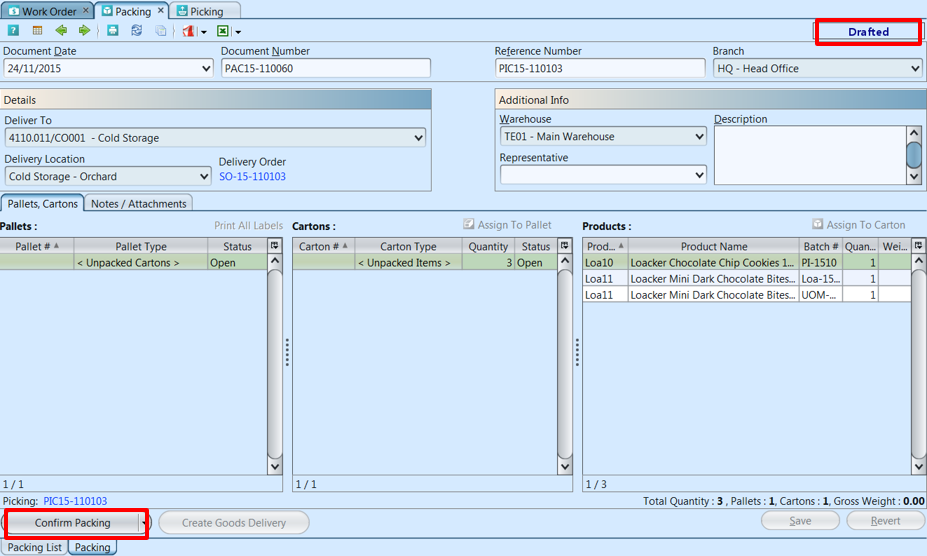
1. Confirm the Packing document, this will allow creation of Packing Work Order in the warehouse scanner. Please refers to the title: Create and Released Work Order at above. (Create, Assign, Release and Complete the application)
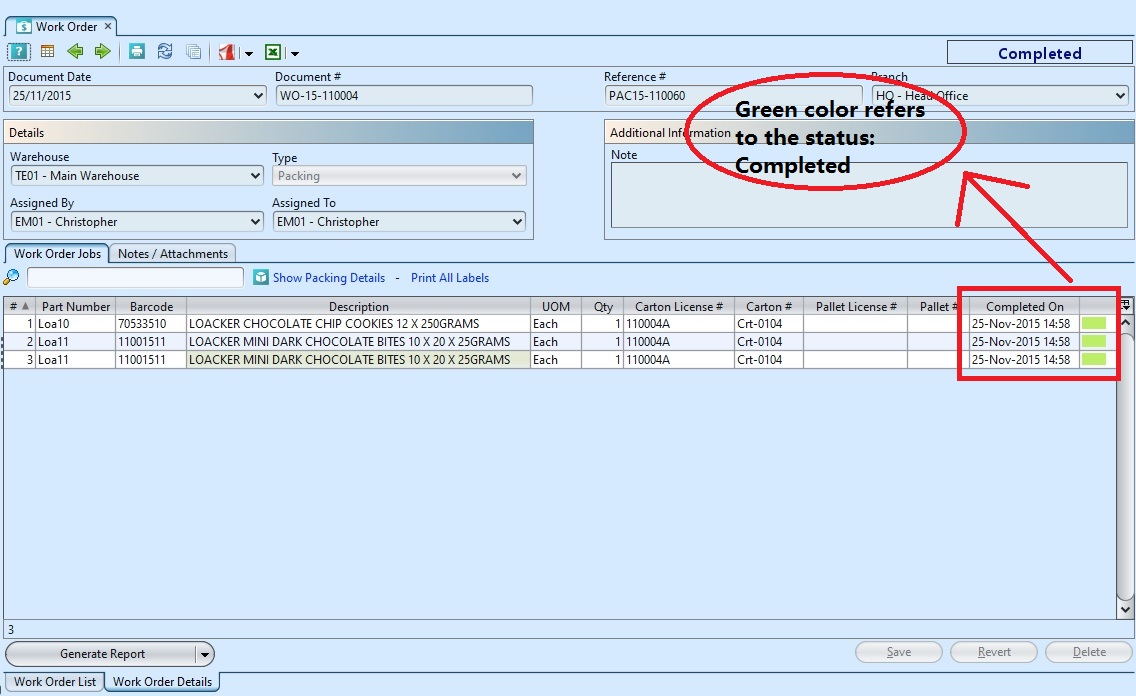
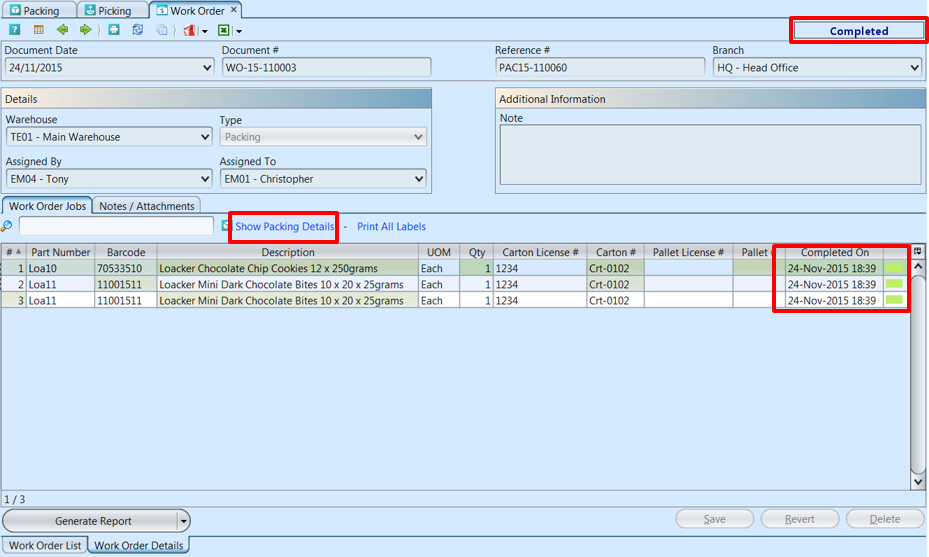
2. After Packer completed the Packing Work Order in the warehouse scanner, user will see the completed Work Order in the main Samooha application
3. Click “Show Packing Details” to open the corresponding (Completed) Packing document
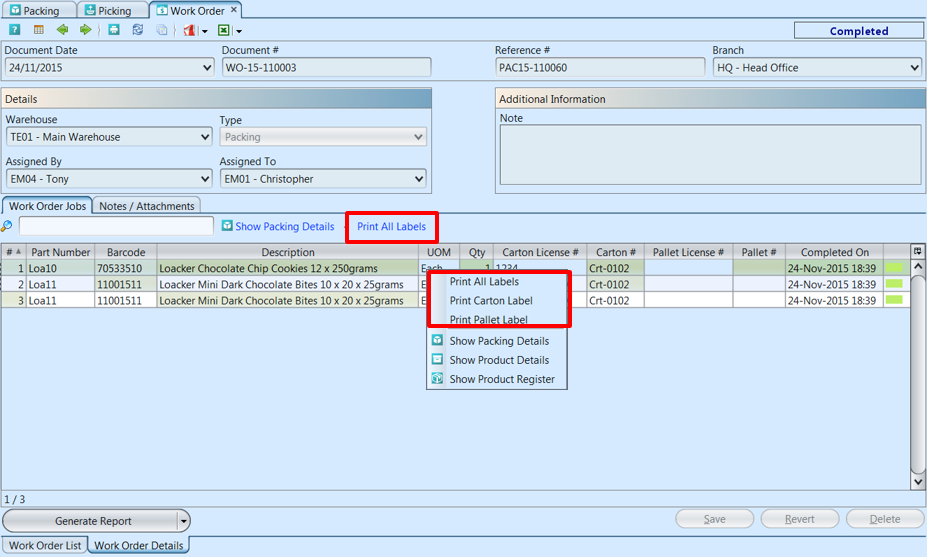
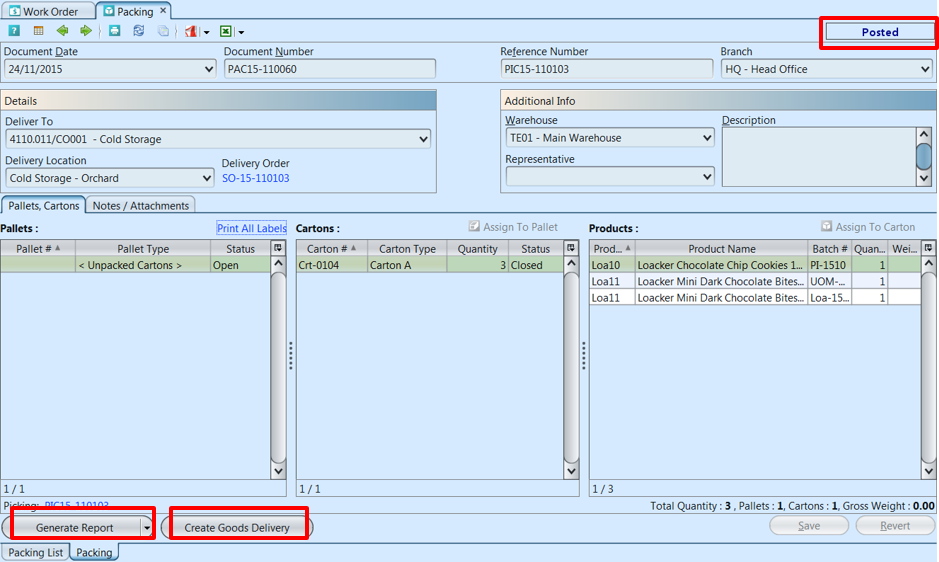
4. Click “Print All Labels” to print all Customers labels for the packed Carton(s) (and Pallet – if any). Alternatively, user can right-click on a product line to show options for user to print carton or pallet labels only
*NB: Packing Work Order must be completed and Carton(s) closed before user can print the labels
5. Click on “Create Goods Delivery” to generate the corresponding Goods Delivery document
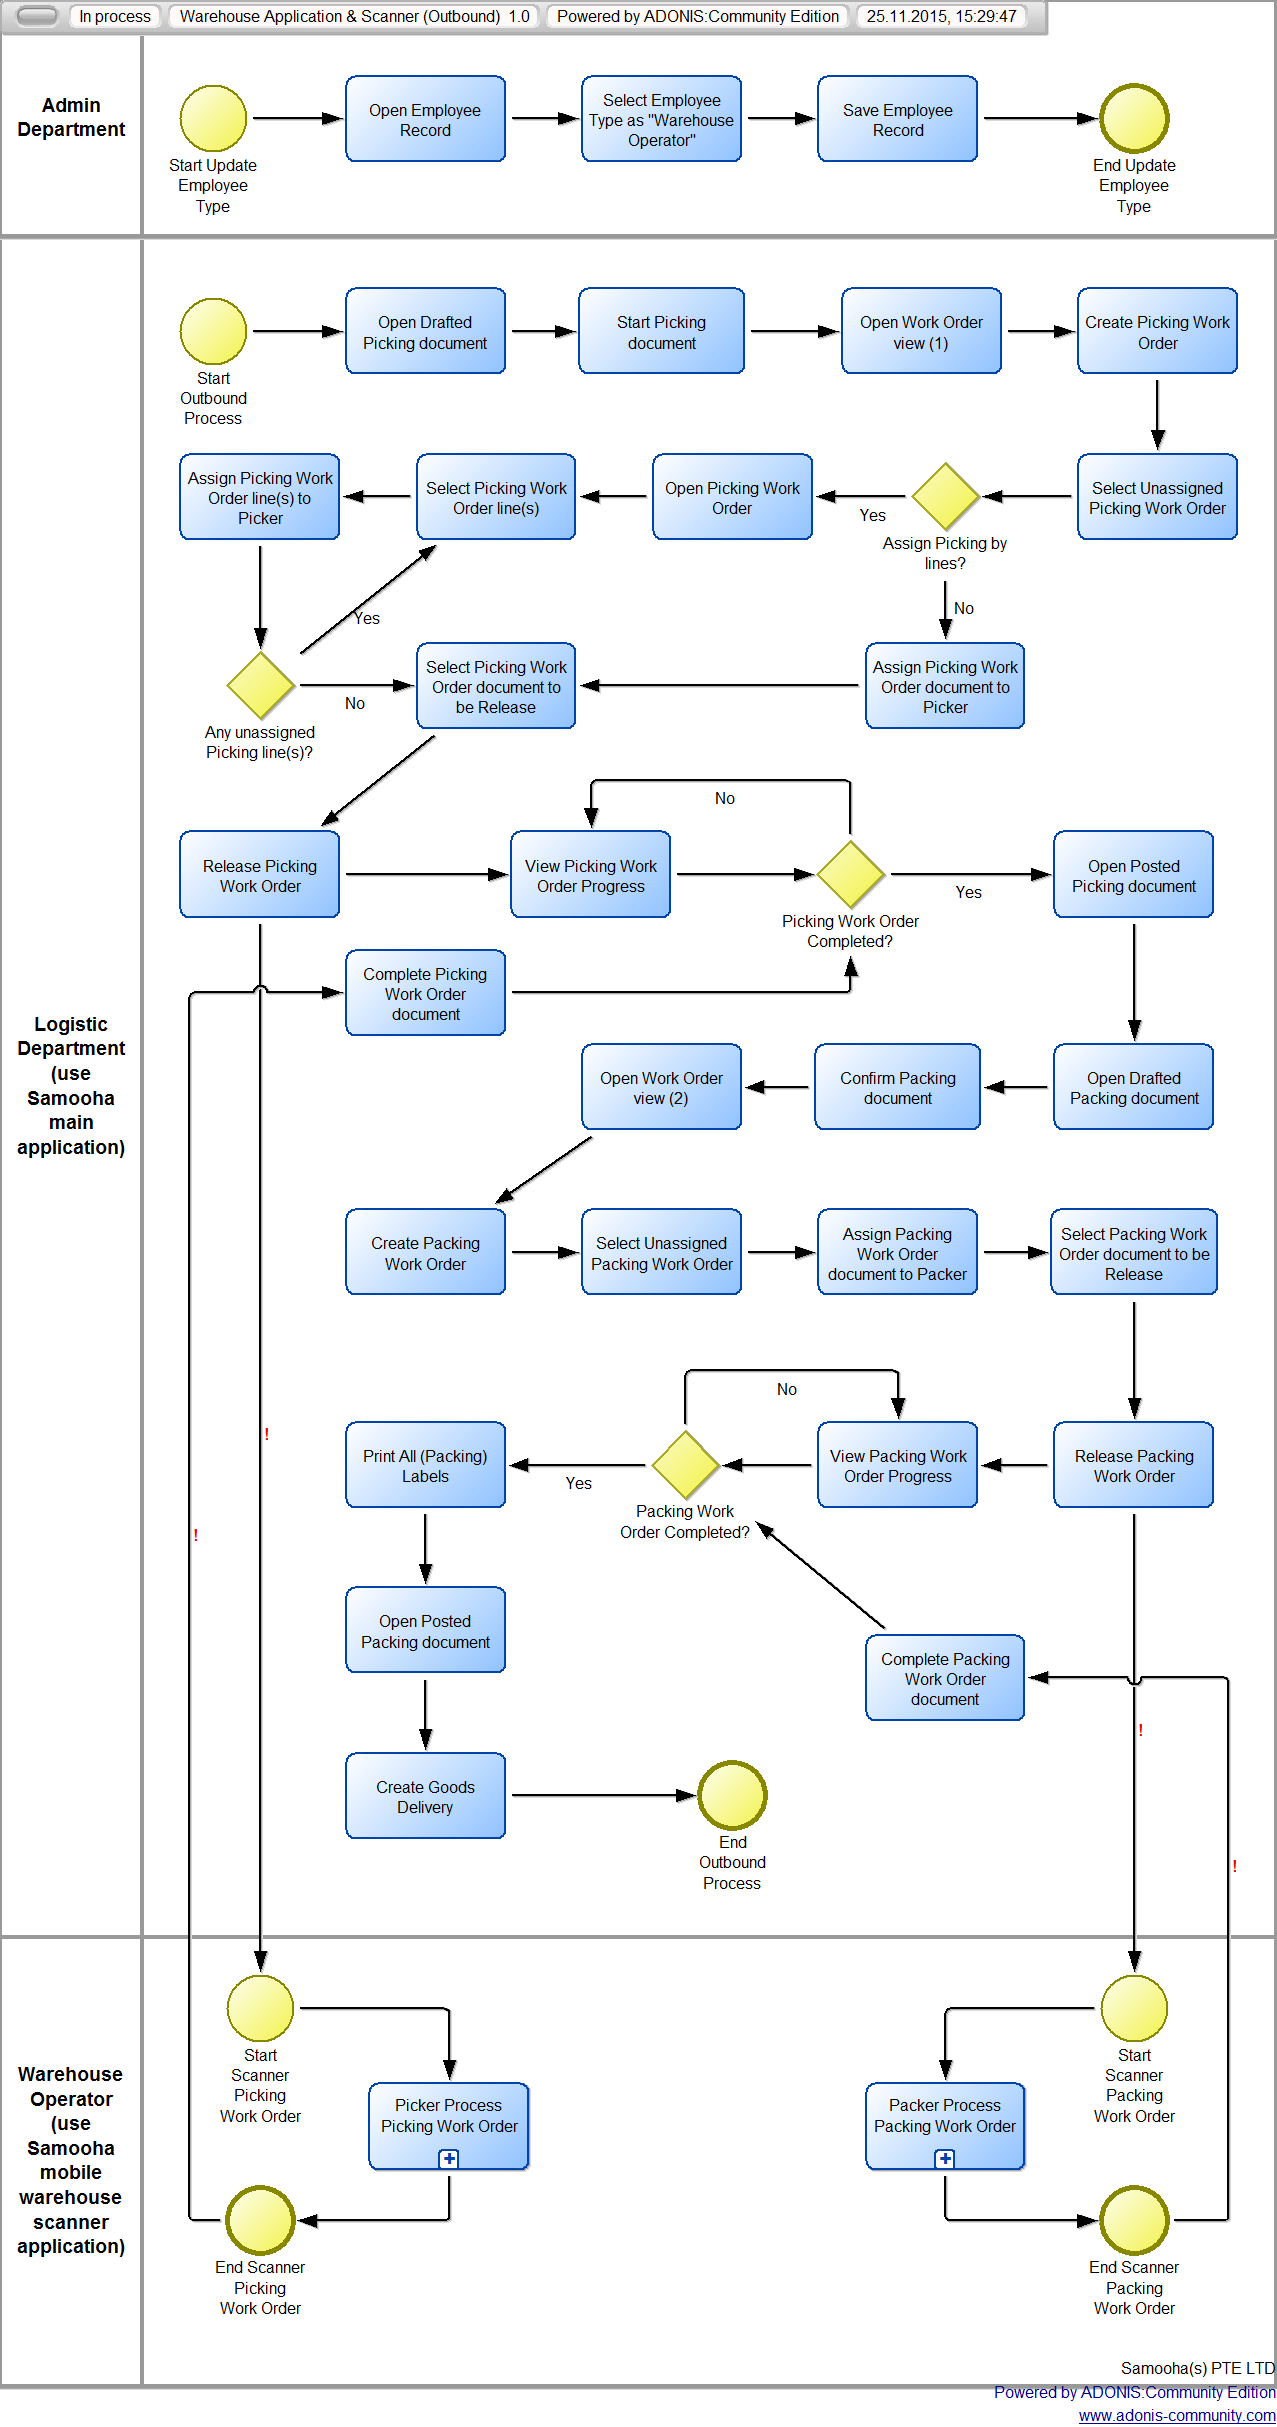
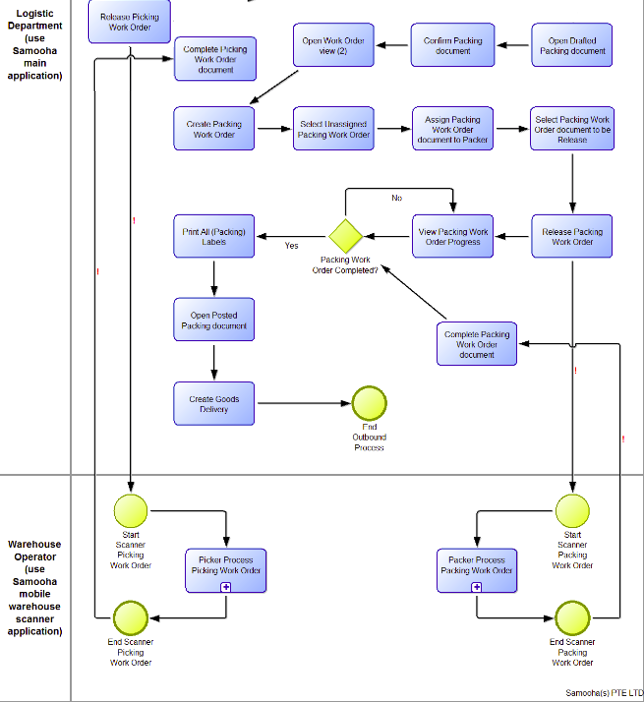
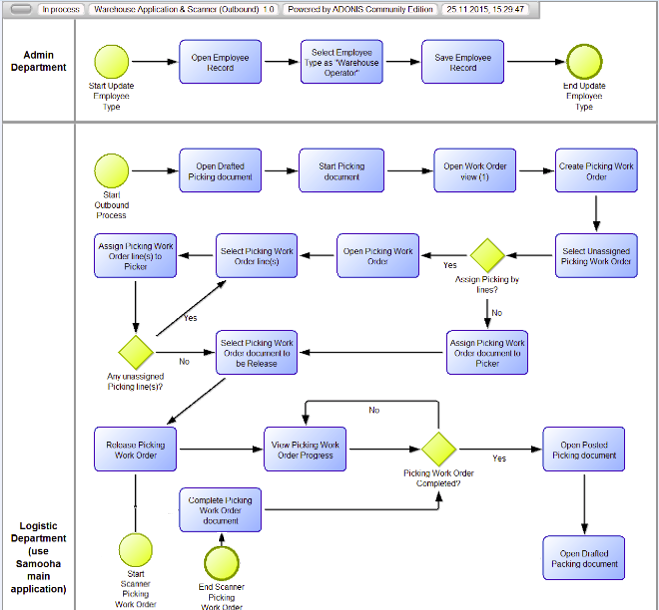
Warehouse Application (Outbound) – Flowchart (1)
Warehouse Application (Outbound) – Flowchart (2)
Warehouse Application (Outbound) – Flowchart (3)
