Store Model
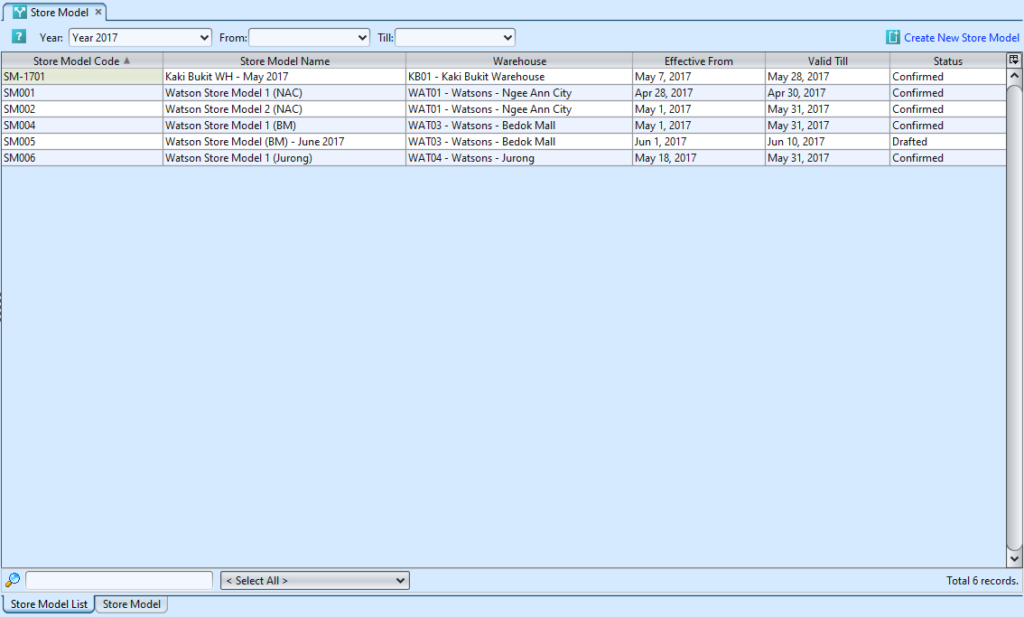
Store Model is a model to replenish a store (warehouse) to a certain stock level as defined in the Store Model; user can define minimum or maximum quantities for a certain product for each store in GOOMI.
Below actions are available under “Store Model”:
![]() Create store models for warehouse(s)
Create store models for warehouse(s)
![]() Update, delete, view and search for store model details
Update, delete, view and search for store model details
Field Name |
Description |
Mandatory Information |
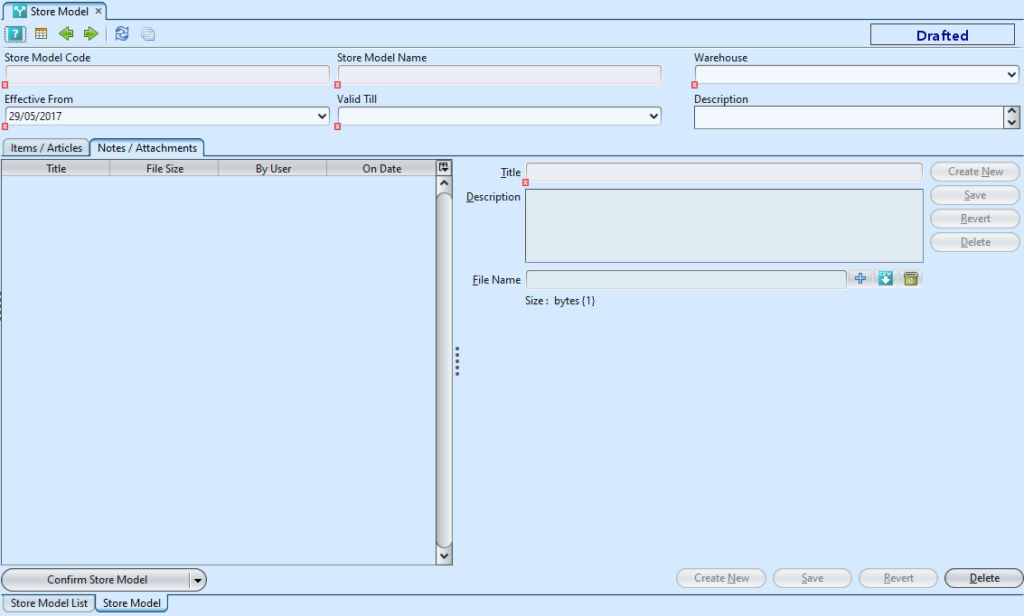
| Store Model Code | Custom code for the store model |
Y |
| Store Model Name | Name of store model |
Y |
| Warehouse | Which warehouse to assign the store model |
Y |
| Effective From | Starting date of store model validity period |
Y |
| Valid Till | End date of store model validity period |
Y |
| Description | Self-explanatory |
N |
| Product # | Product’s code |
Y |
| Product Name | Name / description of the product |
Y |
| Product Uom | Unit of Measurement of the product (default Each) |
Y |
| Locator | Locator of the warehouse; default locator of the warehouse will be entered if user did not select any locator |
Y |
| Min Qty | Minimum quantity for replenishment |
Y |
| Max Qty | Maximum quantity for replenishment |
Y |
| (Items / Articles) Description | Description / comment |
N |
Create New Store Model
1. Click “ Create New Store Model” on top right of “Store Model List” tab to create a new store model record, it will create new empty form
2. Fill up Store Model’s header information*
*Note: user is allowed to create multiple Store Models for the same Warehouse, but the validity period should not overlap. GOOMI will check on the validity period for the Warehouse during confirmation of the Store Model.
3. Click “Save” button at the bottom right of screen to save
4. Filter the products list by selecting a brand from “Product Brand” drop-down list. Add product into the Store Model by searching for the product from the product number drop-down list in the table of “Items / Articles”.
5. Enter the product’s Warehouse “Locator” info, “Min Qty” and “Max Qty” values, then click ” ![]() ” button to add the product into the price list. Default locator of the warehouse will be entered if user did not select any locator.
” button to add the product into the price list. Default locator of the warehouse will be entered if user did not select any locator.
6. Repeat steps 4-5 to add more products into the Store Model
7. Click “Confirm Store Model” button at the bottom left side of screen to confirm
Update Store Model Details
1. On “Store Model List” tab double click on store model to be updated, it will bring up the details on “Store Model” tab for the selected store model
2. If the Store Model’s status is confirmed, click “Reopen Store Model” button
3. Make change(s) on the Store Model information
4. Click on “Save” button at the bottom right of screen when done
5. Click on “Revert” button at the bottom right of screen or refresh icon at the top of the screen to roll back the changes
6. Click “Confirm Store Model” button at the bottom left side of screen to confirm
Delete Store Model
2. Click on “Delete” button at the bottom of screen
3. Click on “Yes” button on the pop-up window to confirm record deletion
View and Search for Store Model Details
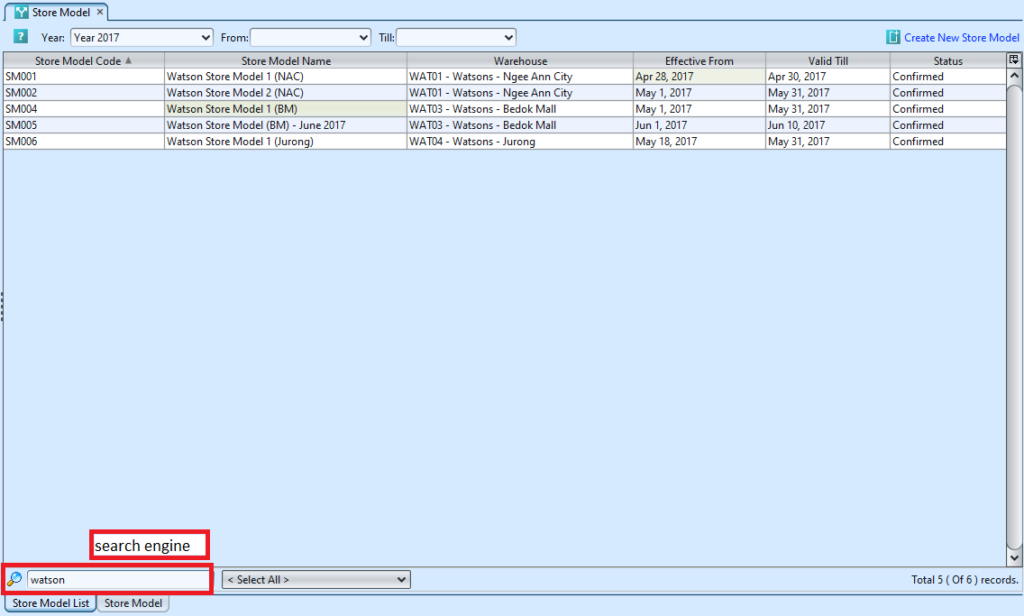
1. On “Store Model List” tab enter search parameter in the search text field box at bottom left of screen to filter the result, i.e. type in name of the store model
2. Result can be sorted alphabetically by clicking the fields’ columns
3. Double click on store to view full details of the store model, it will bring up the details on “Store Model” tab for the selected store model


