


Stock Take view allows user to track stock take progress in a warehouse and update the inventory information (i.e. quantity, batch number, expiry date) based on the stock take report. Variance in the quantity and value can be viewed in the report after Stock Take process is completed.
Below are available actions for the user from “Stock Take” view:
![]() Create new stock take
Create new stock take
![]() Update stock take details
Update stock take details
![]() Delete stock take
Delete stock take
![]() View and search for stock take details
View and search for stock take details
Field Name |
Description |
Mandatory Information |
| Document Date | Creation date of the document | Y |
| Document Number | Document number of the purchase order | Y |
| Reference Number | Code for easy reference search of the document | N |
| Branch | Name of company’s branch | Y |
| Warehouse | The warehouse of which to do the stock take | Y |
| Representative | Name of staff assigned to process the stock take | N |
| Stock Take Type | Complete Locator Count or Selected Product Count | Y |
| Analytical Group | N | |
| Description / comments | Additional information in regard to the stock take document | N |
| Product Brand | Select product brand(s) to filter products | N |
| Filter | Enter keyword(s) to filter / search for products | N |
| Select Locators | Select which Locator(s) to do the stock take | Y |
| Locator | Locator of the product in the warehouse | Y |
| Product | Product code of the item | Y |
| Description | Product Description | Y |
| UOM | Type of the item (Unit of Measure) | Y |
| Counted Qty | Quantity as counted by stock take process for batch of items | Y |
| Batch # | Batch number of the counted item | N |
| Mfg. Date | Manufacturing date of the product batch | N |
| Expiry Date | Expiry date of the product batch | N |
| Comments | Comments on the counted line item, if any | N |
| Total Counted Qty | Total Counted Quantity for all the items listed in the stock take document lines items | Y |
| Variance Qty | Total Variance Quantity (difference between system total quantity vs total counted quantity) for all the items listed in the stock take document lines items | Y |
| Grand Total | Total variance in value for all the items listed in the stock take document | Y |
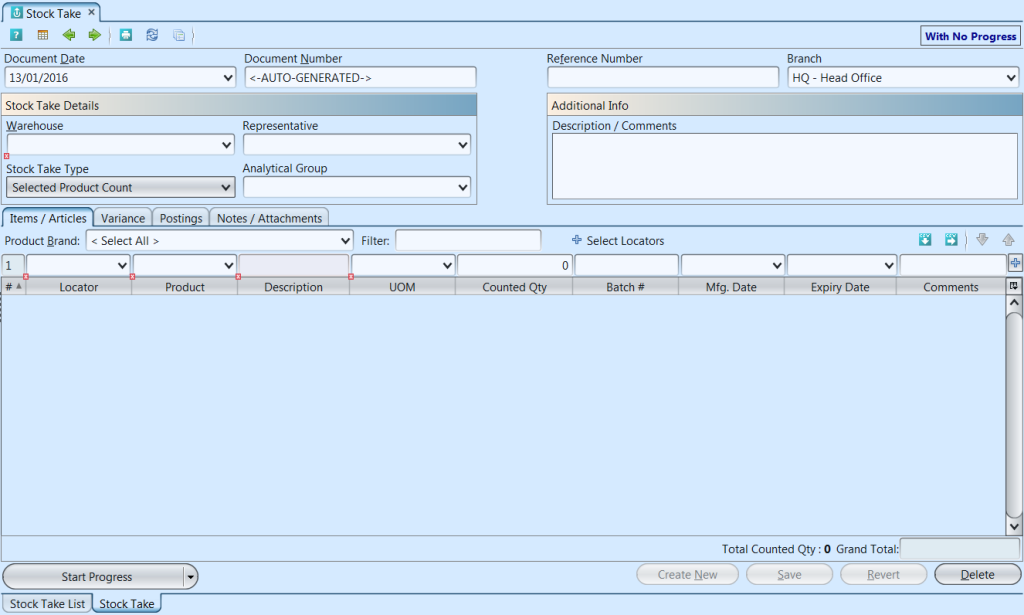
Create New Stock Take:
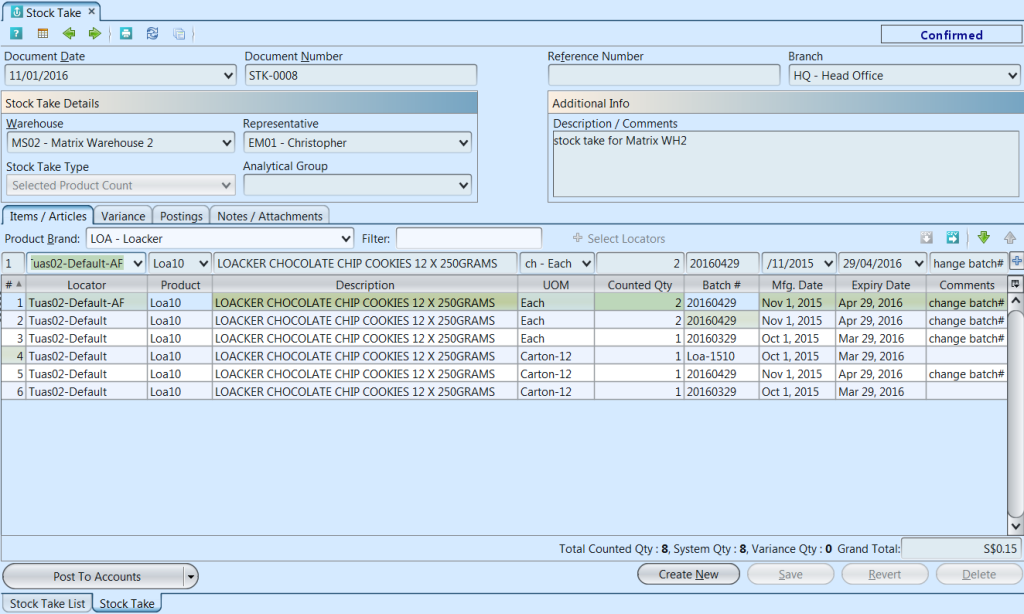
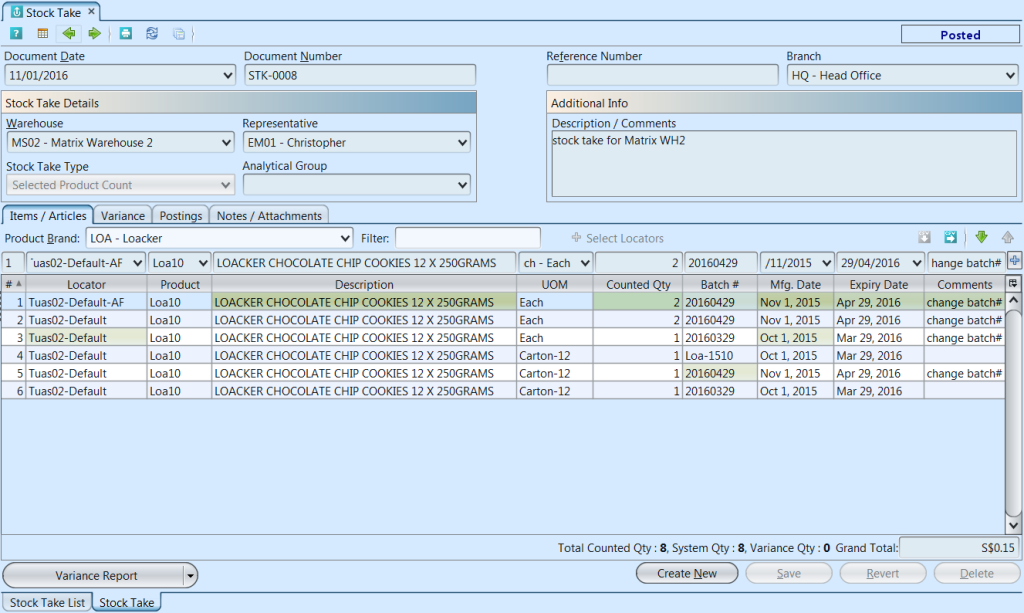
1. Click on “Create New” at the top right of screen of “Stock Take List” tab, it will open “Stock Take” tab with empty form
2. Fill up stock take’s information on the top half of screen. For “Stock Take Type“:
- Complete Locator Count: all products in the selected locator(s) will be counted and have its batch information updated (if there is any variance)
- Selected Product Count: only products entered into the stock take document in the selected locator(s) will be counted and its batch information updated (if there is any variance)
3. Click “Save” button at the bottom right side of screen
4. Select which locator(s) to do the stock take from by clicking on ![]() in the middle of the screen. User to tick checkbox(es) of locator(s) in the pop up window. Alternatively, user may select all the locators by clicking on the “Select All” button. Click OK to confirm the selected locator(s)*
in the middle of the screen. User to tick checkbox(es) of locator(s) in the pop up window. Alternatively, user may select all the locators by clicking on the “Select All” button. Click OK to confirm the selected locator(s)*
*Note: Locators of staging type will not be included in the Stock Take process. Locator(s) selected will be reserved and thus unavailable for selection in other Stock Take document, until the former Stock Take document is posted.

5. Click on “Start Progress” button at the bottom left of screen to start the stock take process*.
*Note: Starting a stock take process will lock all the products in the selected locator(s) from being use by other processes with inventory movement. User can stop / pause a stock take progress at any time and continue / start again another time. Stopping the stock take will unlock the selected locator(s) and make available the inventory inside these locators for other processes (WARNING: this may cause discrepancy in the stock take result)

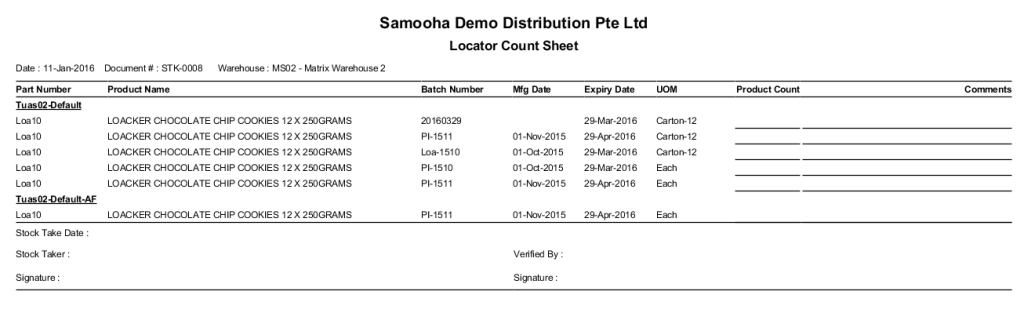
6. Click on “Count Sheet Report” button at the bottom of screen and print the stock take count sheet report
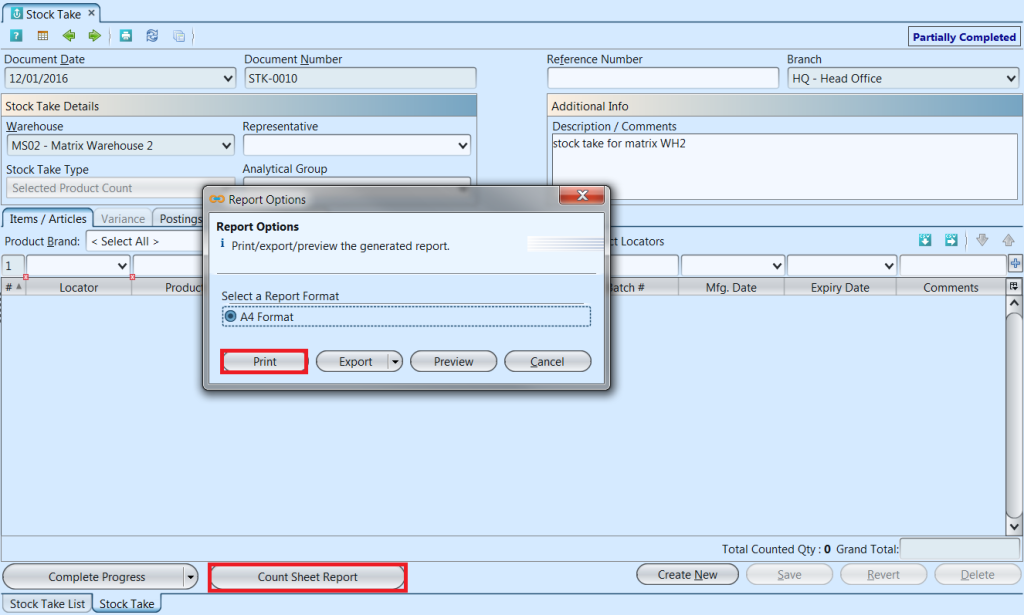
- Locator Count Sheet: count sheet listing (selected) products in the selected locator(s), to be use for Stock Take process
7. User may filter the products list by selecting a brand from “Product Brand” drop-down list.
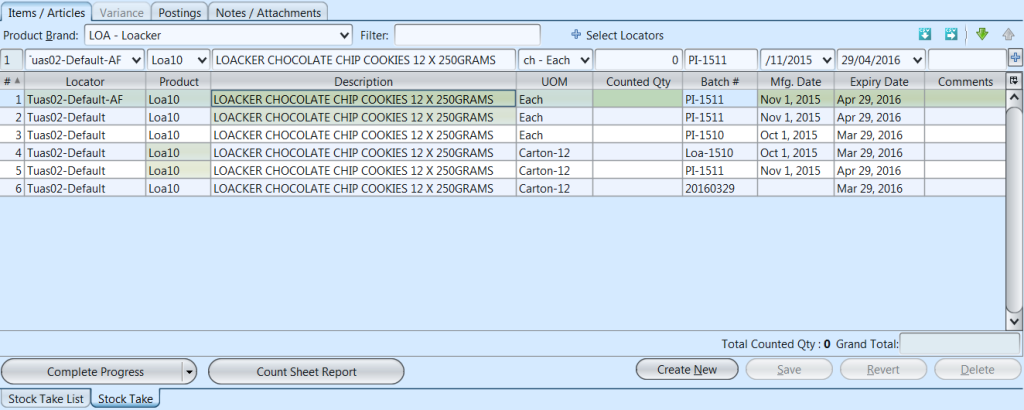
8. Add locator into the stock take by searching for the locator from the “Locator” drop-down list in the table on “Items / Articles” tab
9. Select product to add into the stock take from the “Product” drop-down list in the table on “Items / Articles” tab. Enter the product’s UOM, counted quantity, and batch information for the selected locator, and click ![]() button to add the product info into the stock take document. If there is no changes to the batch information, user may leave the batch number textfield empty
button to add the product info into the stock take document. If there is no changes to the batch information, user may leave the batch number textfield empty
10. Repeat steps 8-9 to add more products into the stock take*
*Note: User can stop / pause a stock take progress at any time and continue (start) again another time. Stopping the stock take will unlock the selected locator(s) and allow inventory inside these locators for other processes (WARNING: this may cause discrepancy in the stock take result)

11. Click on “Complete Progress” button at the bottom left of screen to confirm completion of the stock take process. Click on arrow on “Complete Progress” button and select “Stop Progress” to stop/pause the stock take progress
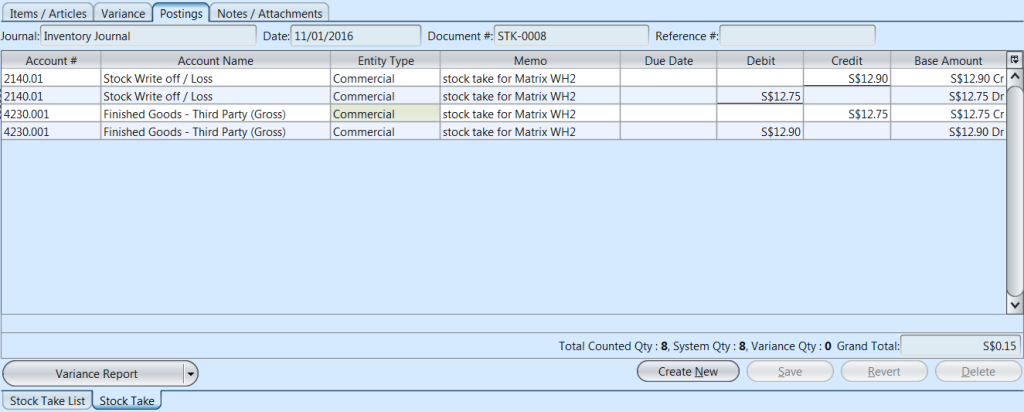
12. Click on “Post To Accounts” button at the bottom left of screen to post the stock take to accounts. If there is any variance in quantity or batch info, the system will create:
- Differences in the product batch information / quantity / total cost for the stock take variance under “Variance” tab
- Journal entries for the stock take variance under “Posting” tab
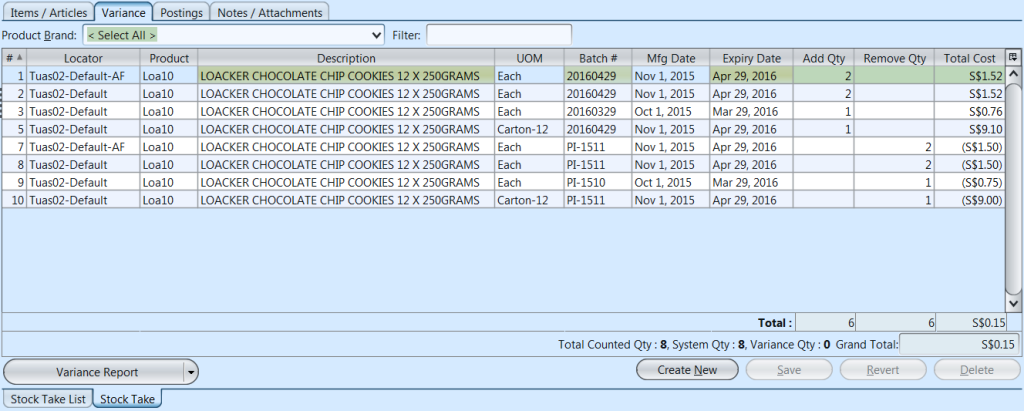
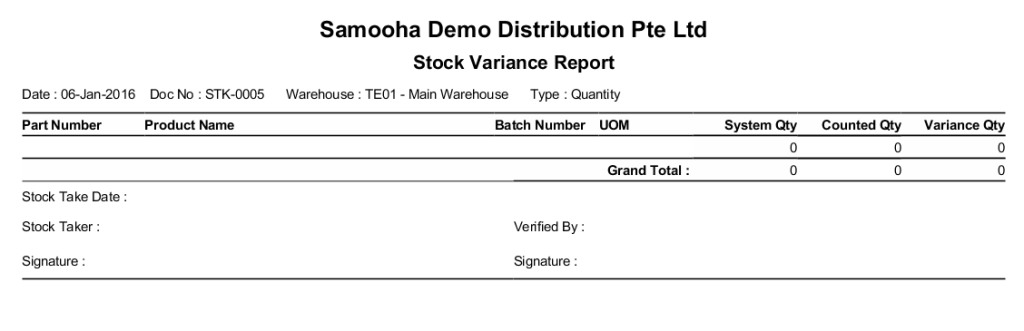
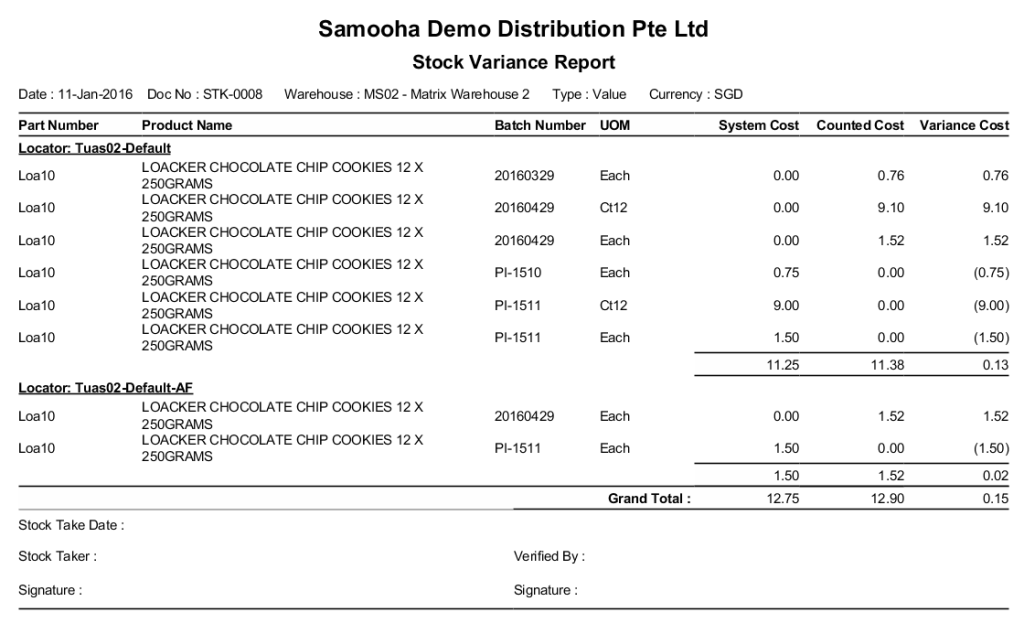
13. Click on “Variance Report” button at the bottom left of screen to print the Stock Variance Report (by quantity or value). The Variance Report will only print list of items where there are any changes / differences in the quantity, batch info, and / or cost value

- Stock Variance Report: below is sample report (type: Quantity) without variance in the counted quantity & value
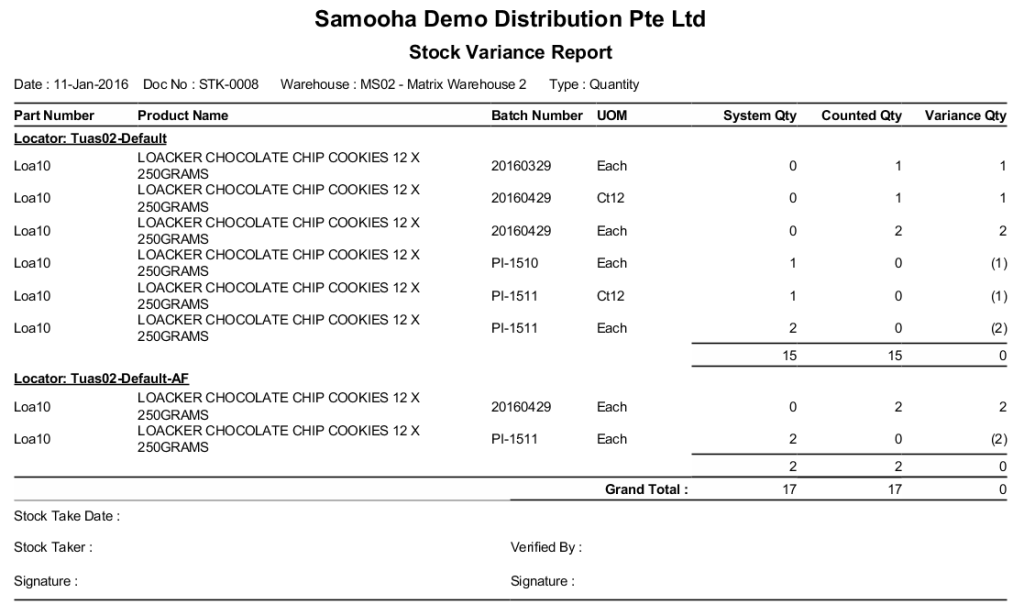
- Stock Variance Report: below is sample report (type: Quantity) without variance in the counted quantity but have variance in total cost value
- Stock Variance Report: below is sample report (type: Value) without variance in the counted quantity but have variance in total cost value
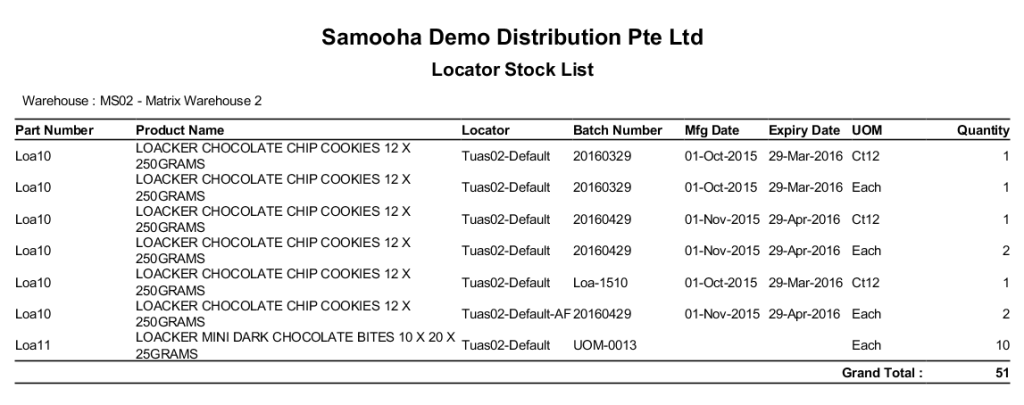
- Locator Stock List Report: sample report. Quantity is in Stock UOM, Grand Total Quantity is in base UOM (Each)
Update Stock Take Details:
1. Click on “Stock Take List” tab at the bottom of screen
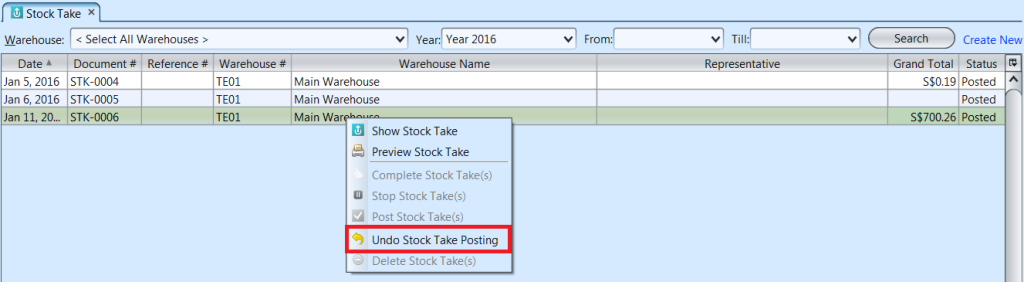
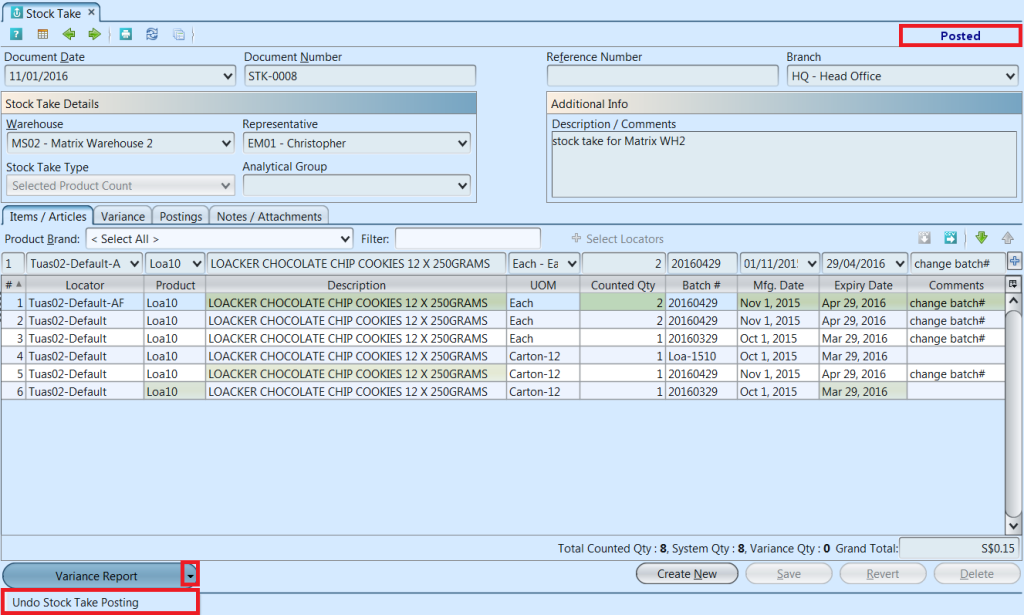
2. Double click on stock take to be updated, it will bring up the details on “Stock Take” tab for the selected stock take. If a stock take’s status is “Confirmed” or “Posted”, right click on the document in the list view and undo posting of the document first. Alternatively, open the posted document, click the arrow on “Variance Report” button, then click on “Undo Stock Take Posting”
3. Make change(s) on the stock take information
4. Click on “Save” button at the bottom right of screen to save
5. Click on “Revert” button at the bottom right of screen or refresh icon at the top of the screen to roll back the changes
6. Click on “Start Progress” button at the bottom left of screen to start the stock take process*.
7. Click on “Complete Progress” button at the bottom left of screen to confirm completion of the stock take process.
8. Click on “Post To Accounts” button at the bottom left of screen to post the stock take to accounts. If there is any variance in quantity or batch info, the system will create:
- Differences in the product batch information / quantity / total cost for the stock take variance under “Variance” tab
- Journal entries for the stock take variance under “Posting” tab
Delete Stock Take:
1. Click on “Stock Take List” tab at the bottom of screen
2. Double click on stock take to be deleted, it will bring up the details on “Stock Take” tab for the selected stock take. If a stock take’s status is “Confirmed” or “Posted”, right click on the document in the list view and undo posting of the document first. Alternatively, open the posted document, click the arrow on “Variance Report” button, then click on “Undo Stock Take Posting”
3. Click on “Delete” button at the bottom right side of screen
4. Click on “Yes” button on the pop-up window to confirm stock take deletion
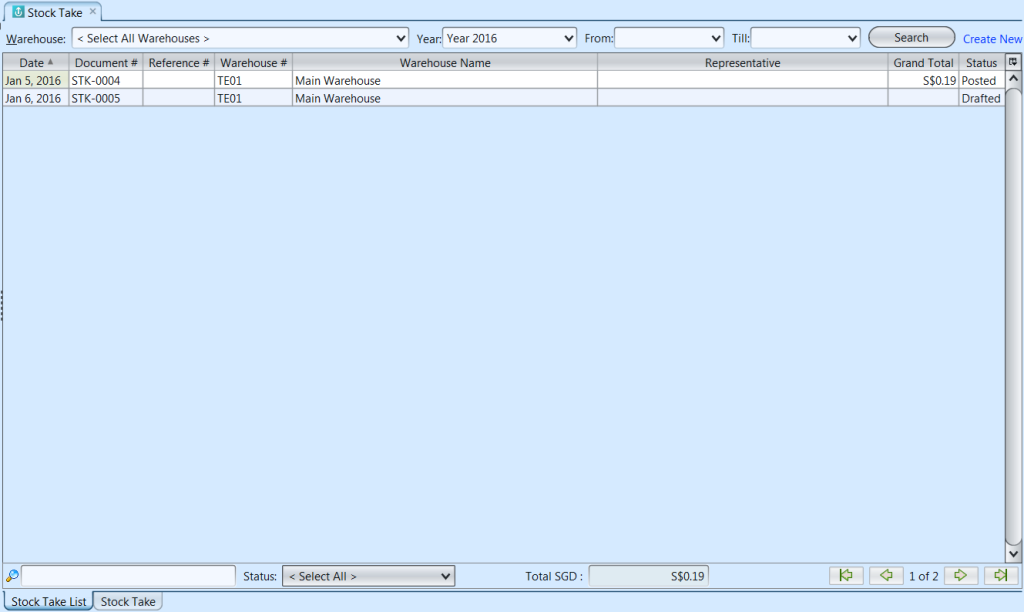
View and Search for Stock Take Details:
1. Click on “Stock Take List” tab at the bottom of screen
2. Enter search parameter to filter the result, i.e. type in which warehouse to search for in the “Warehouse” text field box or select from drop-down list
3. Result can be sorted alphabetically by clicking the fields’ columns
4. Double click on stock take to view full details of the document, it will bring up the details on “Stock Take” tab for the selected document