


Retail Customer view allows user to manage / register retail customers in POS (Point of Sale) module. Below are available actions for the user from Retail Customer view:
![]() Create new retail customer
Create new retail customer
![]() Update retail customer details
Update retail customer details
![]() Delete retail customer
Delete retail customer
![]() View and search for retail customer details
View and search for retail customer details
![]() Import and export of retail customer data:
Import and export of retail customer data:
1. Export to CSV file
2. Import from CSV file
3. Export for Mail Chimp
Field Name |
Description |
Mandatory Information |
| Customer Code | Custom code for the customer |
Y |
| First Name | First name of customer. |
Y |
| Surname | Family name of customer. |
N |
| Gender | Male or female |
Y |
| Date of Birth | Self-explanatory |
N |
| Country | Self-explanatory |
N |
| Sales Rep | Sales representative staff who served the customer. |
N |
| How do you know about us? | How did customer find out about the retail store |
N |
| Join Loyalty | Tick checkbox if customer would like to join store loyalty program |
N |
| Loyalty Joined On | Self-explanatory |
N |
| Location | Location of registration of customer |
N |
| Is Active? | Tick checkbox if customer is active |
N |
| Mobile Number | Self-explanatory |
N |
| Address | Self-explanatory |
N |
| City | Self-explanatory |
N |
| Postal Code | Self-explanatory |
N |
| State | Self-explanatory |
N |
| Country | Self-explanatory |
N |
| Phone1 | Self-explanatory |
N |
| Phone2 | Self-explanatory |
N |
| Fax | Self-explanatory |
N |
| Self-explanatory |
N |
|
| Website | Self-explanatory |
N |
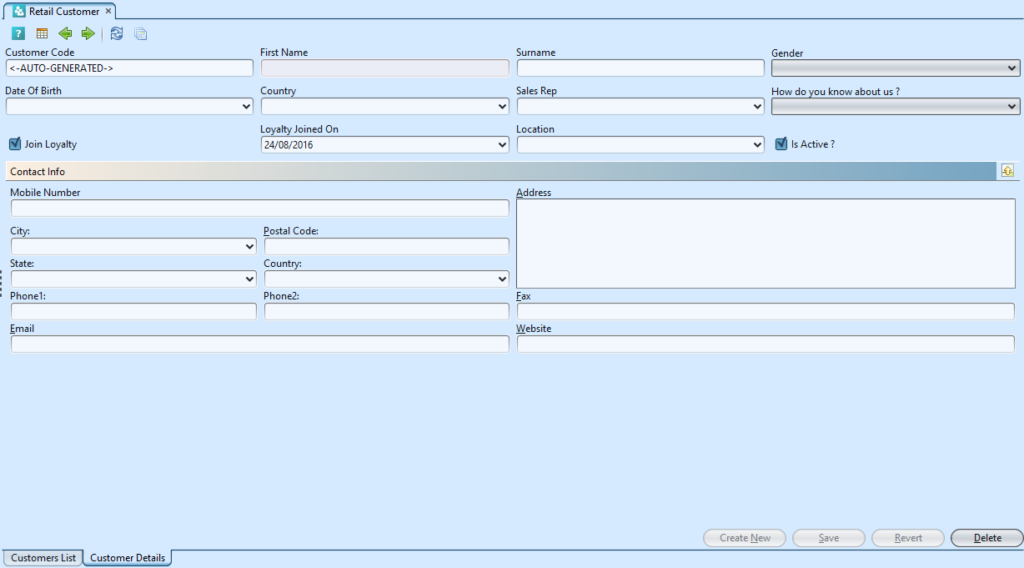
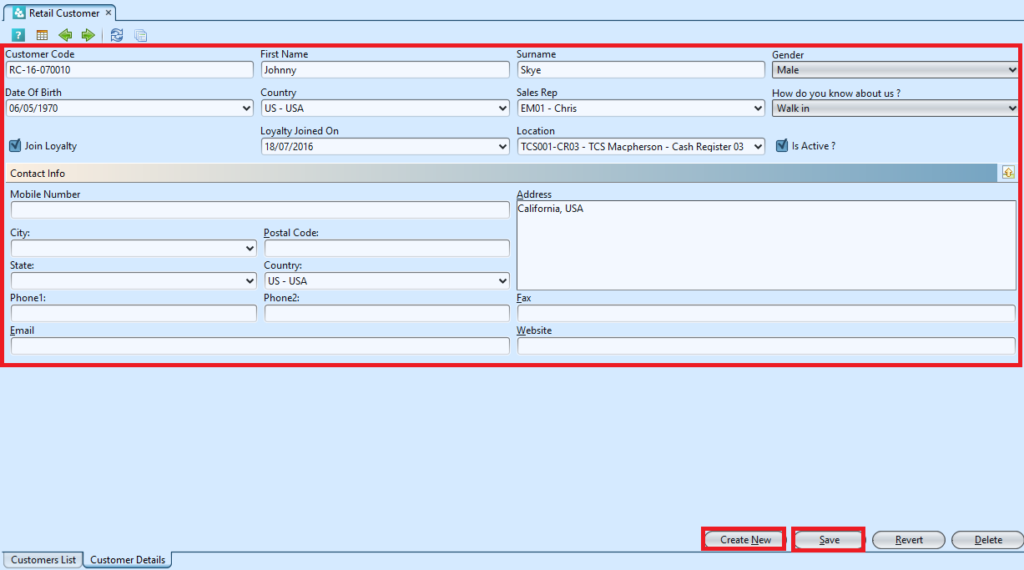
Create New Retail Customer
1. Click on “Customer Details” tab at the bottom of screen
2. Fill up customer’s information
3. Click “Save” button at the bottom of screen when done. The created retail customers will be available for selection in the Point of Sale Entry (Cash Register).
4. Click “Create New” button to create another retail customer record
Update Retail Customer Details
1. Click on “Customer List” tab at the bottom of screen
2. Double click on customer to be updated, it will bring up “Customer Details” tab for the selected customer
3. Make change(s) on the customer’s information
4. Click on “Save” button at the bottom of screen when done
5. Click on “Revert” button at the bottom of screen or refresh icon at the top of the screen to roll back the changes.
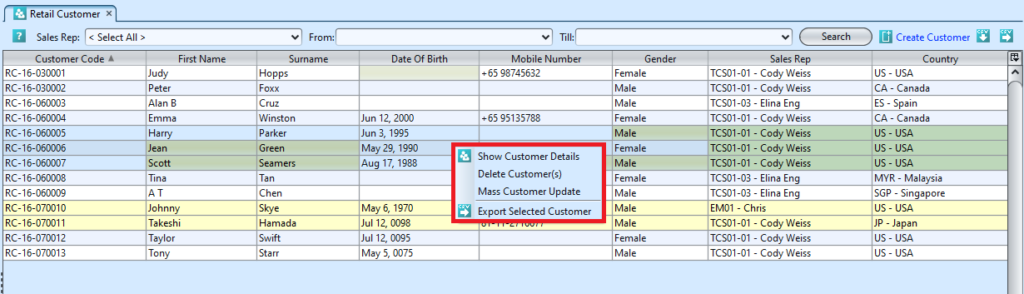
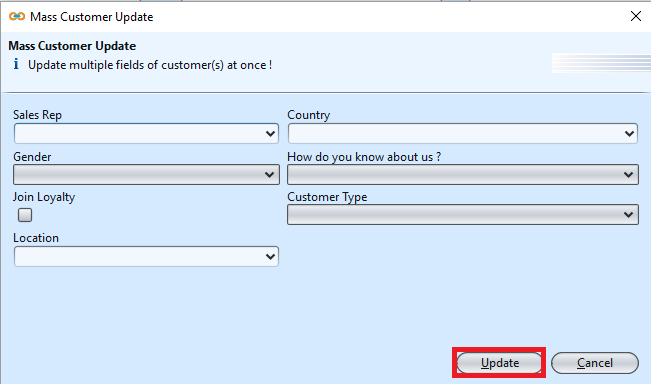
6. User can do mass update of retail customer records from the list view. Select multiple lines in the list view and right-click mouse to show more options. Select “Mass Customer Update” and choose which data field to update for the selected records. Click “Update” button to proceed with the update.
Delete Retail Customer
1. Click on “Customer List” tab at the bottom of screen
2. Double click on customer to be deleted, it will bring up “Customer Details” tab for the selected customer
3. Click on “Delete” button at the bottom of screen
4. Click on “Yes” button on the pop-up window to confirm record deletion.
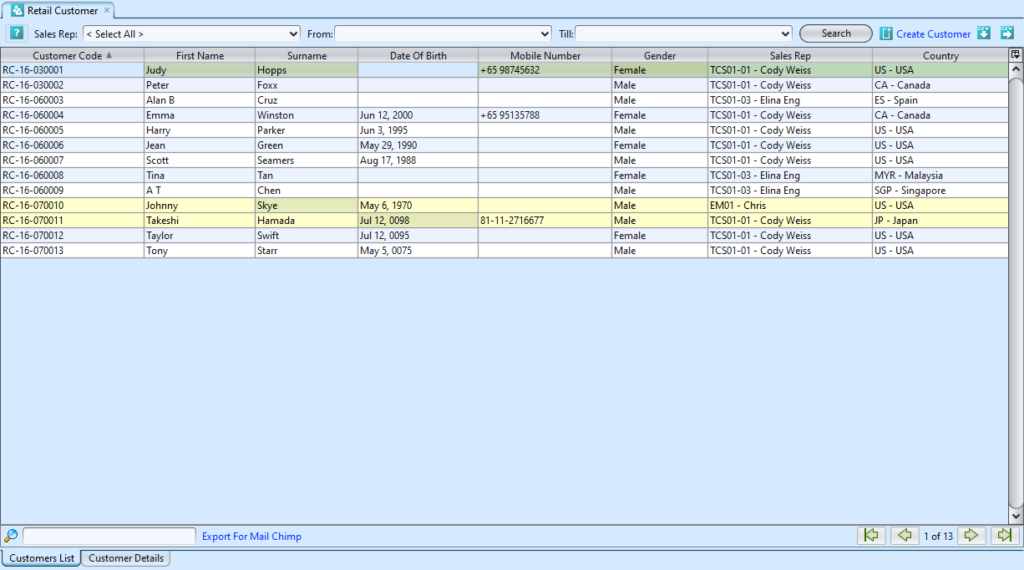
View and Search for Retail Customer Details
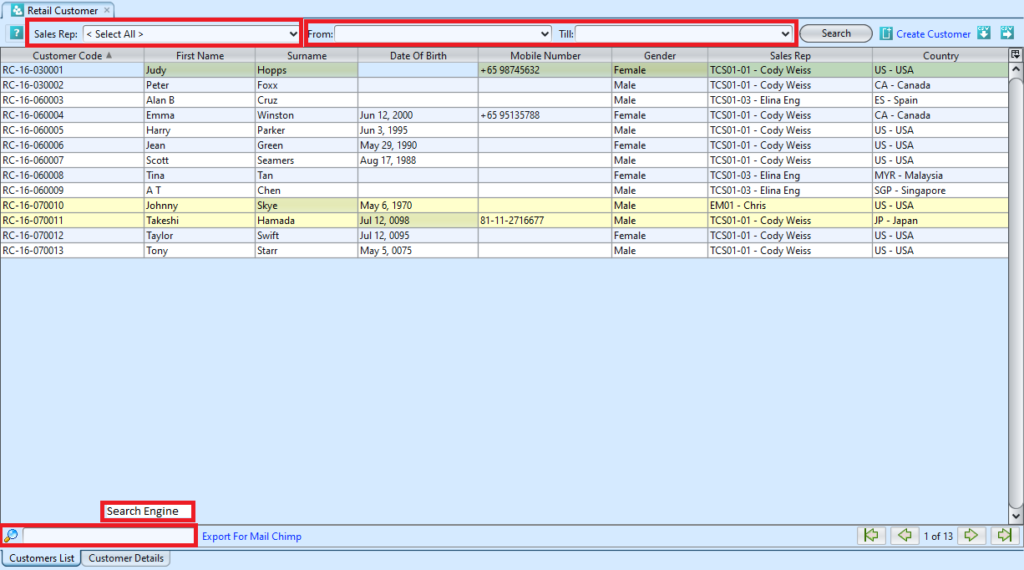
1. Click on “Customer List” tab at the bottom of screen
2. Enter search parameter to filter the result, i.e. type in name of the sales representative in the “Sales Rep” textfield box or select from drop-down list
3. Result can be sorted alphabetically by clicking the fields’ columns
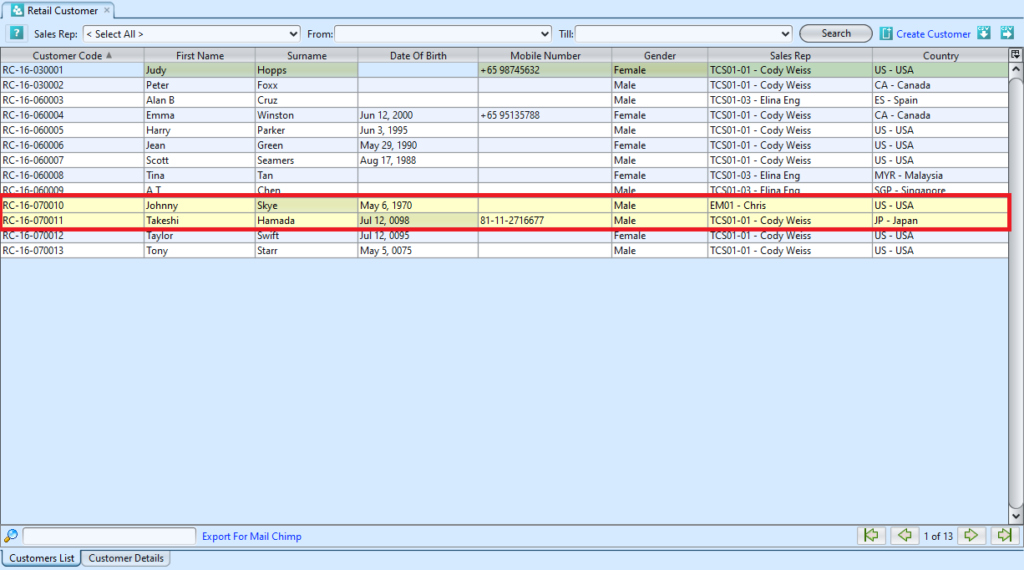
Inactive retail customer records will be highlighted in yellow in the list view.
4. Double click on customer to view full details of the customer, it will bring up “Customer Details” tab for the selected customer
Import and Export of Retail Customer Data
1. Click on “Customer List” tab at the bottom of screen
2. Click “Export to CSV” ![]() button to export listed retail customer data, user can filter the list to only show data to be exported.
button to export listed retail customer data, user can filter the list to only show data to be exported.
3. Click “Import from CSV” ![]() button to import retail customer data. Use “Export to CSV” feature to get the file template with example.
button to import retail customer data. Use “Export to CSV” feature to get the file template with example.
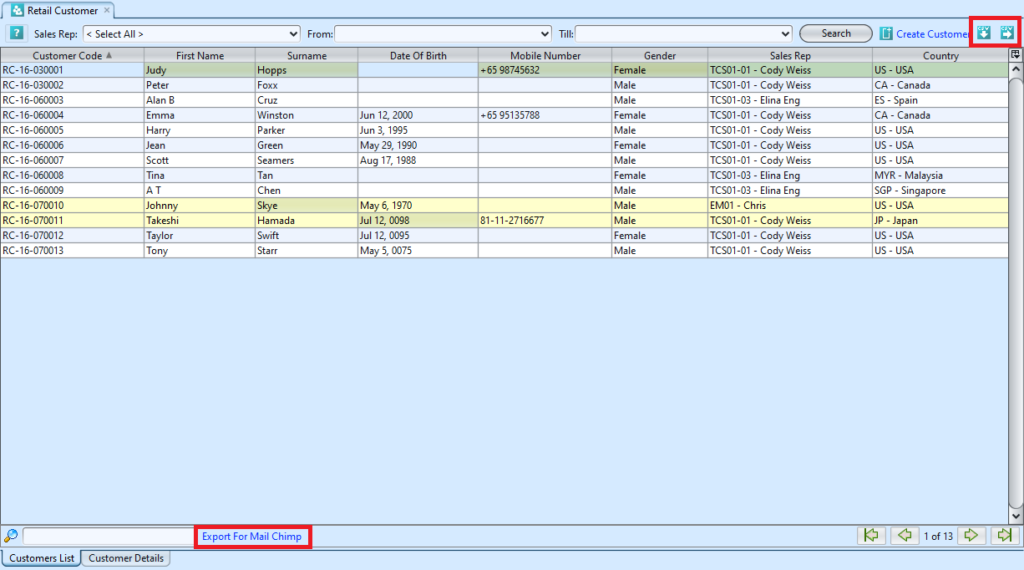
4. User can also export the retail customer data for Mail Chimp using “Export for Mail Chimp” feature.