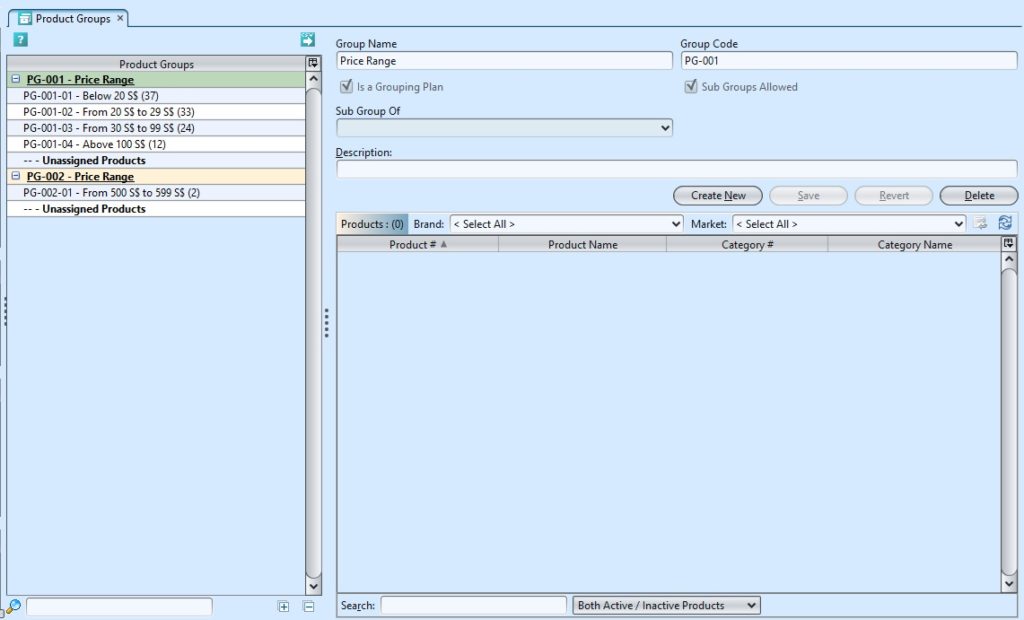
Product Groups view allows user to group products into subgroups e.g. color, category / type, size, etc for multi-dimensions products analysis.
Below actions are available under “Product Groups”:
![]() Create, edit and delete product group
Create, edit and delete product group
![]() Search and view for the product group
Search and view for the product group
![]() Group products into subgroups e.g. colour, skincare , Brand…ect
Group products into subgroups e.g. colour, skincare , Brand…ect
Field Name |
Description |
Mandatory Information |
| Group Name | Self-explanatory |
Y |
| Group Code | Custom code for the product group |
Y |
| Is a Grouping Plan | Tick the checkbox if it is a grouping plan |
N |
| Sub Group Allowed | Tick the checkbox if it allows sub group |
N |
| Sub Group of | Select the main product group if it is sub group |
Y |
| Description | Additional information for the product group |
N |
Create New Product Group
1. Click “Create New” button at the right side of screen
2. Fill up the information on the form on the right side of the screen
3. Optional: If the checkbox name “Is a Grouping Plan” is ticked, it allows user to define sub group under this product group. The checkbox “Sub Groups Allowed” will be automatically ticked once the “Is a Grouping Plan” checkbox was ticked. This grouping plan will now be available for selection as parent group in “Sub Group of” drop-down list for sub groups’ selections.
4. User must create sub groups under a grouping plan. These sub groups select their parent group from “Sub Group of” drop-down list.
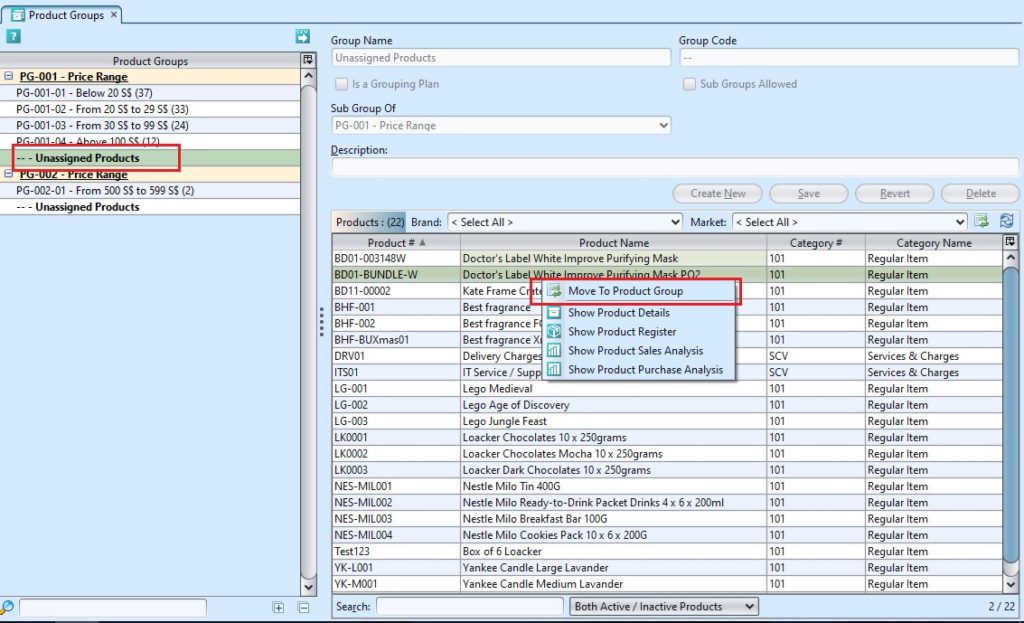
5. Assign product under a product group. Click the “Unassigned Products” for the selected category, click ![]() button at the middle of the screen or right click on the mouse at the list of unassigned products and select “Move to Product Group”
button at the middle of the screen or right click on the mouse at the list of unassigned products and select “Move to Product Group”
Note: Products cannot be assigned to a grouping plan / parent group
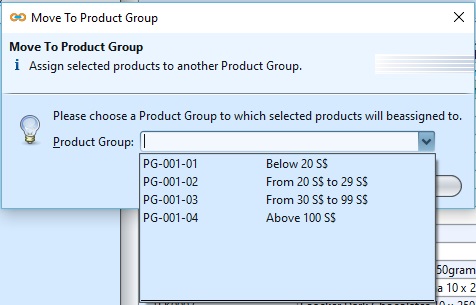
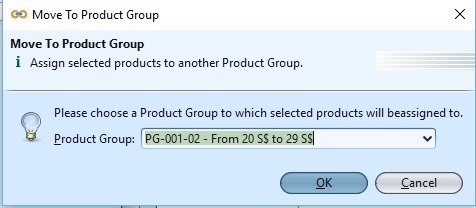
6. Select the product group on the pop-up window and click “OK” to confirm the selection.
7. Click “Save” button at the right side of screen when done
Update Product Group Details
1. Click on product group to be updated, it will bring up the selected product group details on the right side of the screen
2. Click “Save” button at the right side of the screen when done with the update
3. Click “Revert” button at the right side of the screen to reverse any changes
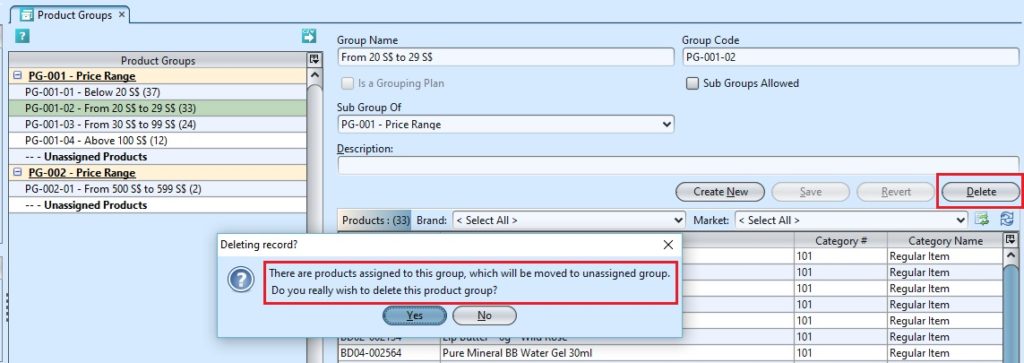
Delete Product Group
1. Click on product group to be deleted, it will bring up the selected product group on the right side of the screen
2. Click on “Delete” button at the right side of screen
3. Click on “Yes” button on the pop-up window to confirm product group deletion
View and Search for Product Group Details
1. Enter search parameter to filter the result, i.e. type in the group name in the search textfield box at the bottom of the screen.
2. Result can be filtered by “Only Active Product”, “Only Inactive Product” or “Both Active/Inactive Product” (see drop-down list in image below)
3. Click on product group to view, it will bring up the details on the right side of the screen,


