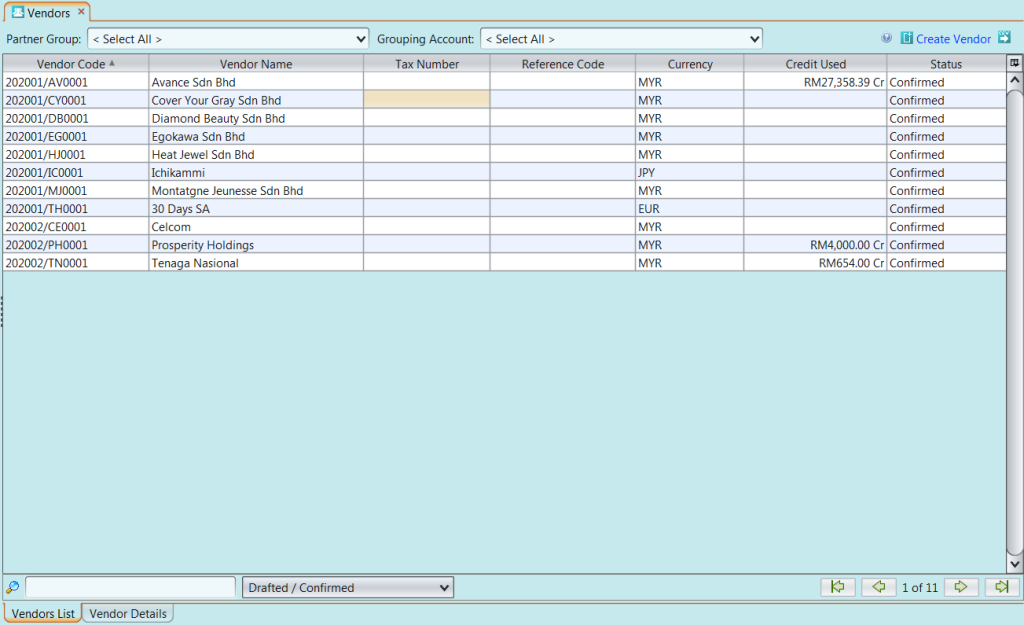
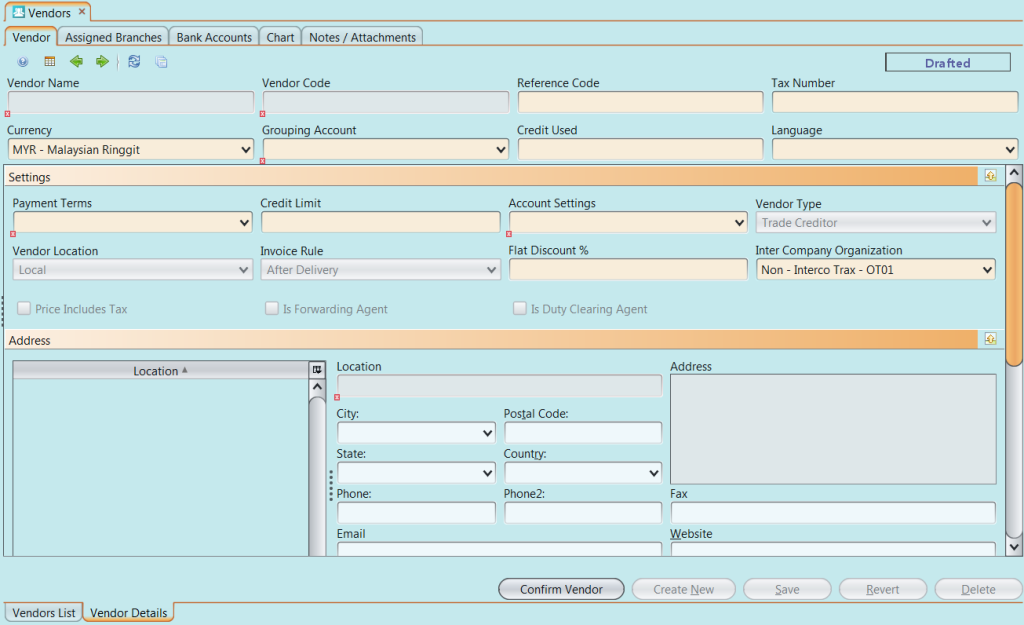
Vendors view allows the user to create and manage vendors. Below are available actions for the user from “Vendors” :
![]() Create new vendor
Create new vendor
![]() Update vendor details
Update vendor details
![]() Delete vendor
Delete vendor
![]() View and search for vendor details
View and search for vendor details
Field Name |
Explanations |
Mandatory Information |
| Vendor Name | The name of vendor | Y |
| Vendor Code | The code for vendor | Y |
| Reference Code | Code for easy reference search of vendor | N |
| Tax Number | Taxpayer Identification Number of the vendor | N |
| Currency | Currency used by vendor for payment purpose | Y |
| Grouping Account | Sub-ledger / grouping account for vendor | Y |
| Credit Used | Amount owed to the vendor | N |
| Language | Language used by vendor | N |
| Payment Terms | Payment terms for vendor payment | Y |
| Credit Limit | Credit limit given by the vendor | N |
| Account Settings | Which purchase account to use | Y |
| Vendor Type | Type of the vendor | N |
| Vendor Location | Location of the vendor (local or international) | N |
| Invoice Rule | Invoice rule for vendor payment | N |
| Flat Discount % | N | |
| Inter Company Organization | N | |
| Price Includes Tax | Checkbox to indicates whether product pricelist from the vendor includes tax | N |
| Is Forwarding Agent | Checkbox to indicates whether the vendor is a forwarding agent | N |
| Is Duty Clearing Agent | Checkbox to indicates whether the vendor is a duty clearing agent | N |
| Location | Location of vendor | Y |
| Address | Address of vendor’s location | Y |
| City | City of vendor’s location | N |
| Postal Code | Postal code of vendor’s address | N |
| State | State of vendor’s location | N |
| Country | Country of vendor’s location | N |
| Phone | Phone number of vendor’s location | N |
| Phone2 | Secondary phone number of vendor’s location | N |
| Fax | Fax number of vendor’s location | N |
| Email of vendor | N | |
| Website | Website of vendor | N |
| Shipping Address | Tick checkbox if this is vendor’s shipping address | N |
| Billing Address | Tick checkbox if this is vendor’s billing address | N |
| Order From Address | Tick checkbox if this is vendor’s address for purchase order | N |
| Name | Contact name of vendor | Y |
| Designation | Designation of vendor’s contact | N |
| Phone | Phone number of vendor’s contact | N |
| Alt Phone | Alternate phone number of vendor’s contact | N |
| Fax | Fax number of vendor’s contact | N |
| Email of vendor’s contact | N | |
| Comments | N | |
| Link to Address | Address of the user | N |
Create New Vendor:
1. Click “Create Vendor” link on top right of “Vendors List” tab to create another vendor record, it will open “Vendor Details” tab with empty form
2. Fill up vendor’s information
3. Click “Save” button at the bottom of screen when done
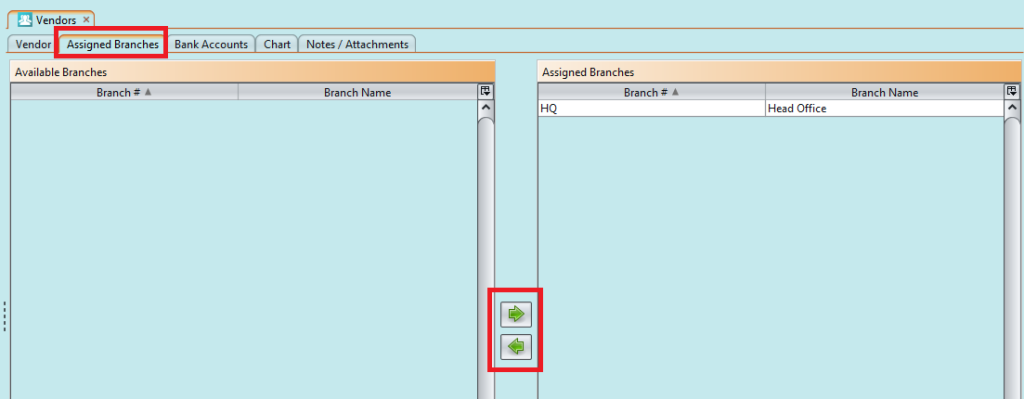
4. On “Assigned Branches” tab, a default branch (e.g. HQ) has been automatically assigned for the new vendor. To assign another branch for the vendor, select available branch from the bottom left table and click ” ![]() ” button in middle of screen
” button in middle of screen
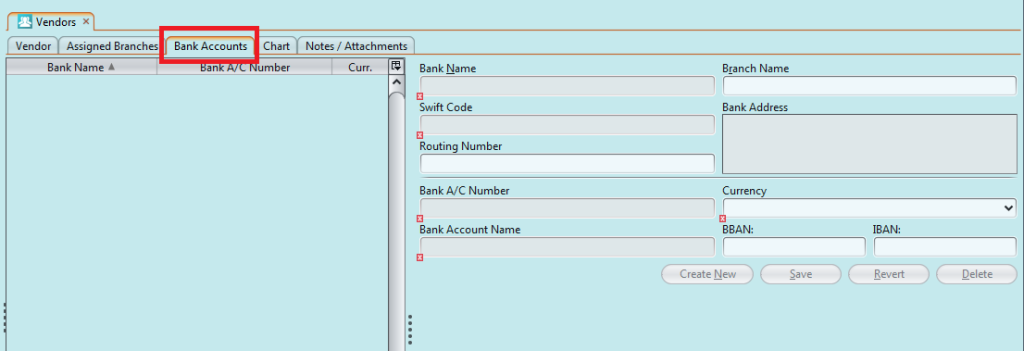
5. To create bank account record for payment to the vendor, click on “Bank Accounts” tab, fill up the information, and click “Save” button.
6. Click “Confirm Vendor” button and click “Yes” button to confirm the vendor record
Update Vendor Details:
1. On “Vendors List” tab double click on vendor to be updated, it will bring up the details on “Vendor Details” tab for the selected vendor.
2. Make change(s) on the vendor’s information
3. Click on “Save” button at the bottom of screen when done
4. Click on “Revert” button at the bottom of screen or refresh icon at the top of the screen to roll back the changes
Delete Vendor:
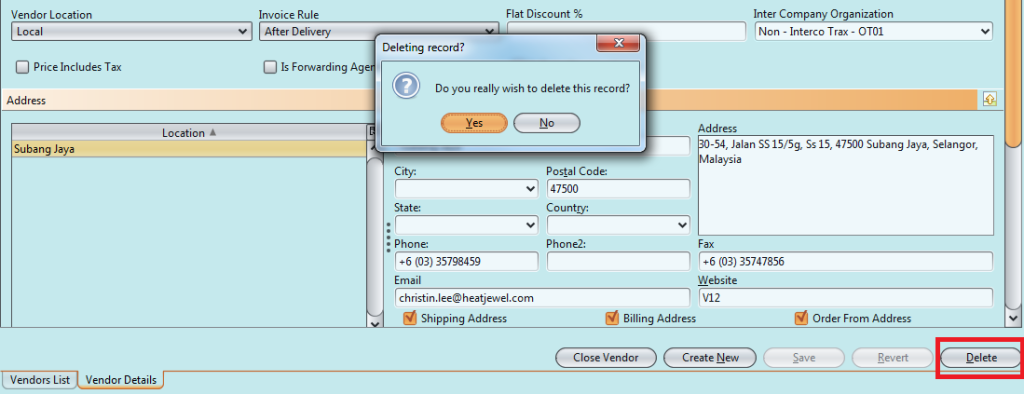
1. On “Vendors List” tab double click on vendor to be deleted, it will bring up the details on “Vendor Details” tab for the selected vendor
2. Click on “Delete” button at the bottom of screen
3. Click on “Yes” button on the pop-up window to confirm record deletion
View and Search for Vendor Details:
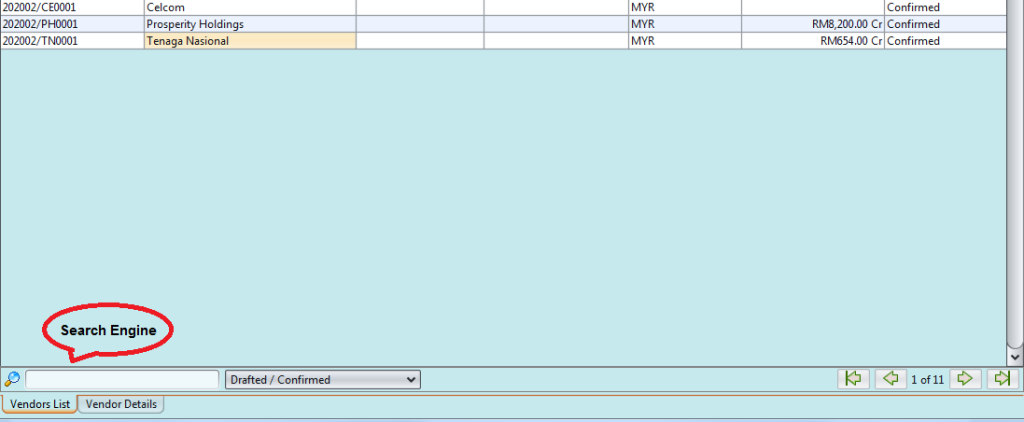
1. On “Vendors List” tab enter search parameter to filter the result, i.e. type in name of the partner group in the “Partner Group” textfield box or select from drop-down lists
2. Result can be sorted alphabetically by clicking the fields’ columns
3. Double click on vendor to view full details of the vendor, it will bring up the details on “Vendor Details” tab for the selected vendor
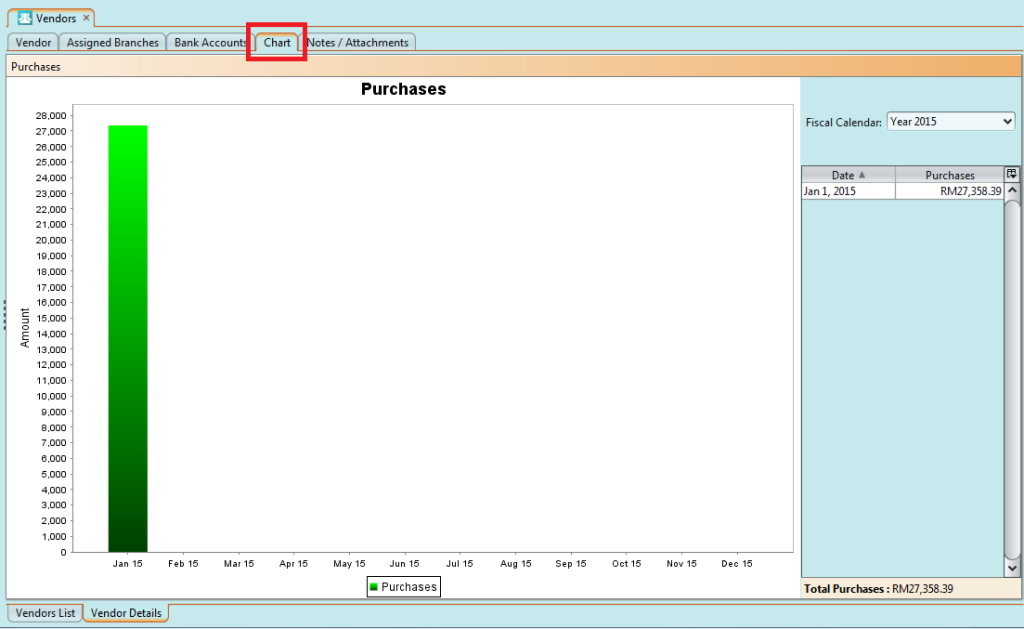
4. The “Chart” tab under “Vendor Details” tab shows purchase records & chart for the selected vendor


