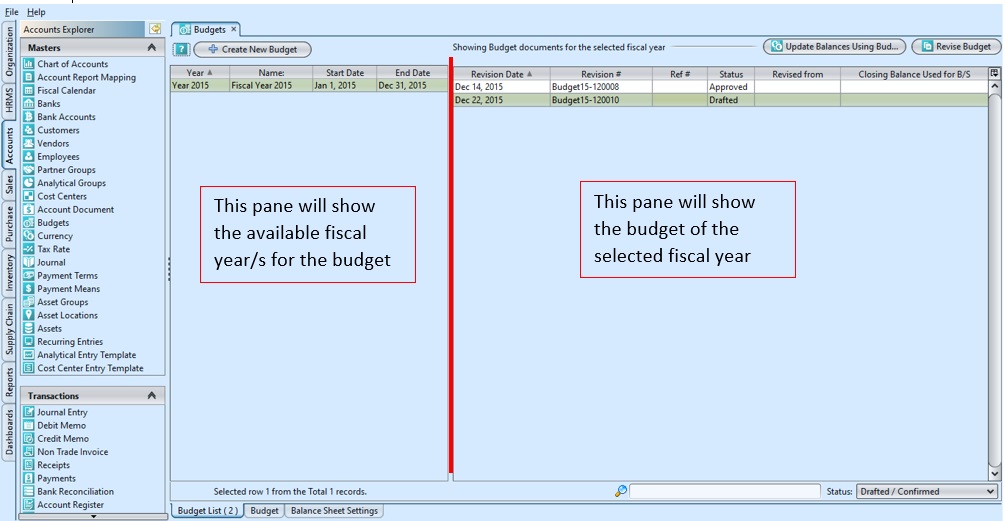
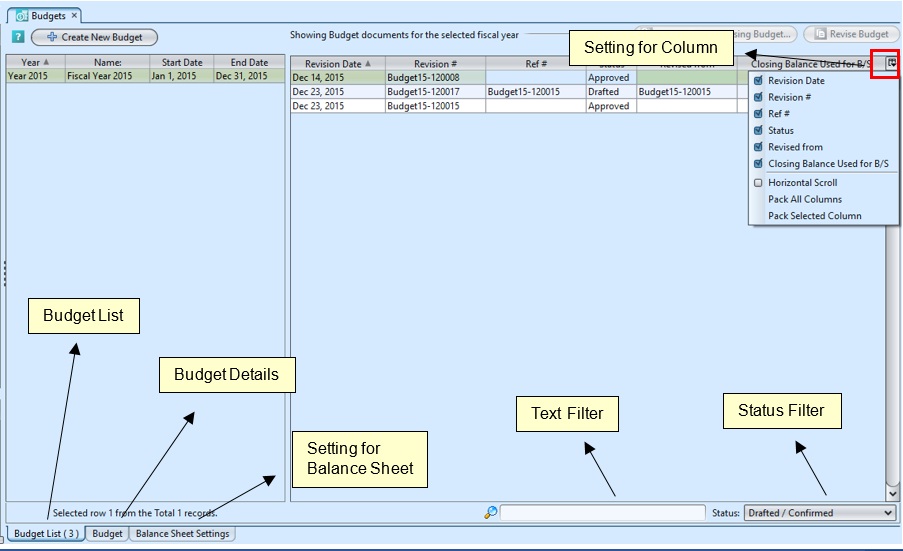
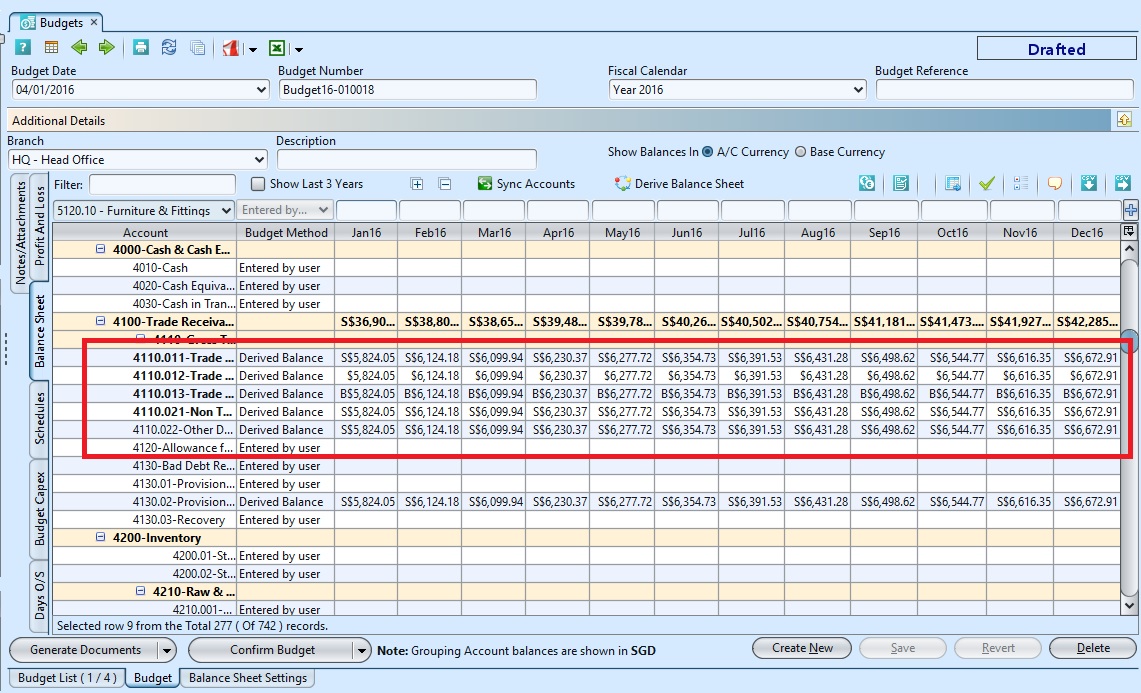
The company Budgets both for the fiscal year and for the open to buy can be set up and monitored using the budget application. Below actions are available under “Budgets”:
![]() Create new budget, revise, update, delete, view and search for details.
Create new budget, revise, update, delete, view and search for details.
![]() Balance Sheet Settings: Create settings for accounts’ balance sheet and assign accounts, update, delete.
Balance Sheet Settings: Create settings for accounts’ balance sheet and assign accounts, update, delete.
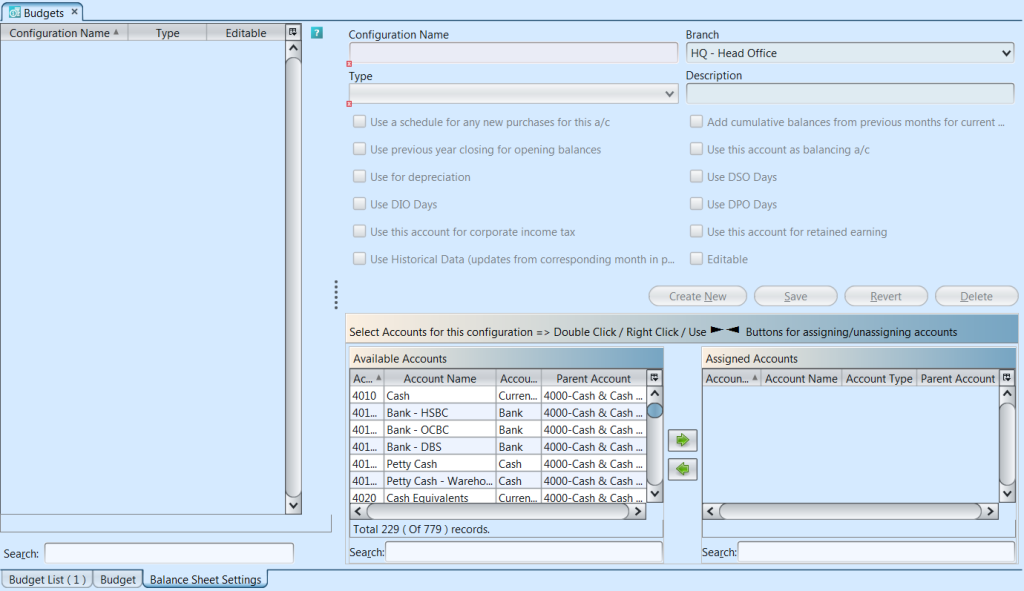
Field Name |
Description |
Mandatory Information |
| Budget Date | The budget creation date |
Y |
| Budget Number | Document’s number |
Y |
| Fiscal Calendar | A fiscal year is an accounting period of 365(6) days that does not necessarily correspond to the calendar year beginning on January 1st. The fiscal year is the established period of time when an organization’s annual financial records commence and conclude. |
Y |
| Budget Reference |
N |
|
| Branch | Select the company’s branch |
N |
| Description | Description |
N |
| Filter |
N |
|
| Account | Account code and name |
Y |
| Balance Sheet Setting – Configuration Name | Configuration name of the budget’s balance sheet settings |
Y |
| Balance Sheet Setting – Branch | Which branch use this configuration settings |
Y |
| Balance Sheet Setting – Type | Type of the configuration settings |
Y |
| Balance Sheet Setting –Description | Self-explanatory |
N |
Create New Budget
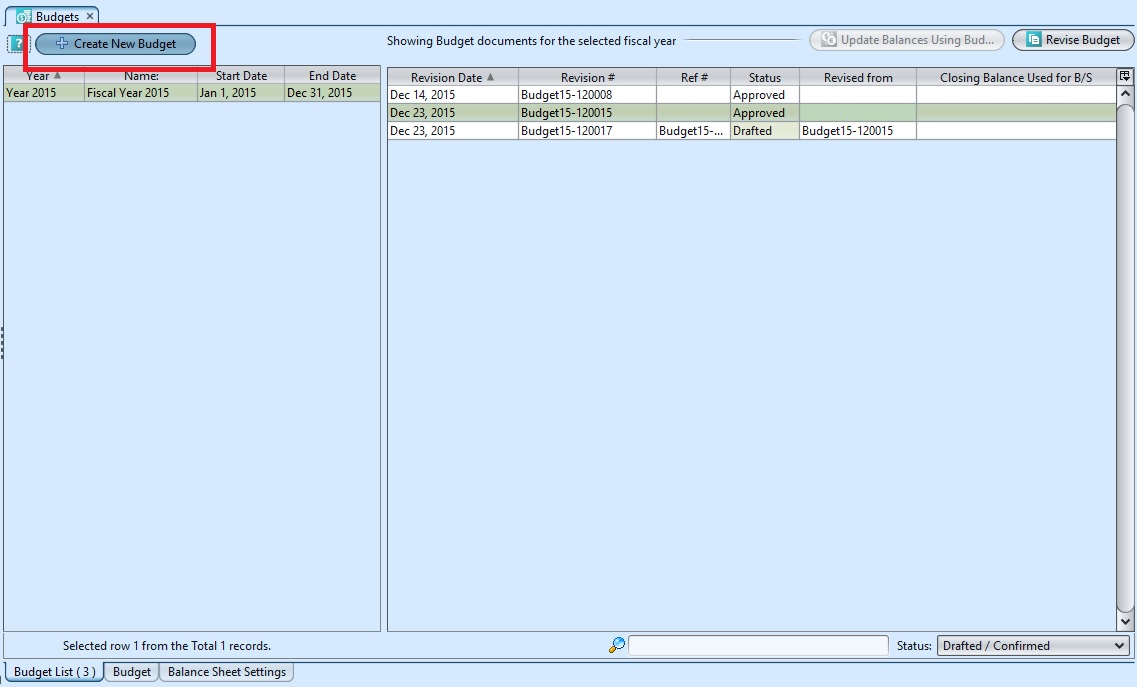
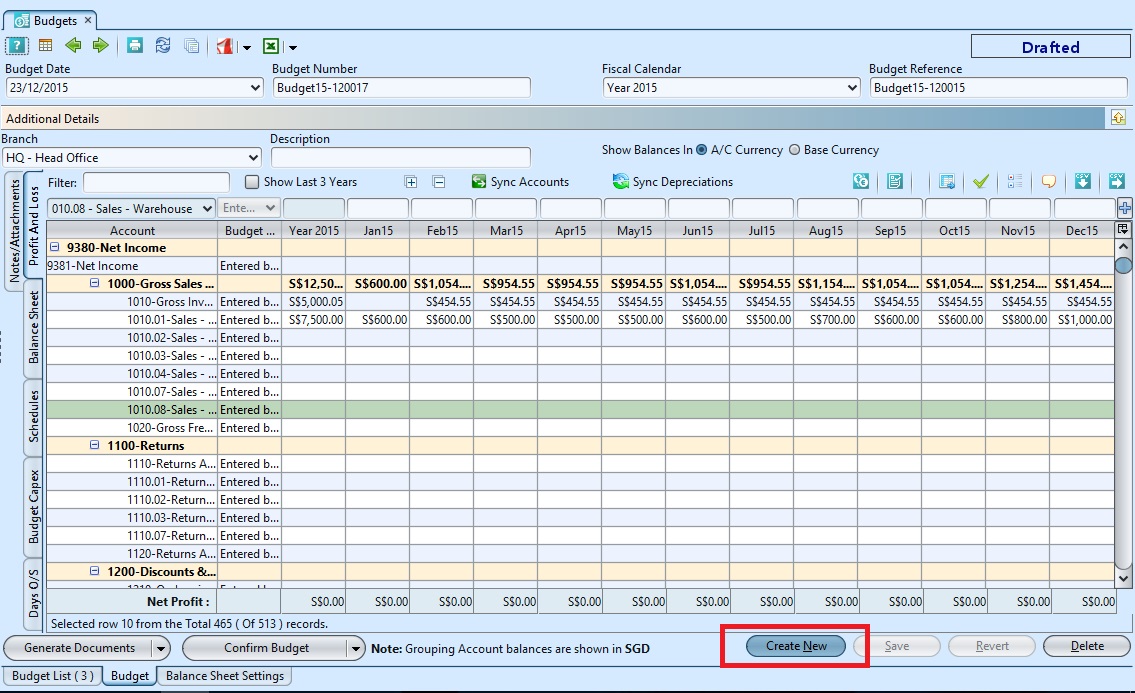
1. Click “Create New Budget” button at the top left side of screen of “Budget List” tab, or Click “Create New” button at the bottom of screen of “Budget” tab
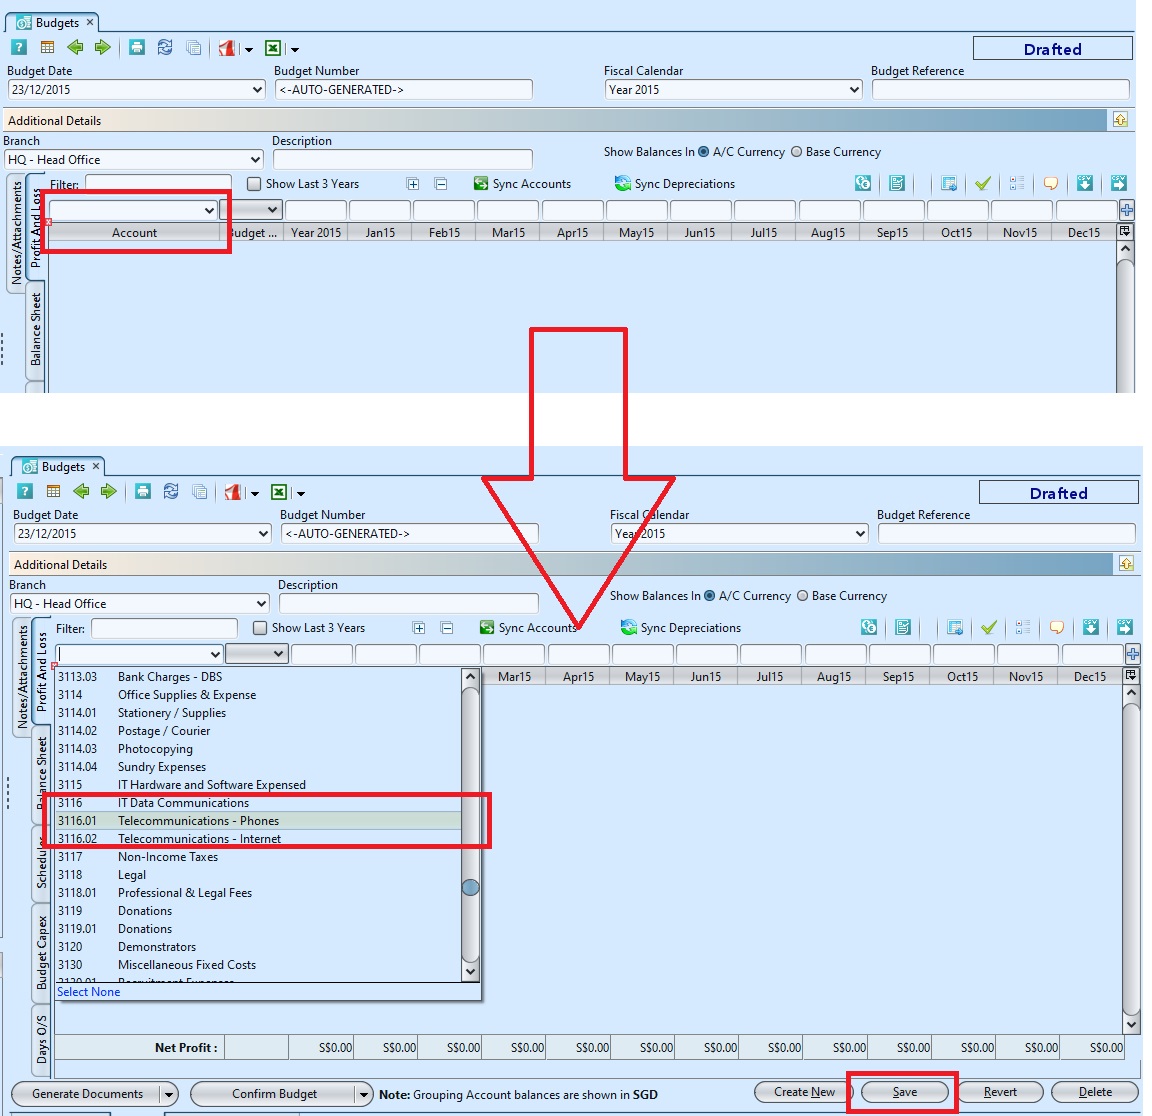
2. Select a fiscal calendar from the drop-down list on top of the screen, then click “Save” button. It will fill up the account tables in “Profit And Loss” and “Balance Sheet” tabs
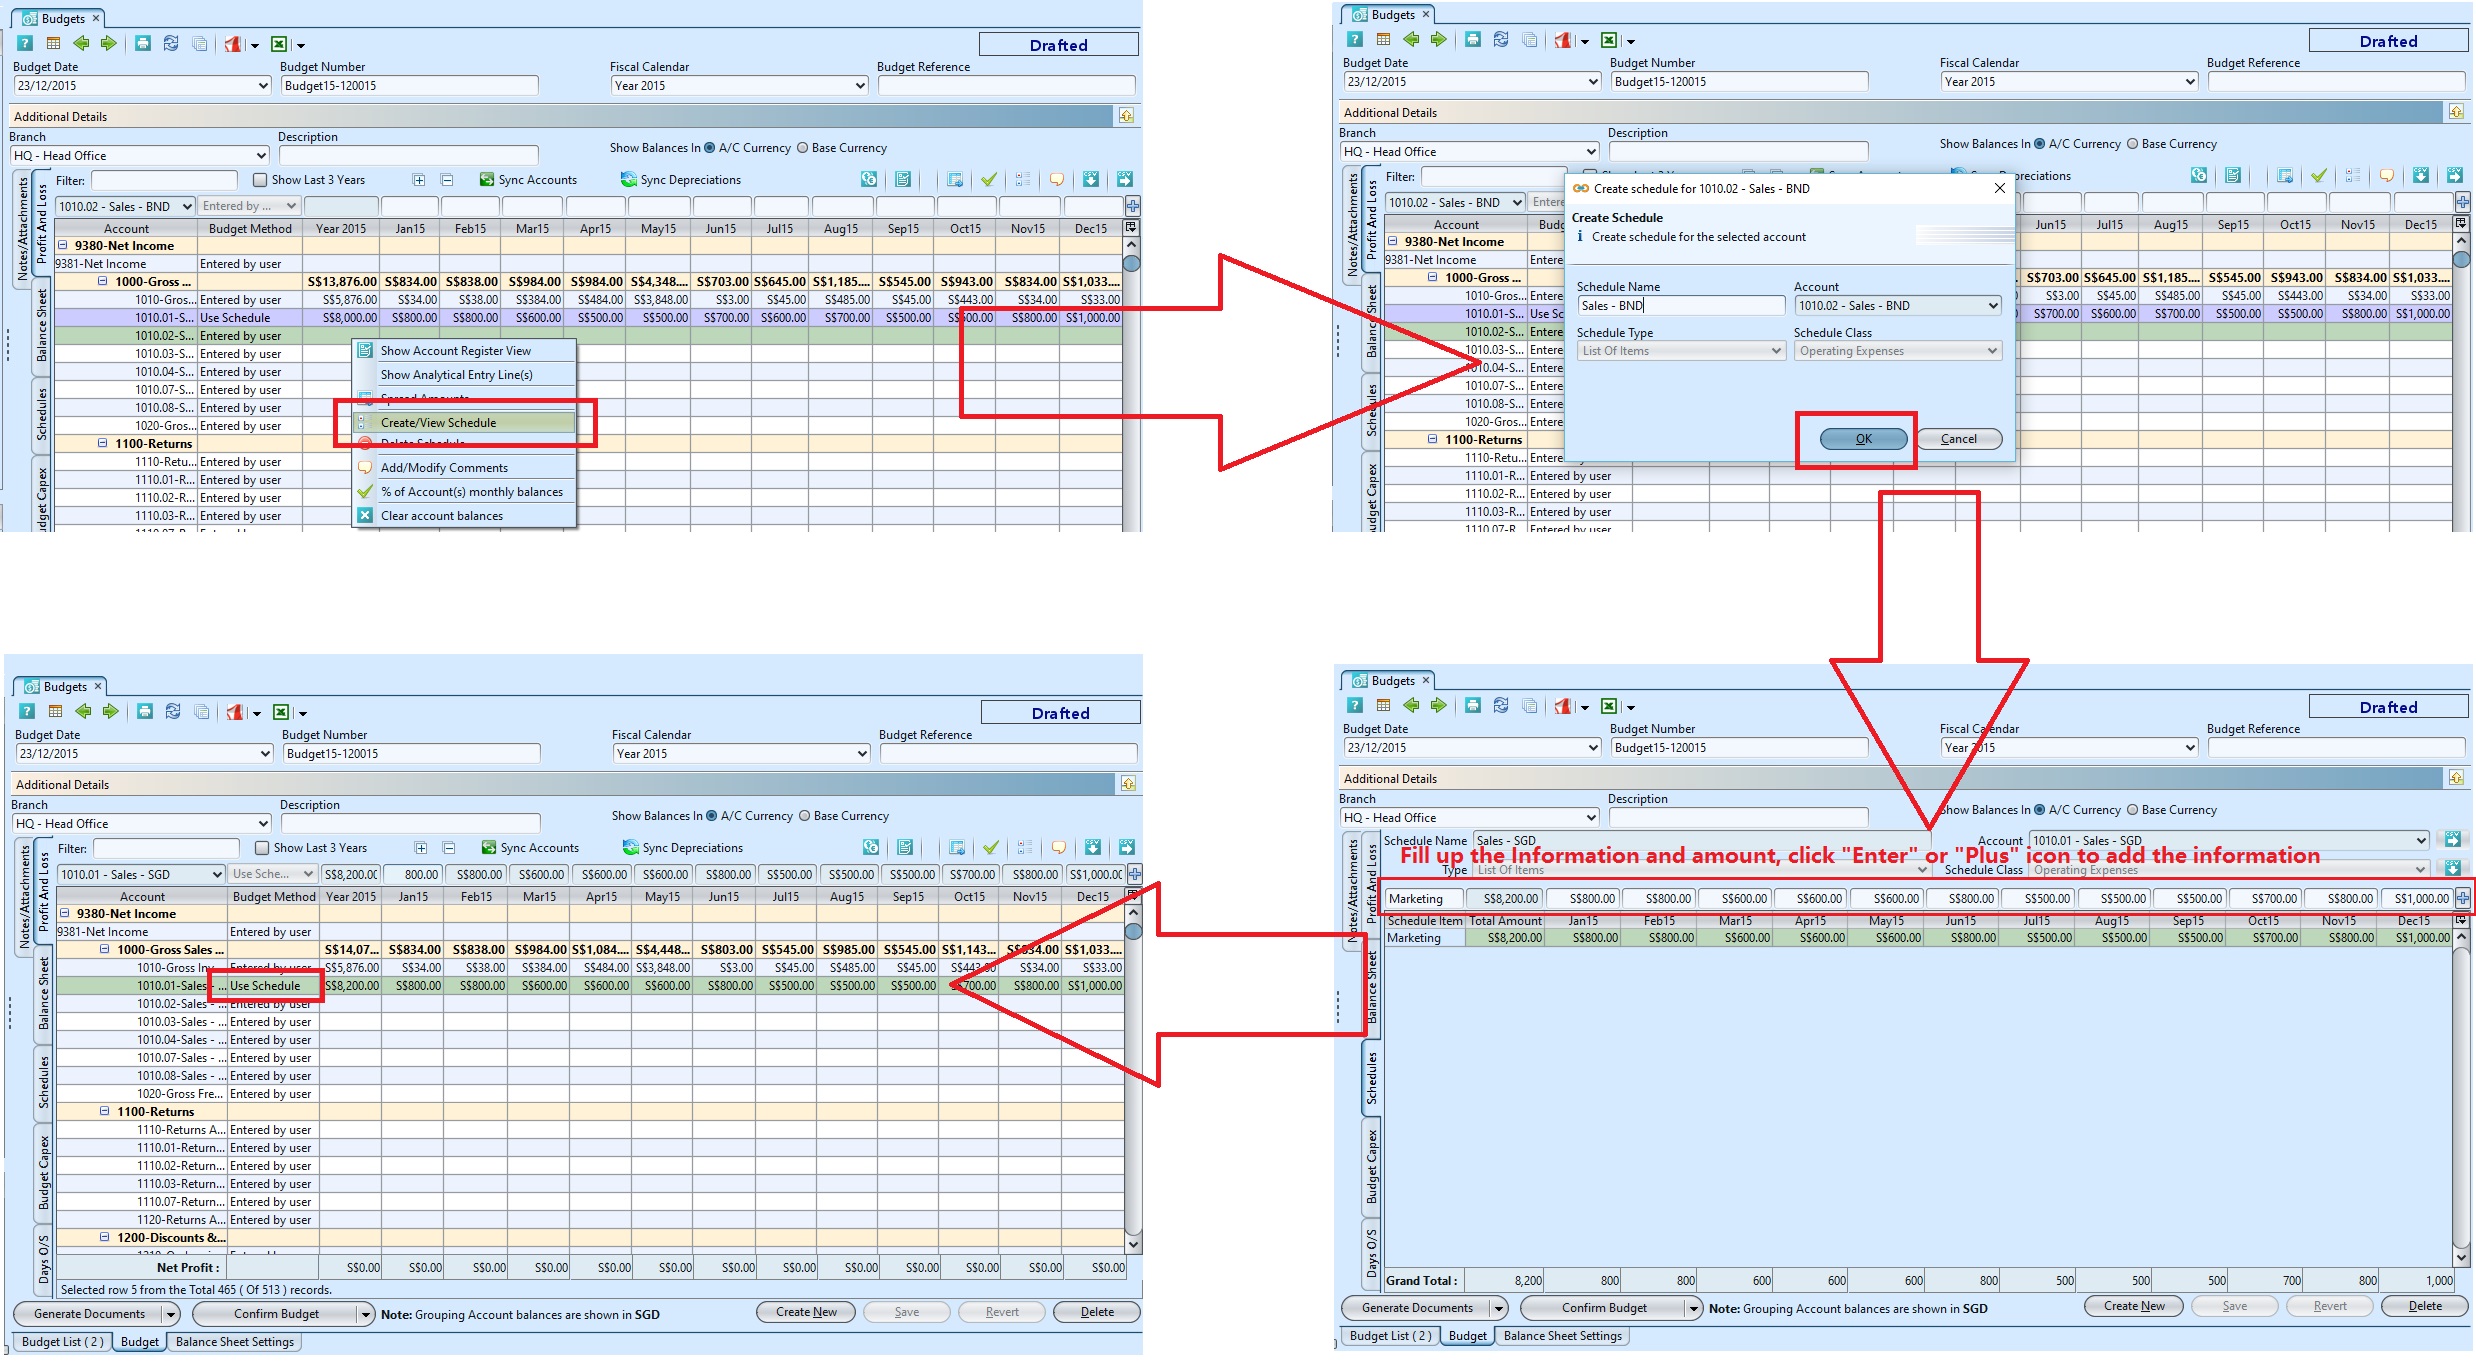
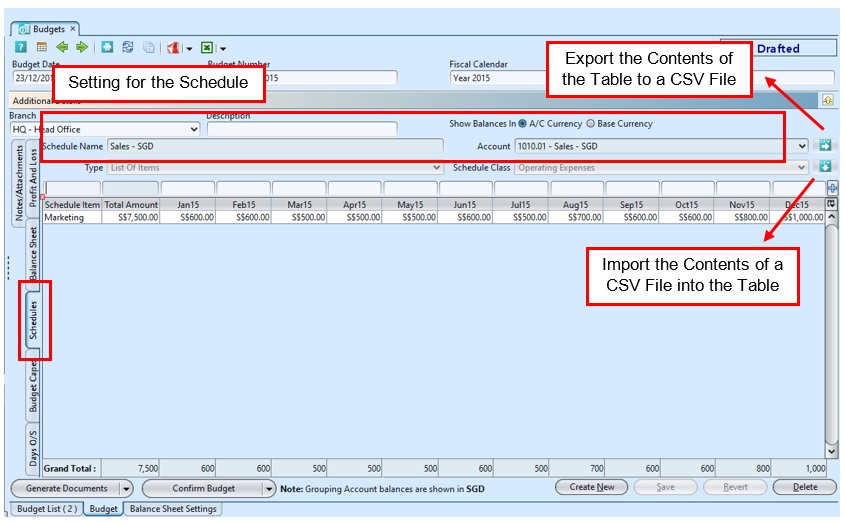
3. Fill up budget’s information on the different tabs where applicable: “Profit And Loss”, “Balance Sheet”, “Schedules”, “Budget Capex”, “Days O/S”, and “Notes/Attachments”
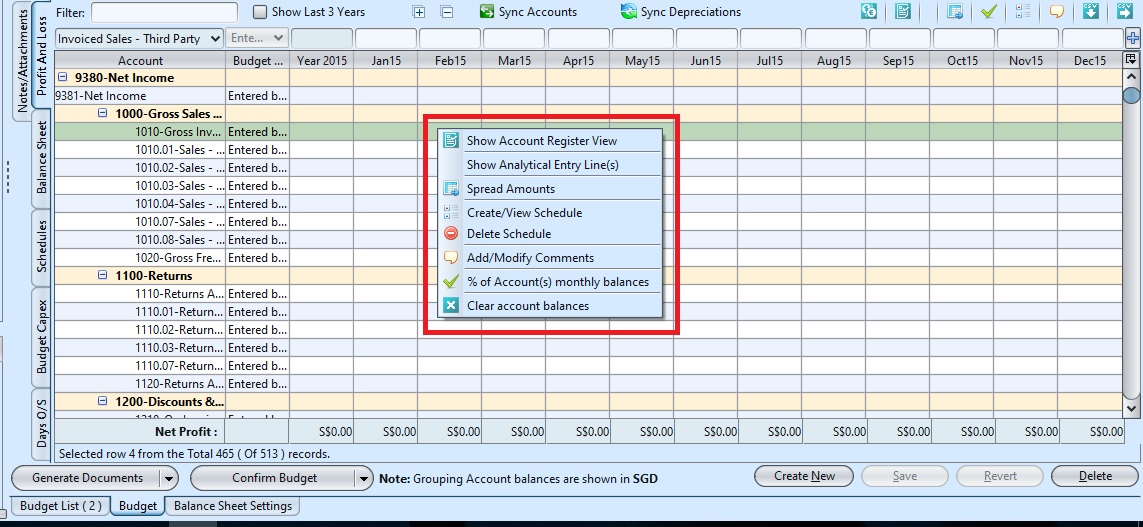
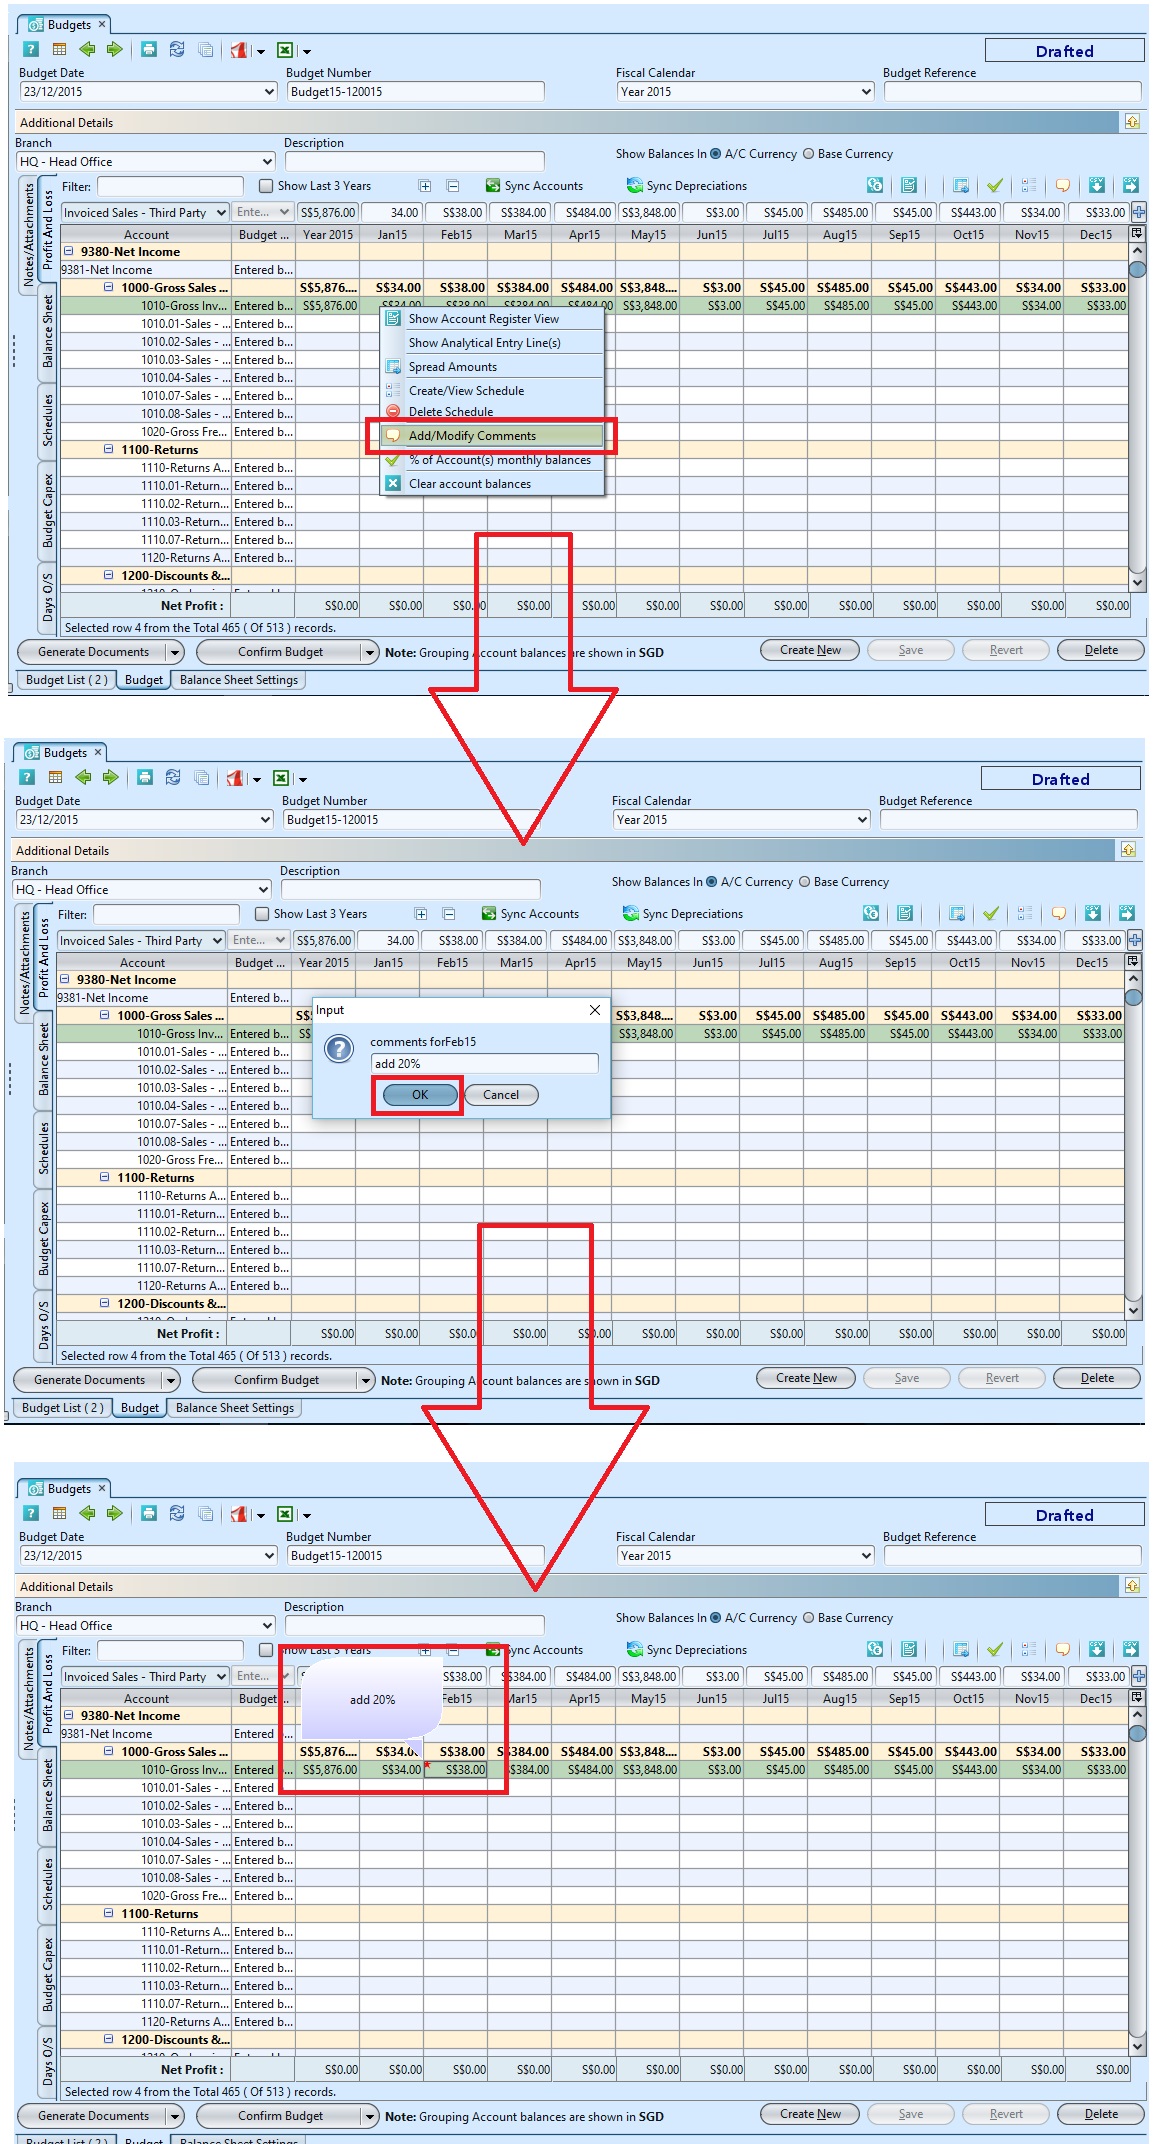
*User may select the features by right click or click the icons on the selected account at “Profit and Loss” and “Balance Sheet” tab
3.1 Show Account Register View
3.2 Show Analytical Entry Line(s)
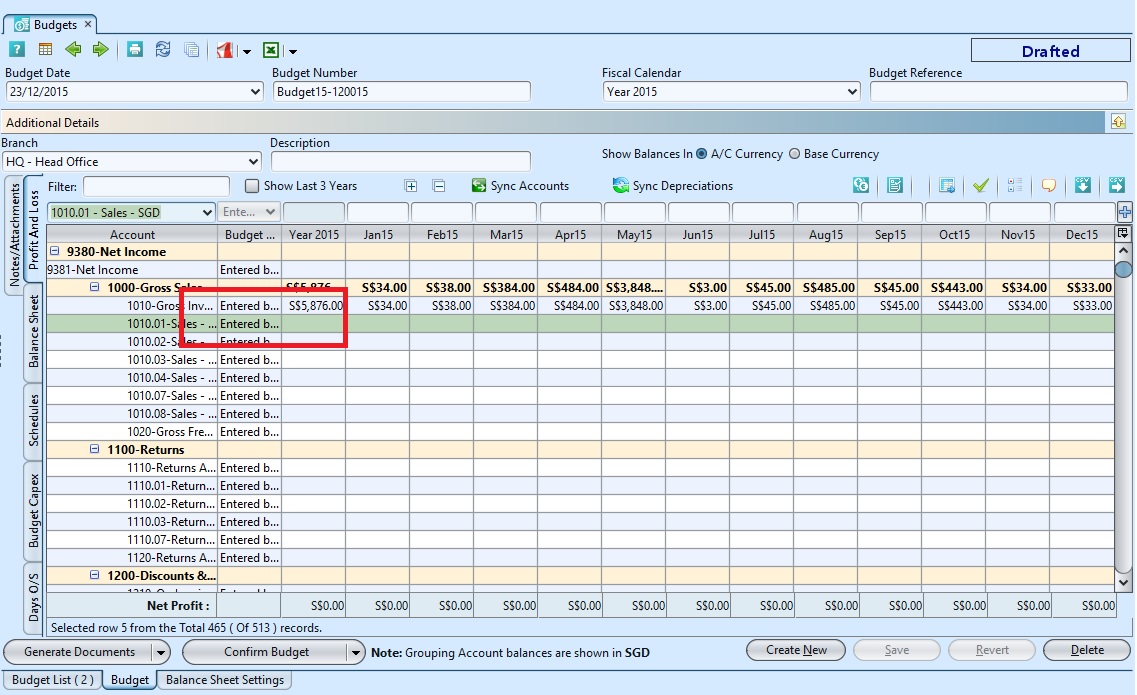
 * The amount need to enter before allocate amount to Analytical Groups.
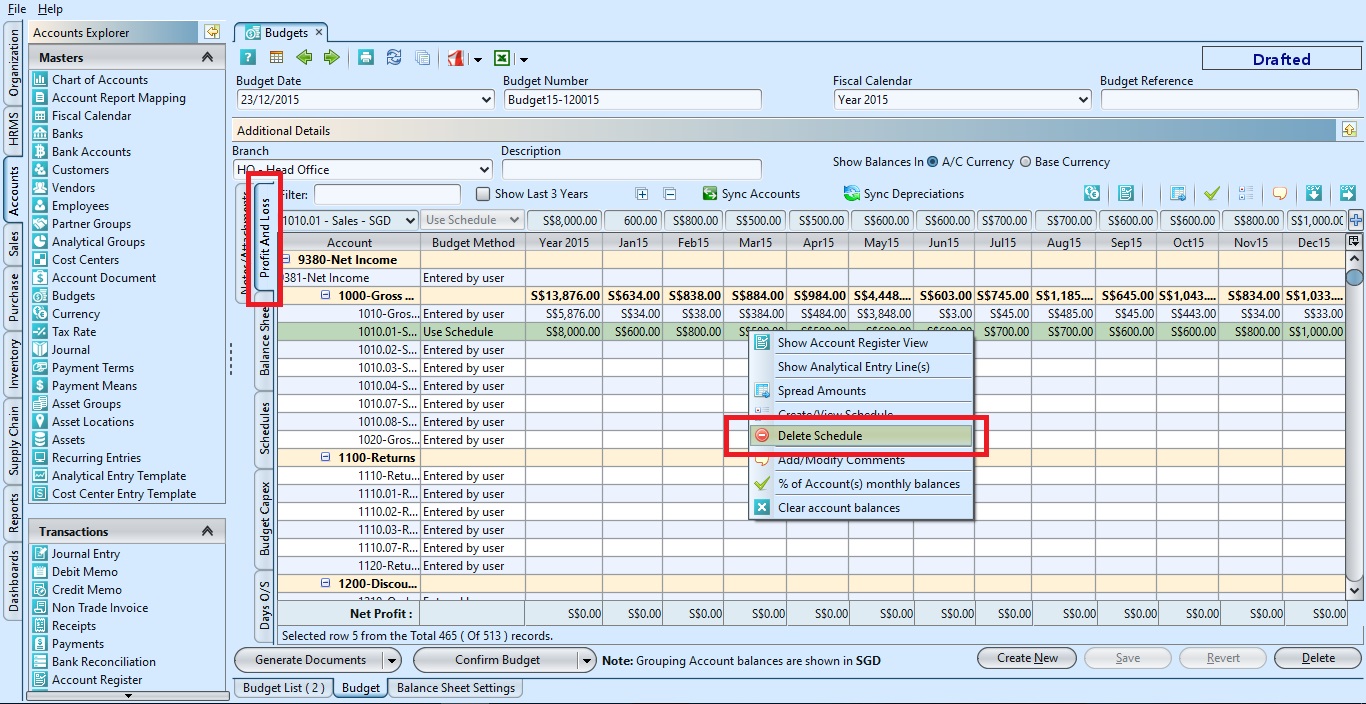
3.3 Spread Amounts
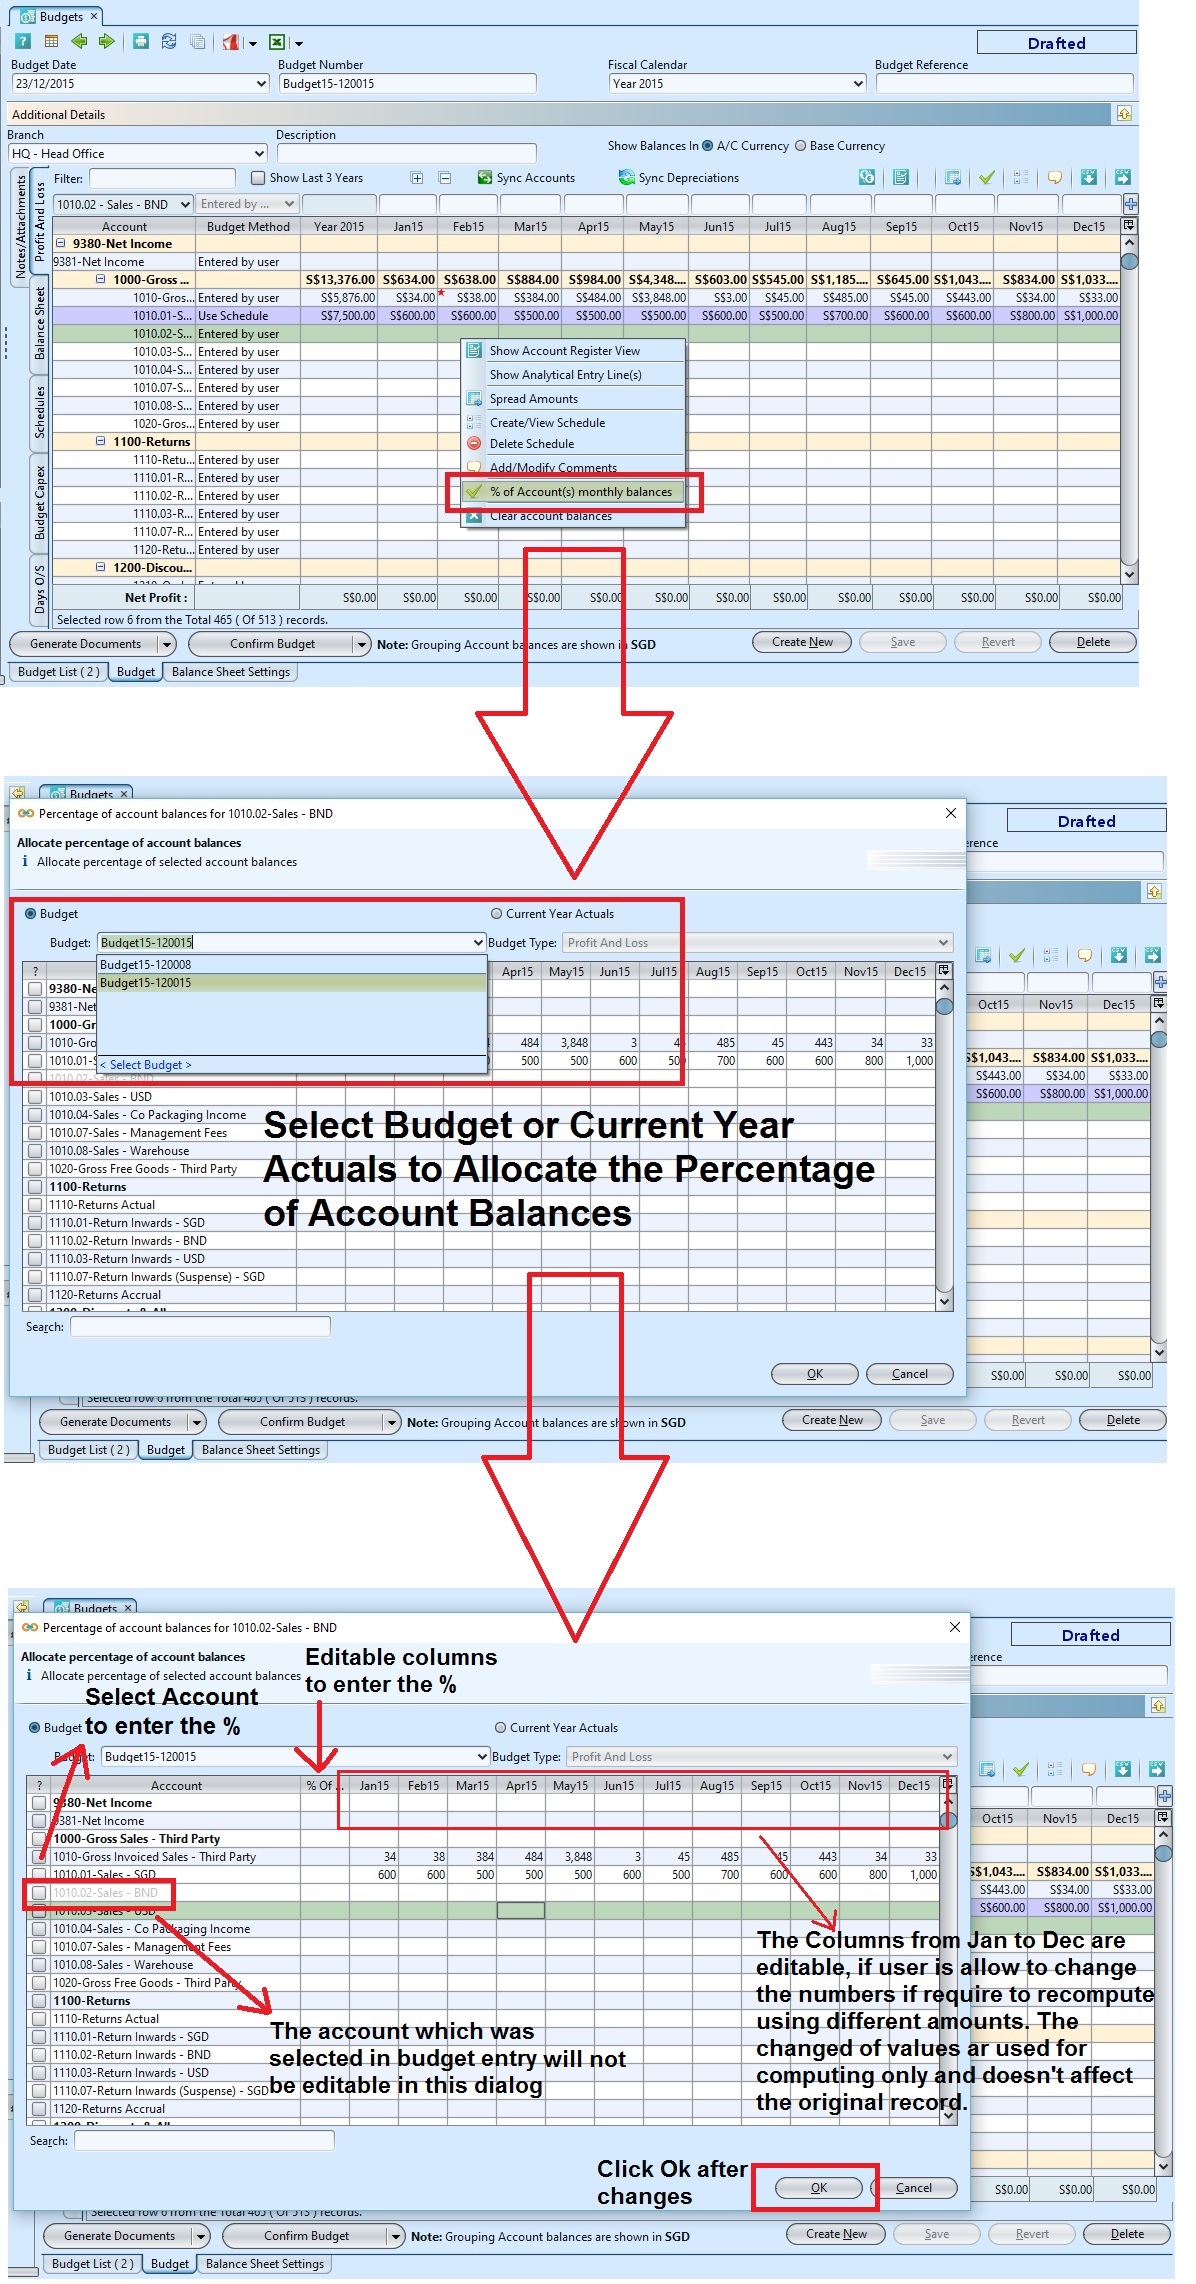
3.7 Percentage(%) of Account(s) Monthly Balances
This feature allows to derive balances for an account using a percentage of selected account balances
(a) From existing budget or previous budgets
(b) From Actual data for selected fiscal calendar
3.8 Clear Account Balance
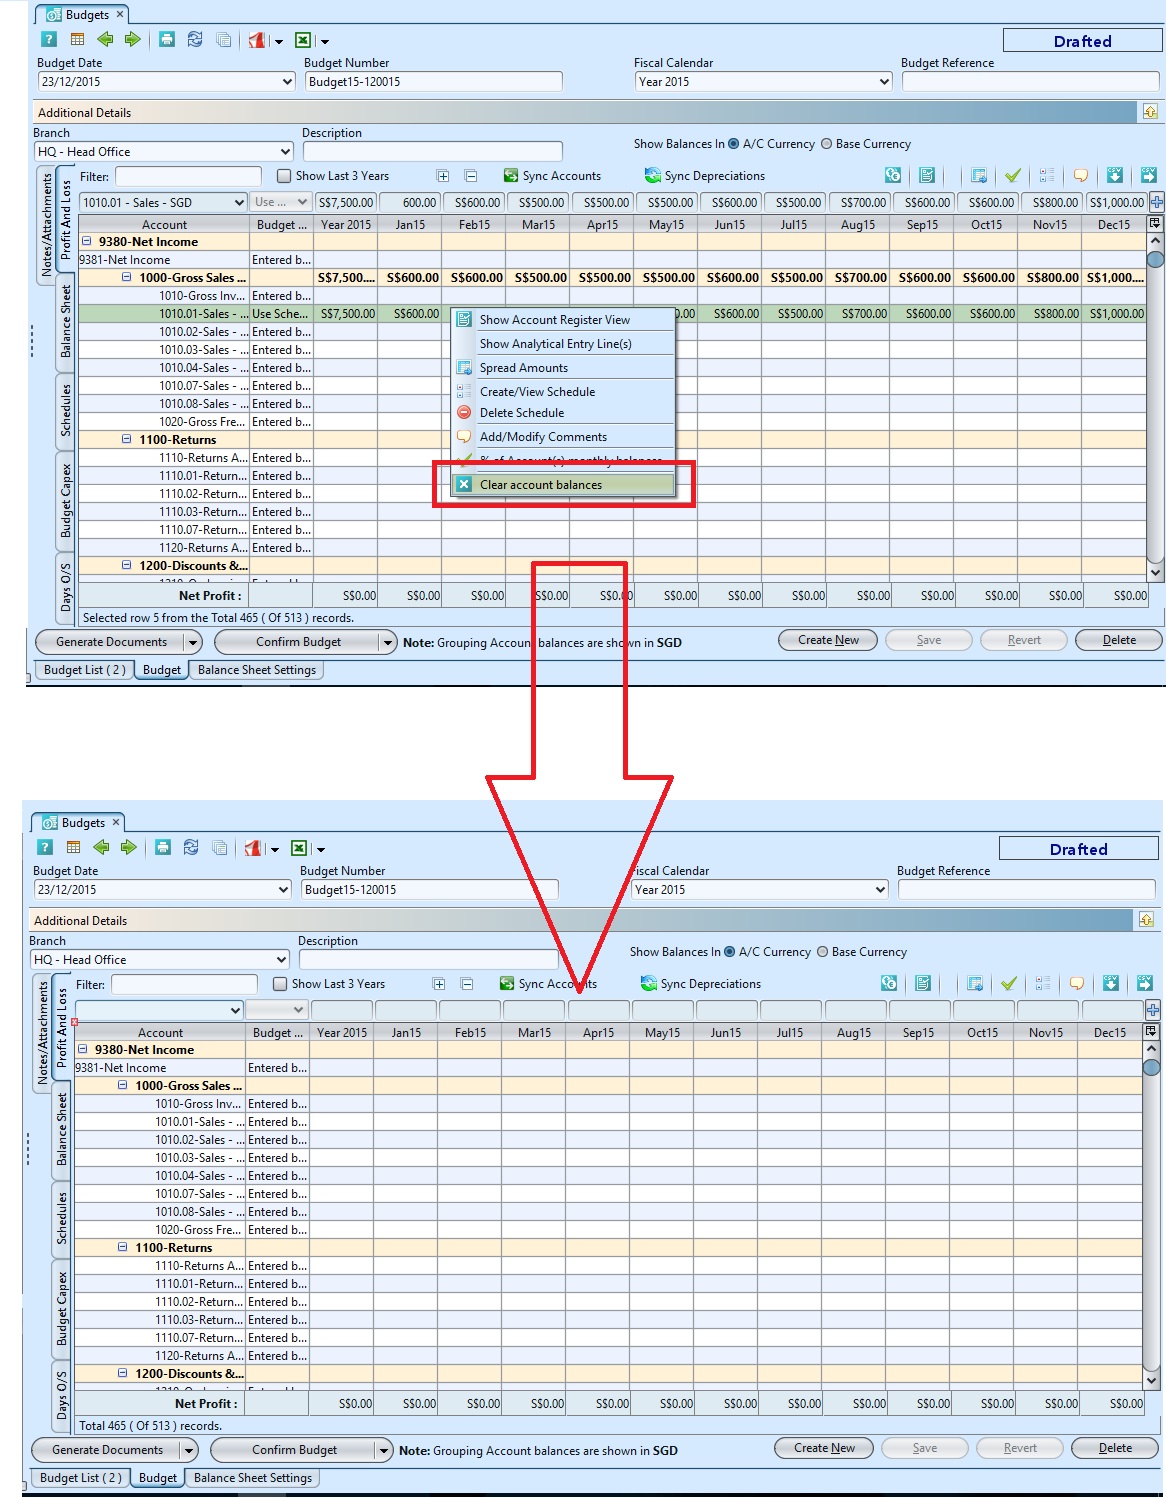 *The delete account balance features do not have the “Confirmation Delete” pop up notification, please check properly before click “Clear”
4. Click “Confirm Budget” button at the bottom of “Budget” tab screen and click “Yes” to confirm
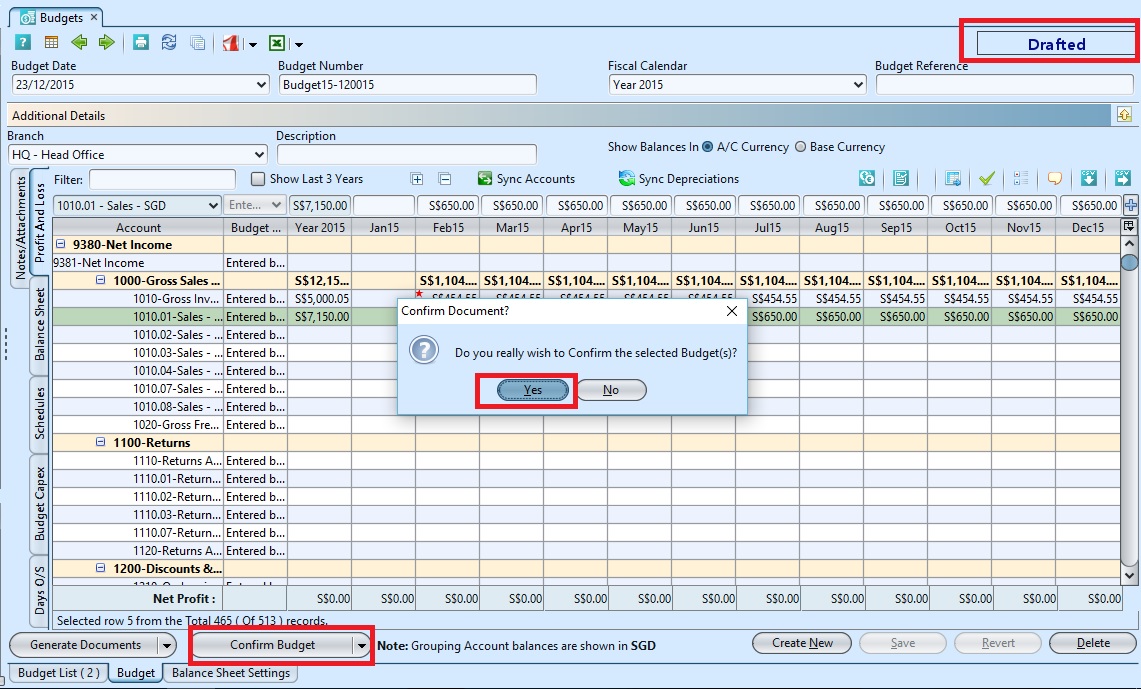 *Budget is required to be in “Drafted” status to confirm the budget.
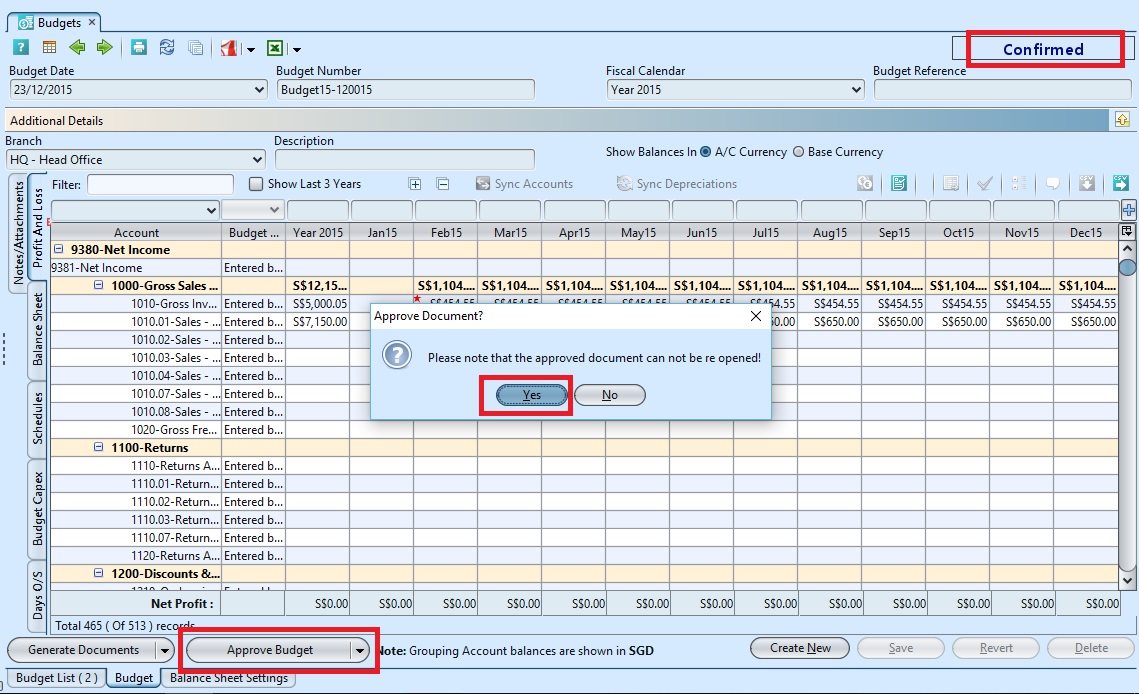
5. The document can be approved once the status of the document is “Confirmed”. Click “Approve Budget” button at the bottom of “Budget” tab screen and click “Yes” to approve
Budget Capex
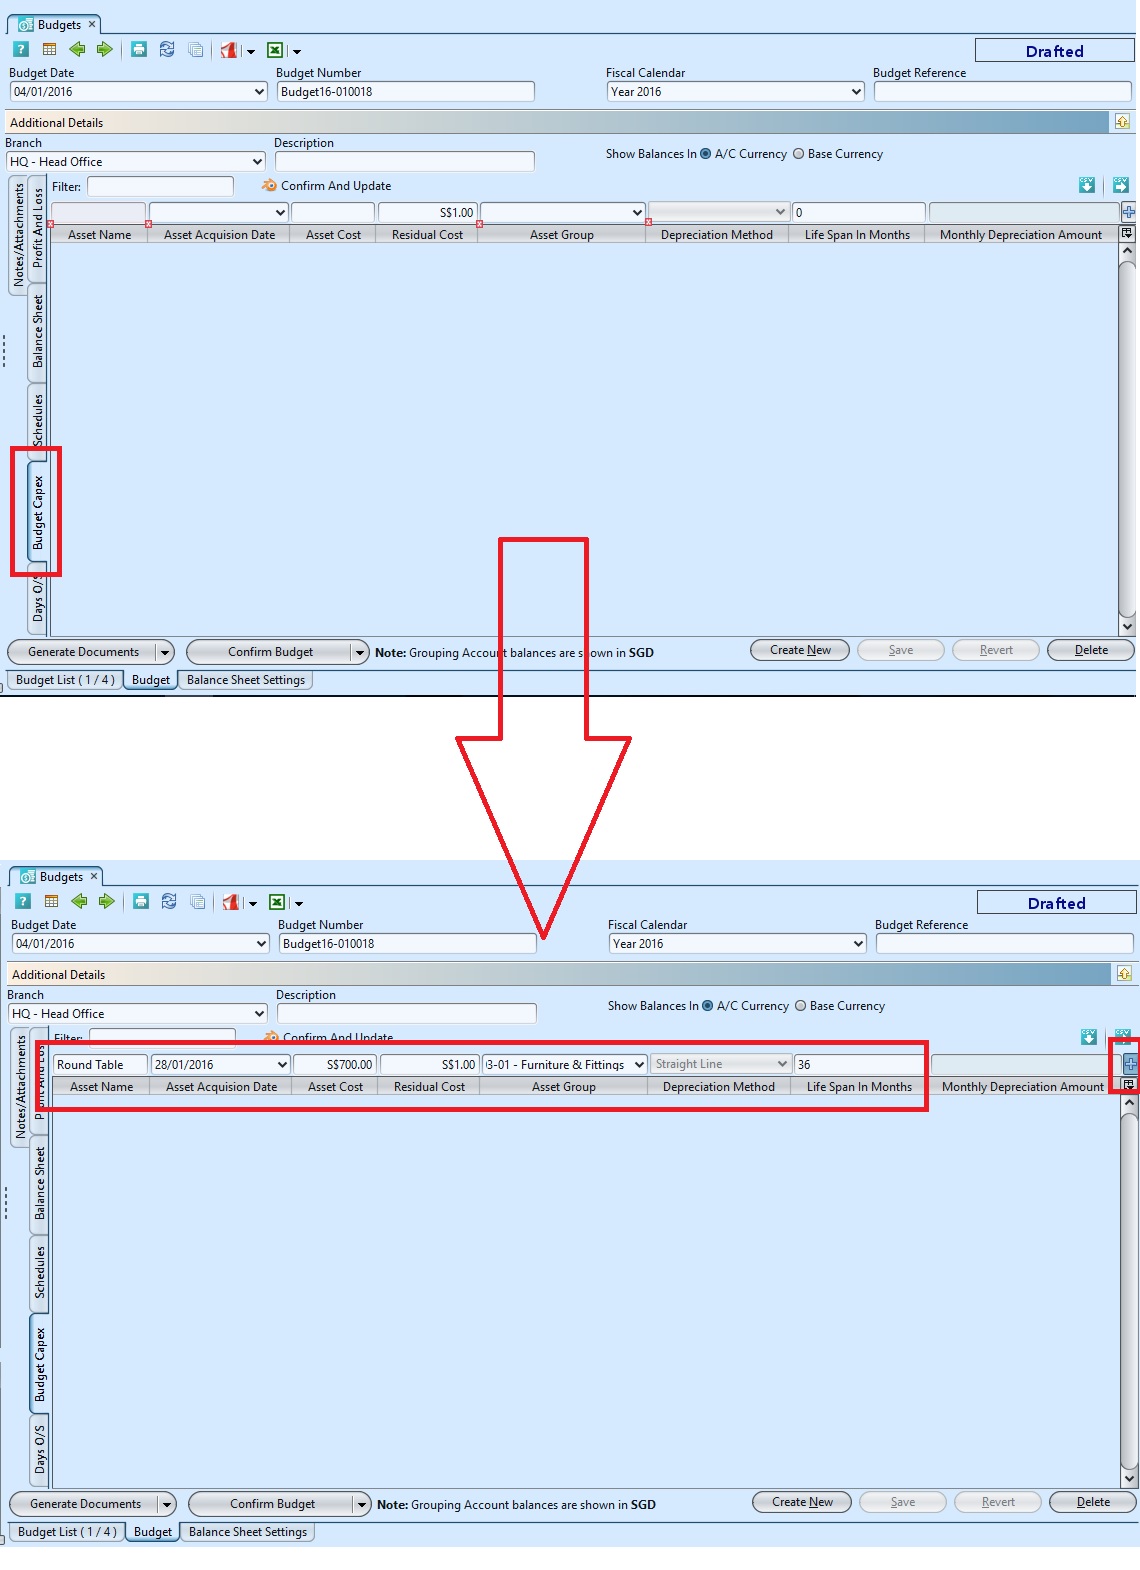
User is allow to create budget for asset while creating budget for the year.
1. Click on the “Budget Capex” tab, fill up the Information required and click the “Plus” icon or “Enter” to add in the line
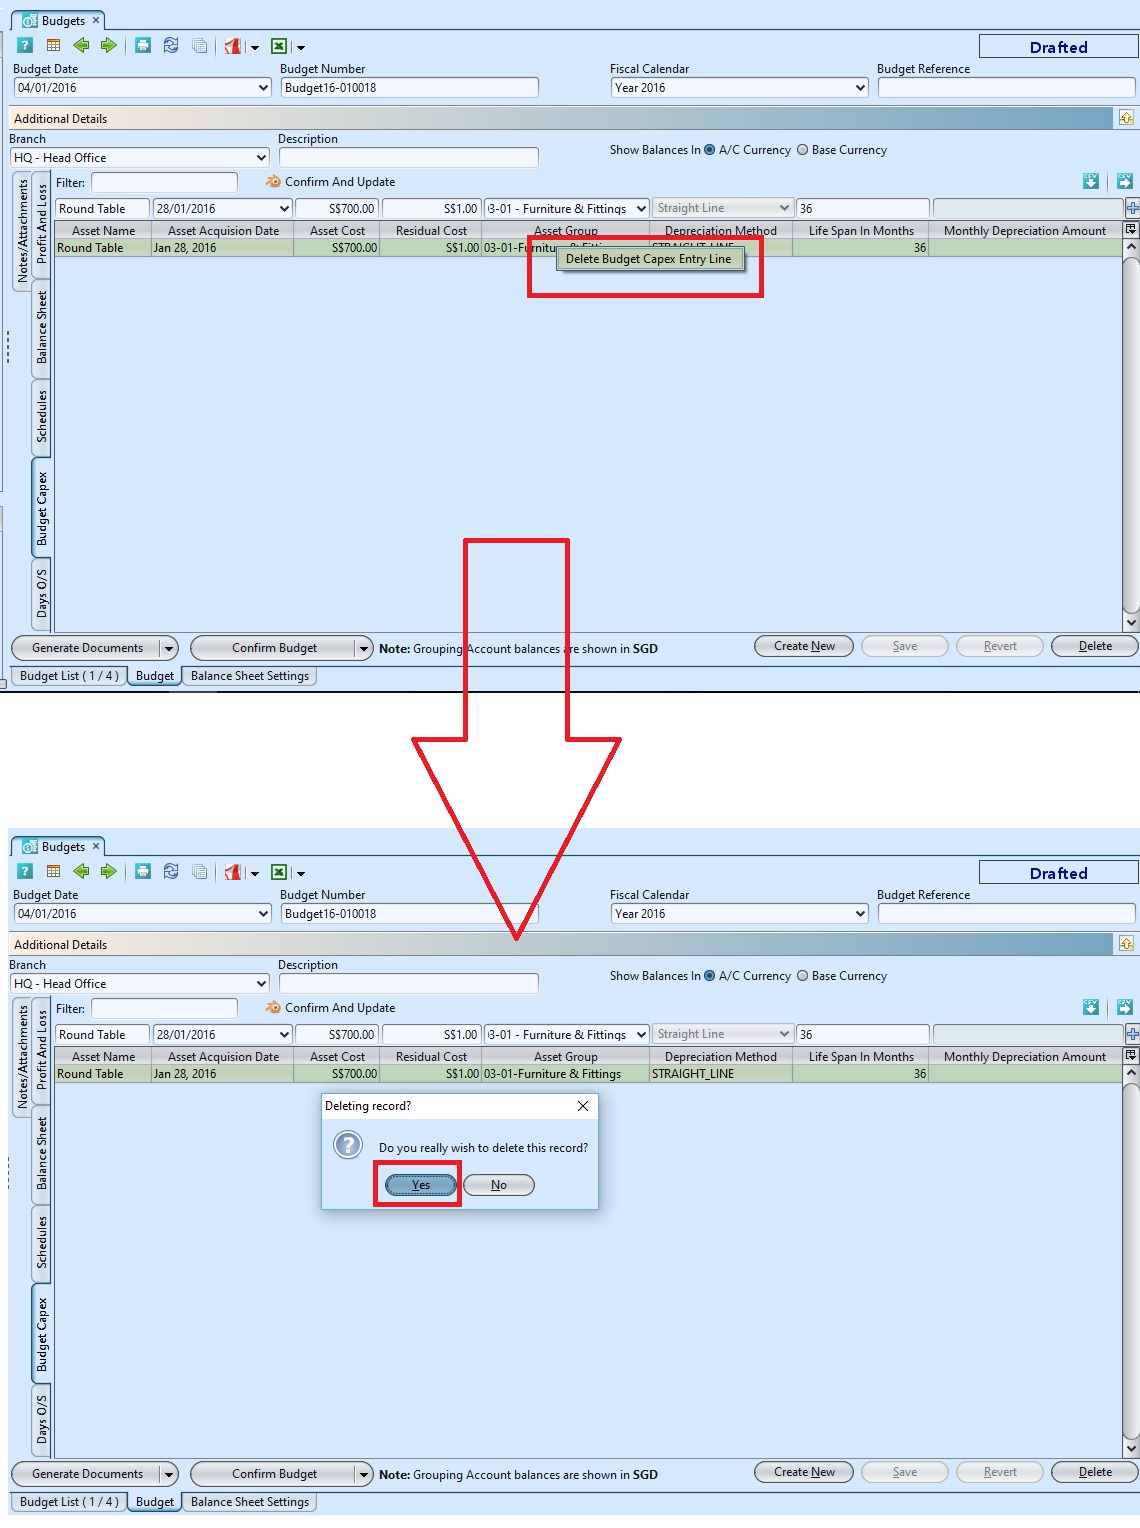
2. Budget Capex is able to delete by using right click on the selected entry line.
Days O/S
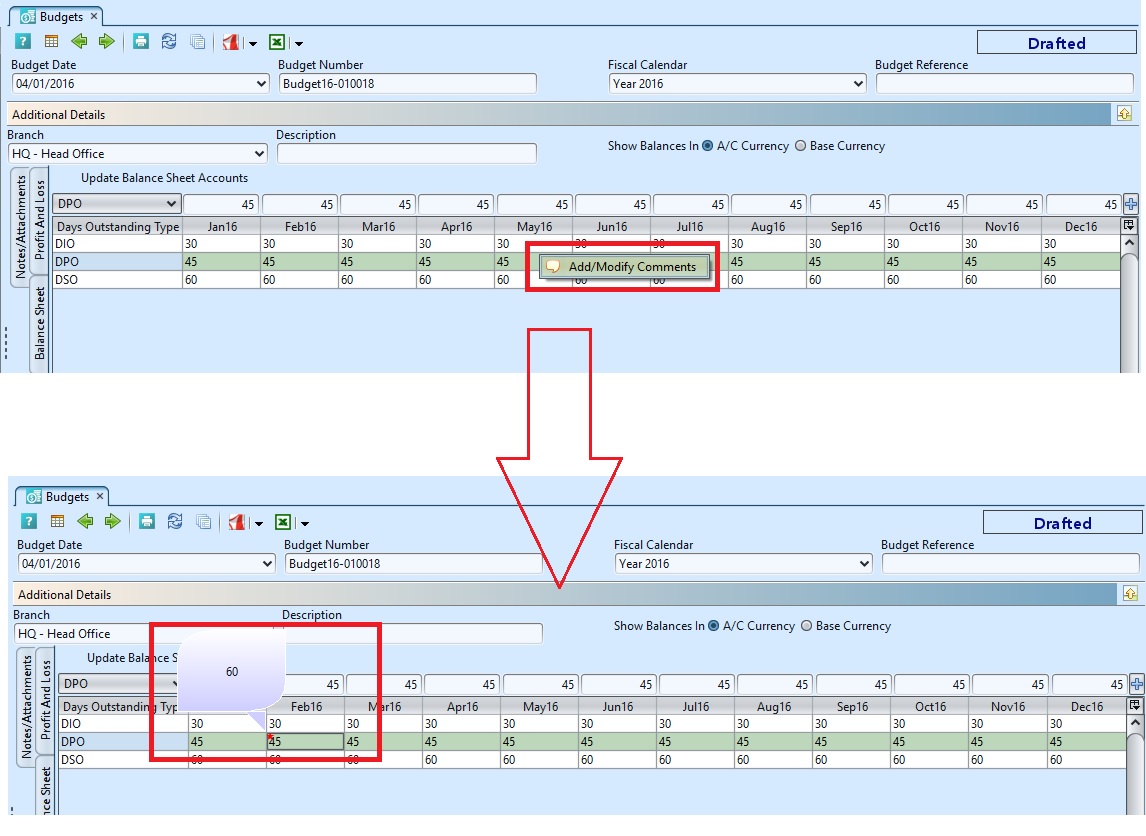
The feature is used to do the setting for the days understanding for DIO (Days Inventory Outstanding), DPO (Days Purchase Outstanding) and DSO (Days Sales Outstanding).
1. Click on the “Days O/S” tab, select the Days Outstanding Type, fill up the information and click “Plus” icon or “Enter” to add the info into entry line.
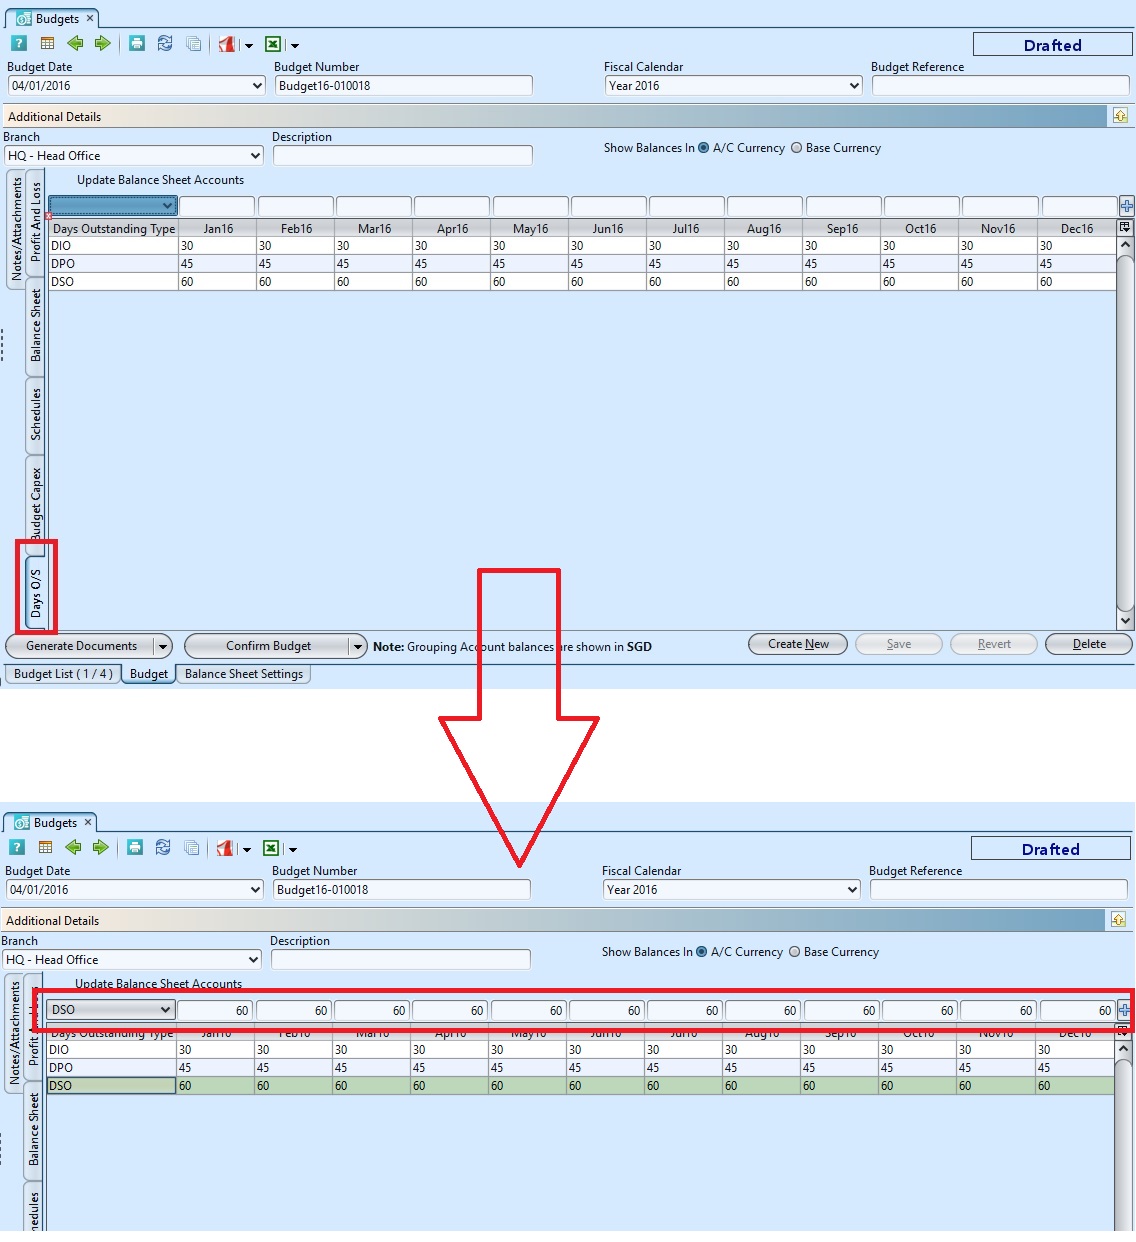
2. User is able to add or view comment in the selected month and selected type of Days Outstanding.
Revise Approved Budget
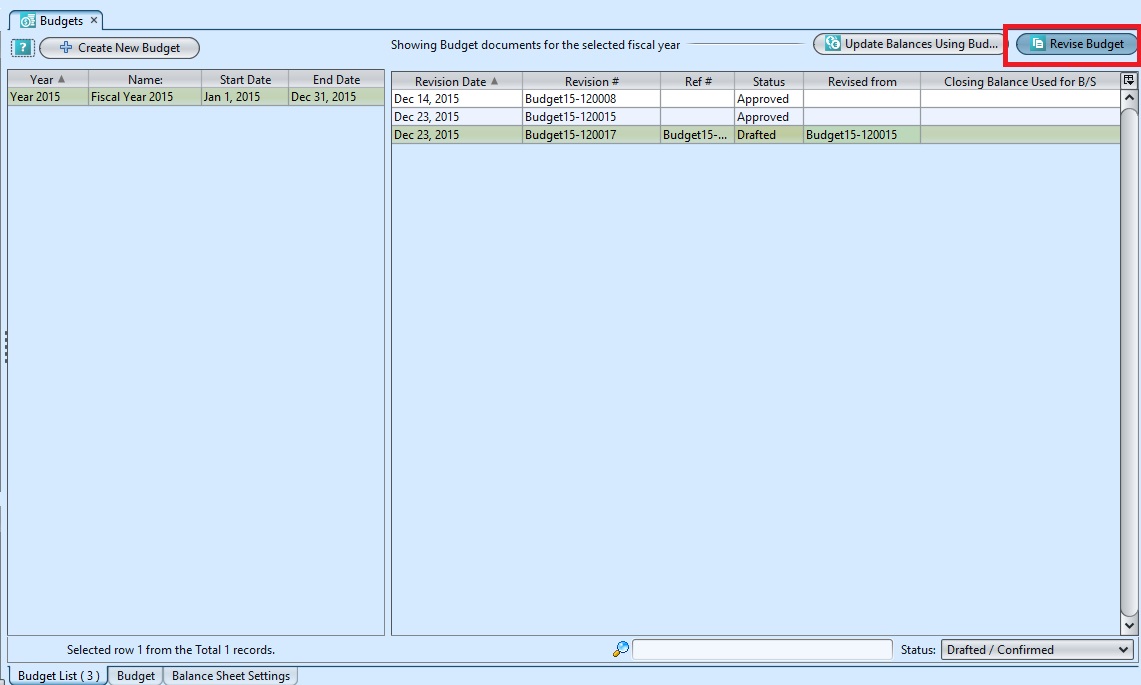
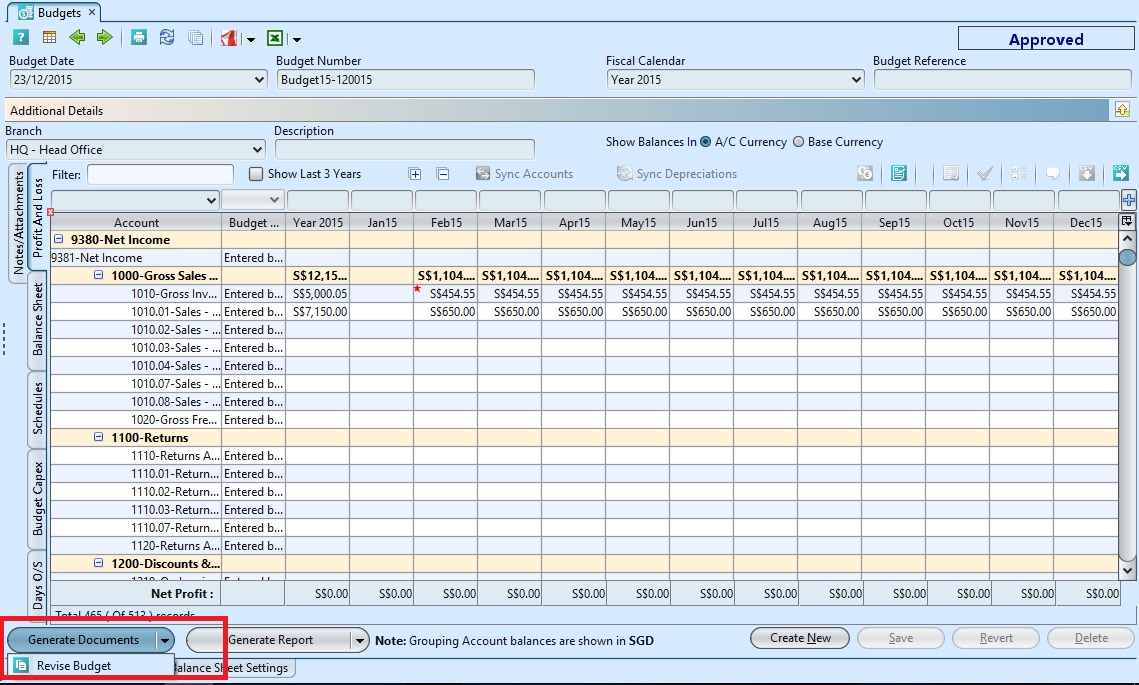
User is allow to create budget revision after budget is approved using the list view or document view. Budget revision creates a copy of the selected approved budget and transforms to a new budget for the selected document date. The newly created budget from the budget revision will maintain the same balances and retain the following from the revised budget:
- Schedules
- Budget capex information
- Days outstanding DPO, DSO, DIO
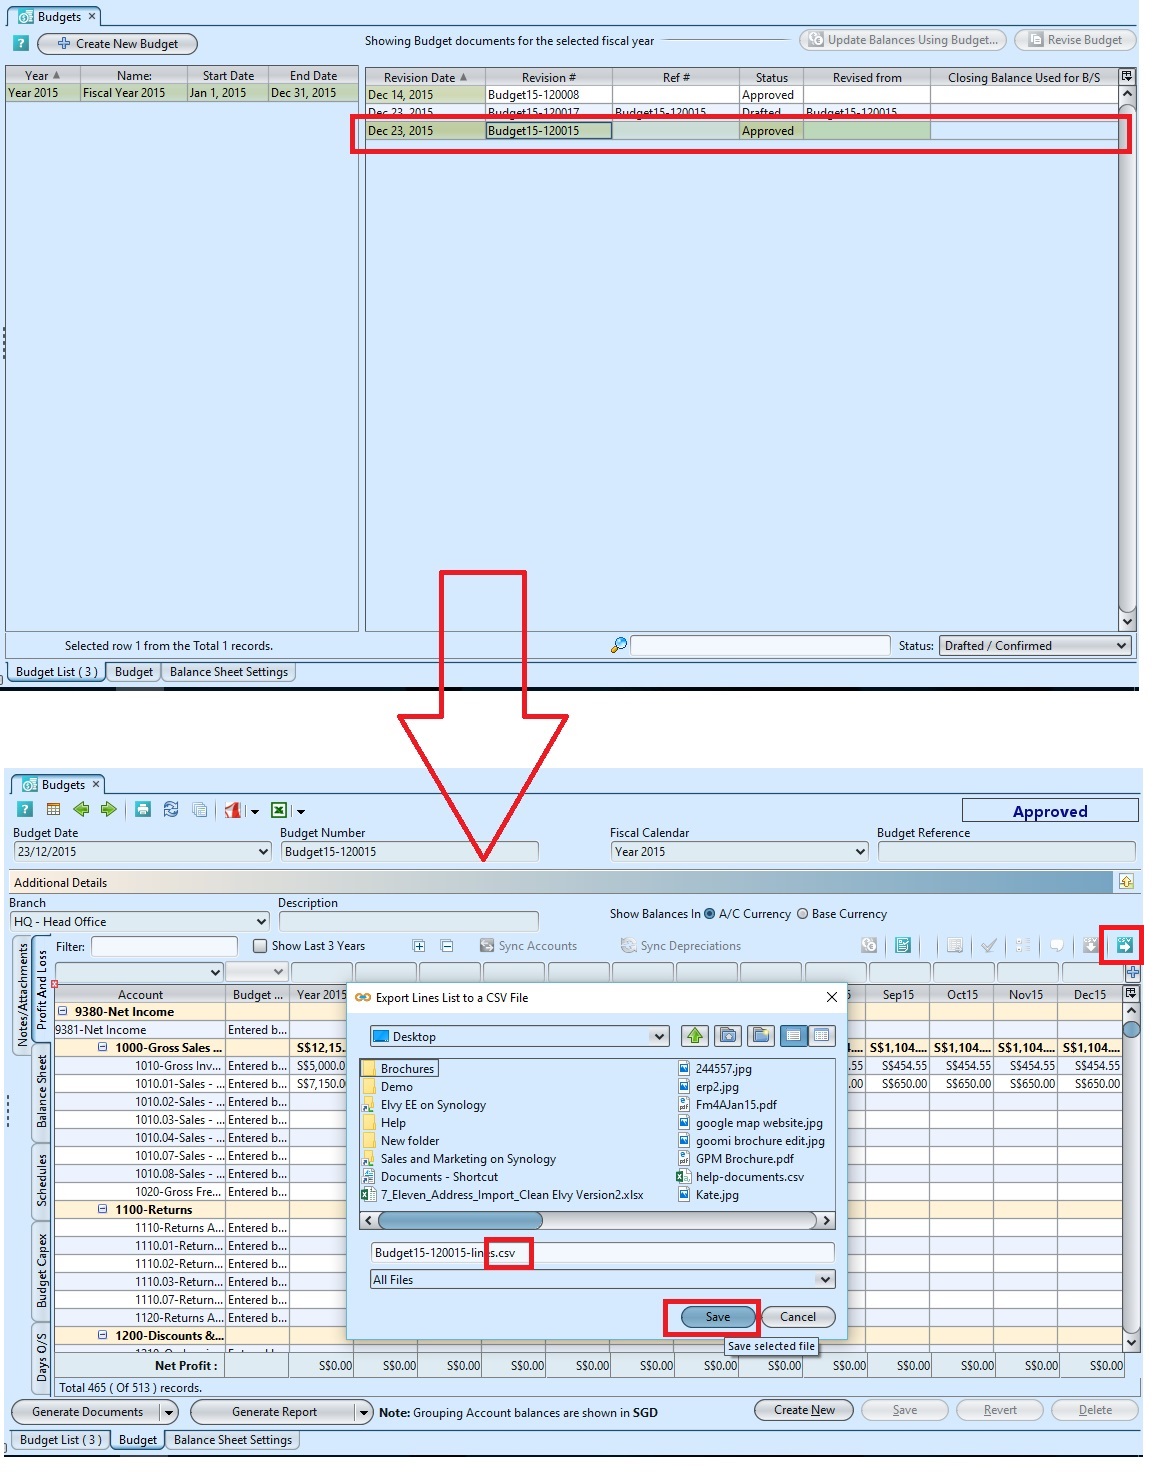
(a) Create Budget Revision from Budget List view.
(b) Creating Budget Revision from Budget Document View
Notes & Attachments
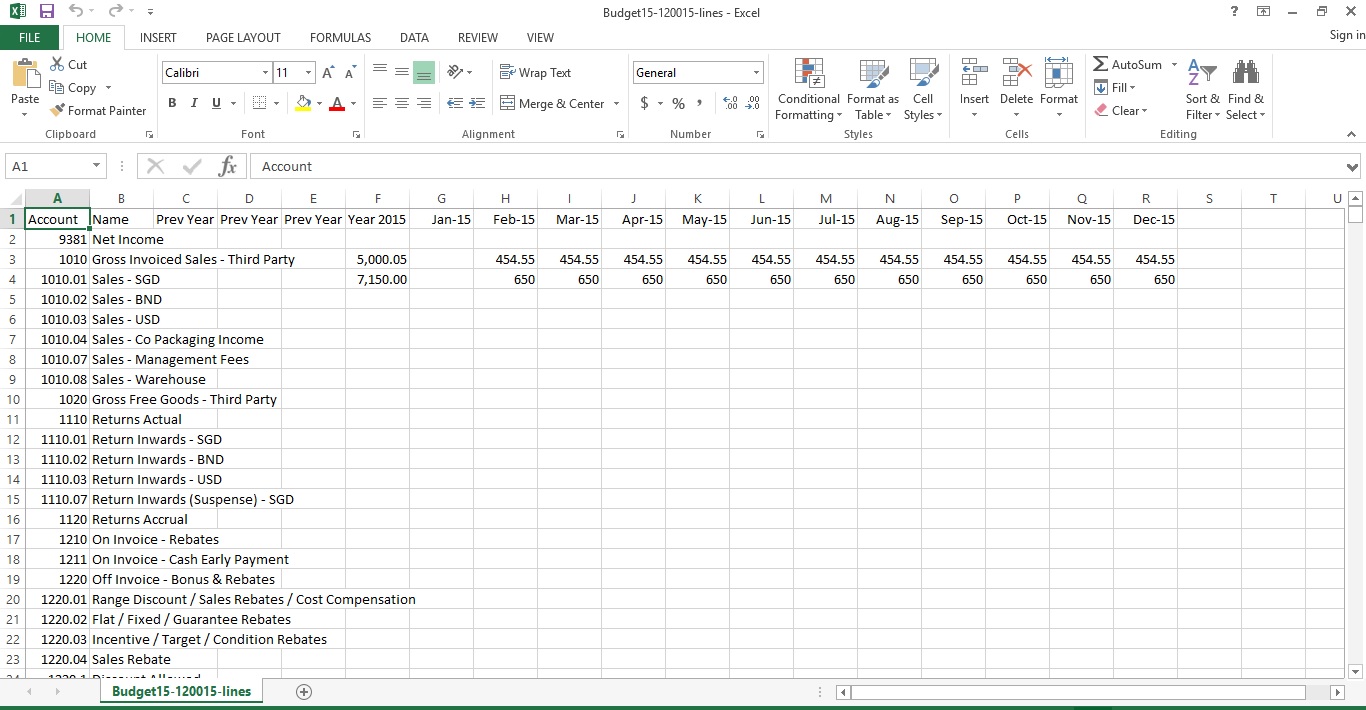
1. Additional notes and attachments can be added at document level. Click on the “Notes/Attachments” tab, fill up the information and click on “Save” button
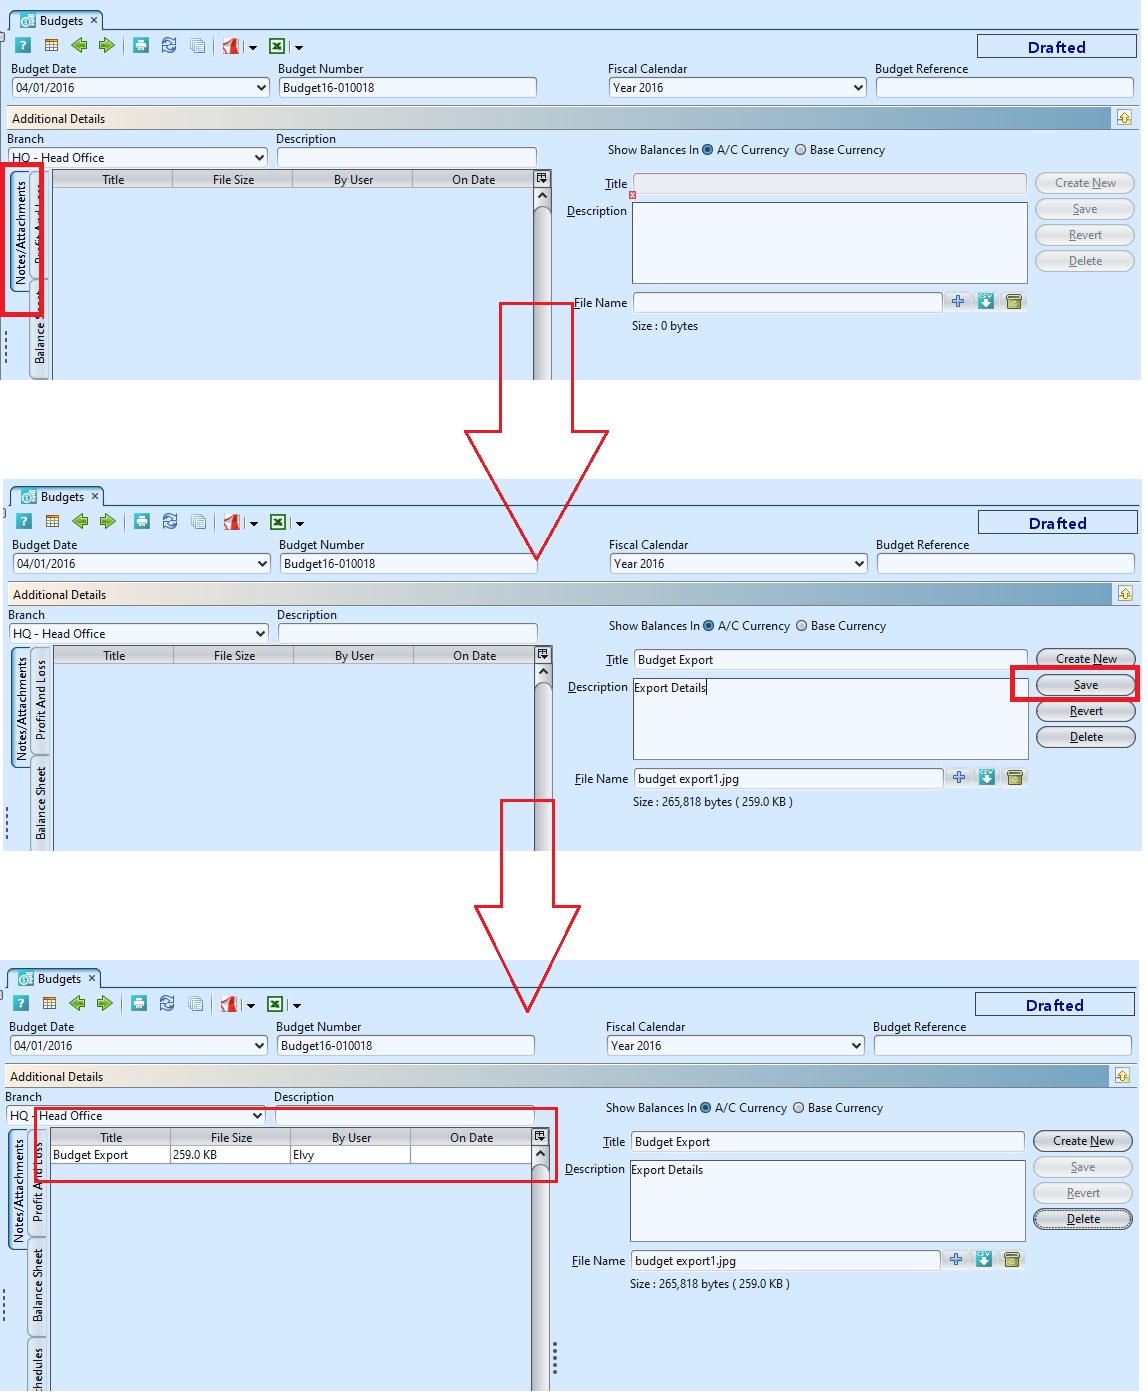 *The attachments/notes list will show at left side after save the notes/attachment
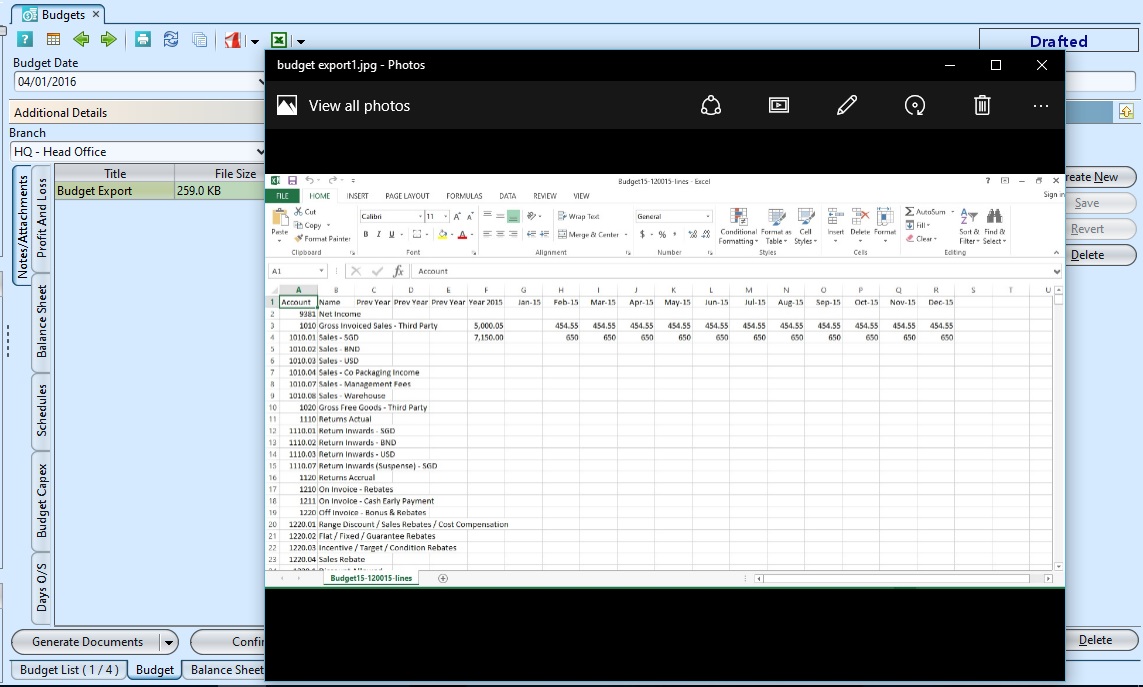
2. Double click on the selected attached document, the attachment will pop out
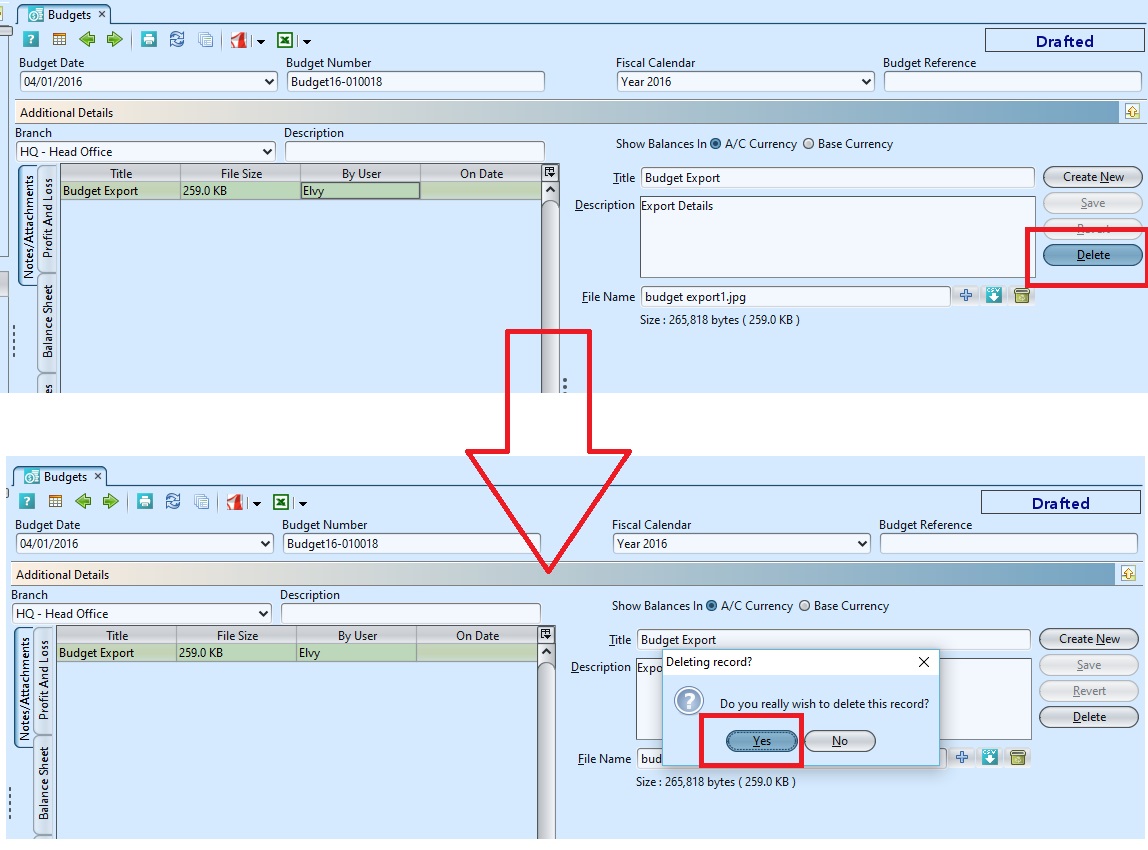
3. The notes/attachments are able to delete by clicking the “Delete” button. Click on “Yes” if confirm to delete it.
Update Budget Details
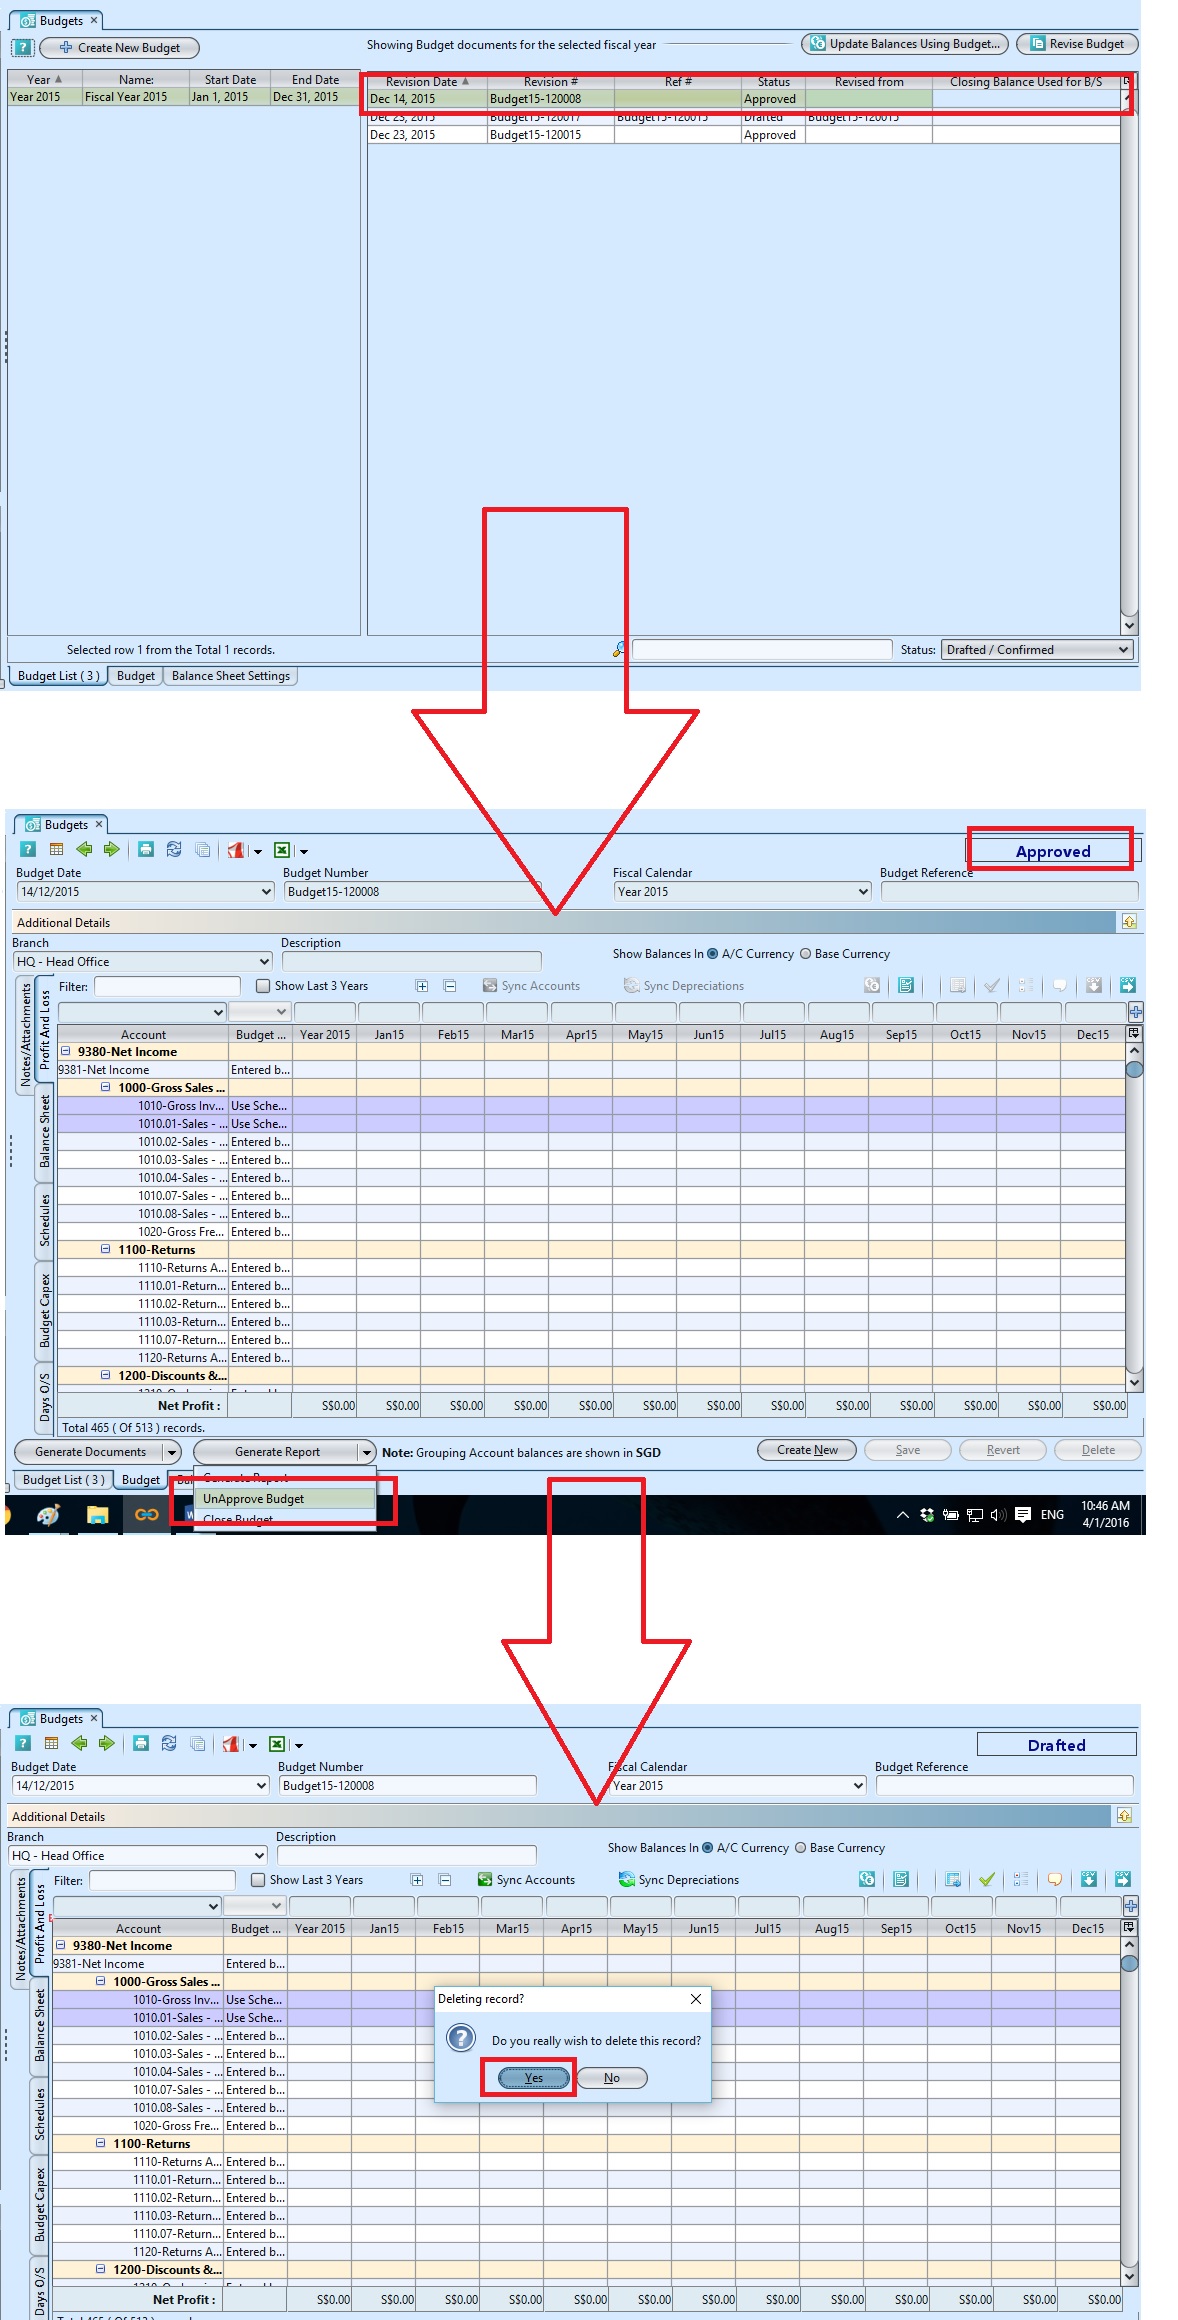
1. Click on a fiscal calendar, it will bring up the budget document on the right side of the screen. Double click on budget document to be updated, it will bring up the selected budget details on the “Budget” tab. User has to “UnApprove Budget” before edit the document by clicking the “Generate Report” tab, the status will change from “Approved” to “Drafted”
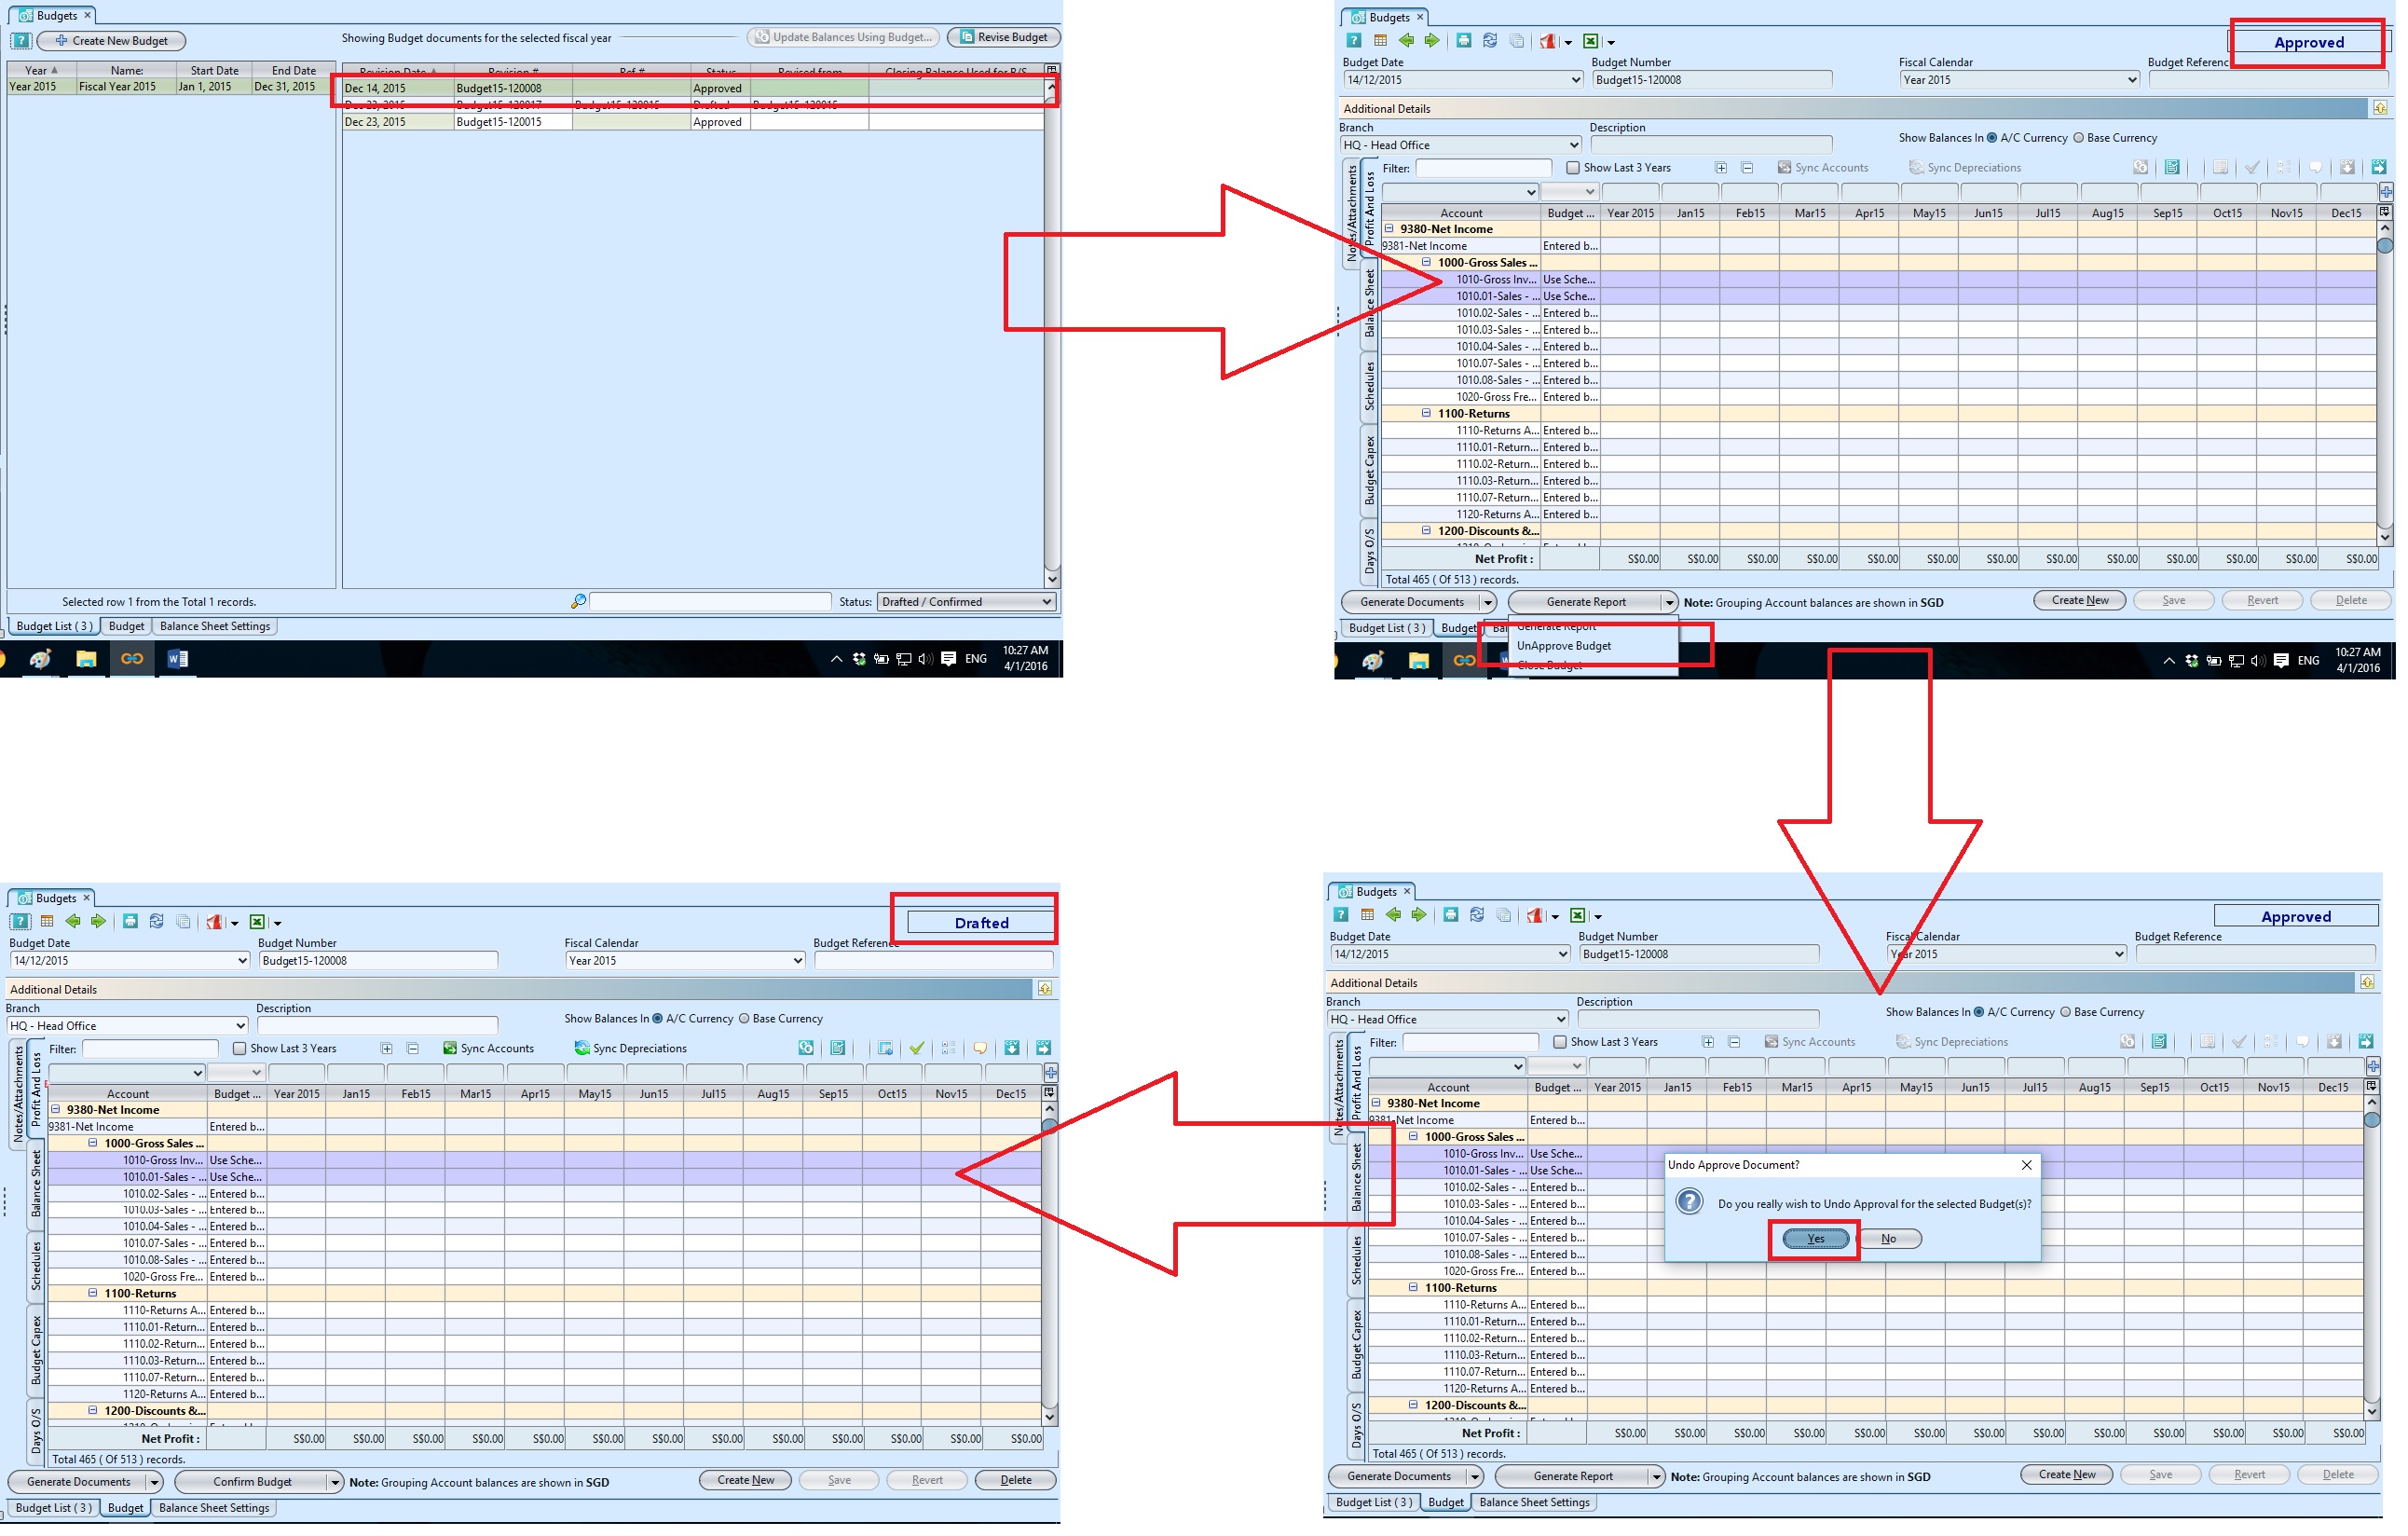 *The revised budget is not able to Reopen.
2. Click “Save” button at the bottom of the screen when done with the updates
Delete Budget
1. Click on a fiscal calendar, it will bring up the budget document on the right side of the screen. Double click on budget document to be deleted, it will bring up the selected budget details on the “Budget” tab. User has to “UnApprove Budget” before delete the document by clicking the “Generate Report” tab, the status will change from “Approved” to “Drafted”
2. Click on “Delete” button at the bottom right side of screen
3. Click on “Yes” button on the pop-up window to confirm budget document deletion
View and Search for Budget Details
1. Enter search parameter to filter the result, i.e. type in the budget name in the search textfield box at the bottom left of the screen.
2. Click on fiscal calendar to view, it will bring up the selected fiscal budget on the right side of the screen
3. Right click on budget document, it will show options related to the budget document

4. Double click on budget document to view, it will bring up the selected budget details on “Budget” tab
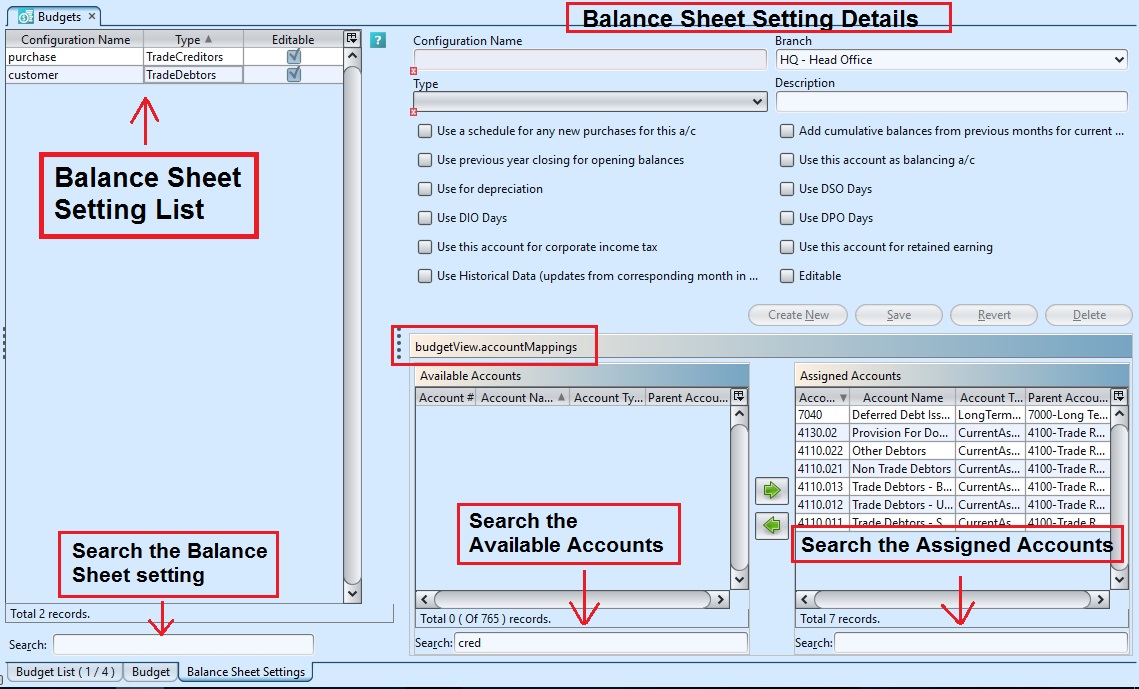
Balance Sheet Settings
Create New Balance Sheet Settings
1. Click “Balance Sheet Settings” tab at the bottom of screen
2. Click “Create New” button at the middle right side of screen
3. Fill up settings’ information.
4. Tick on the appropriate checkboxes
5. Click “Save” button at the middle right side of screen when done
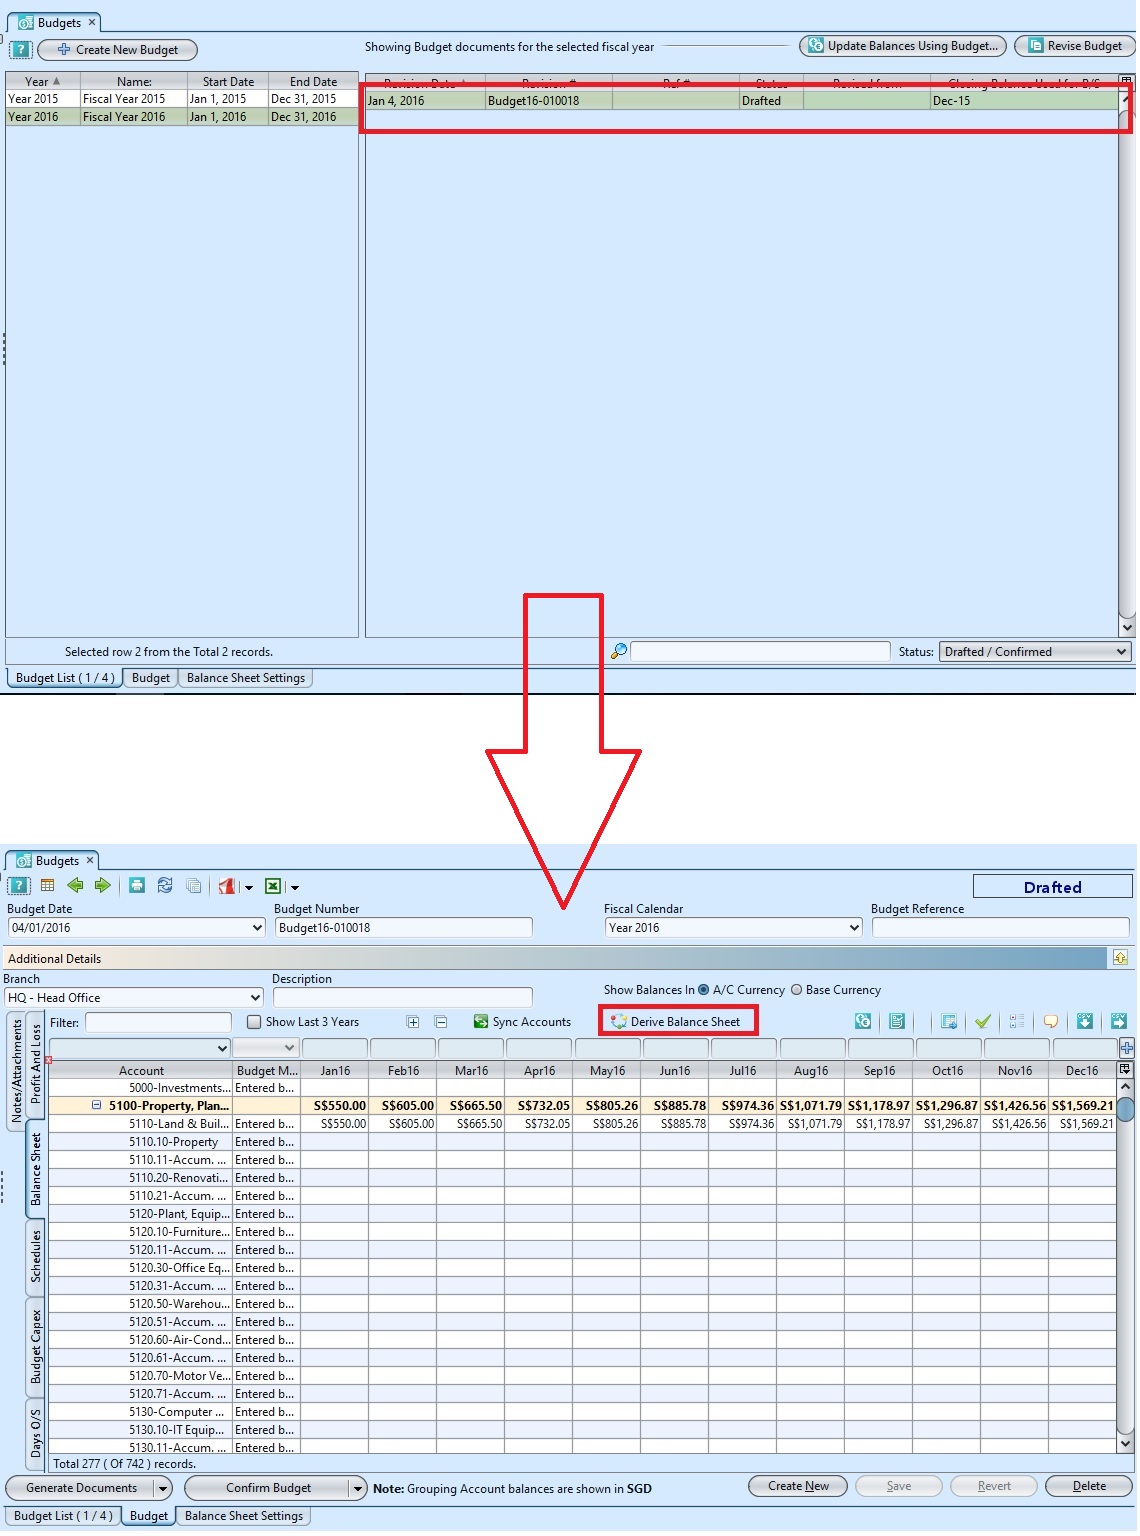
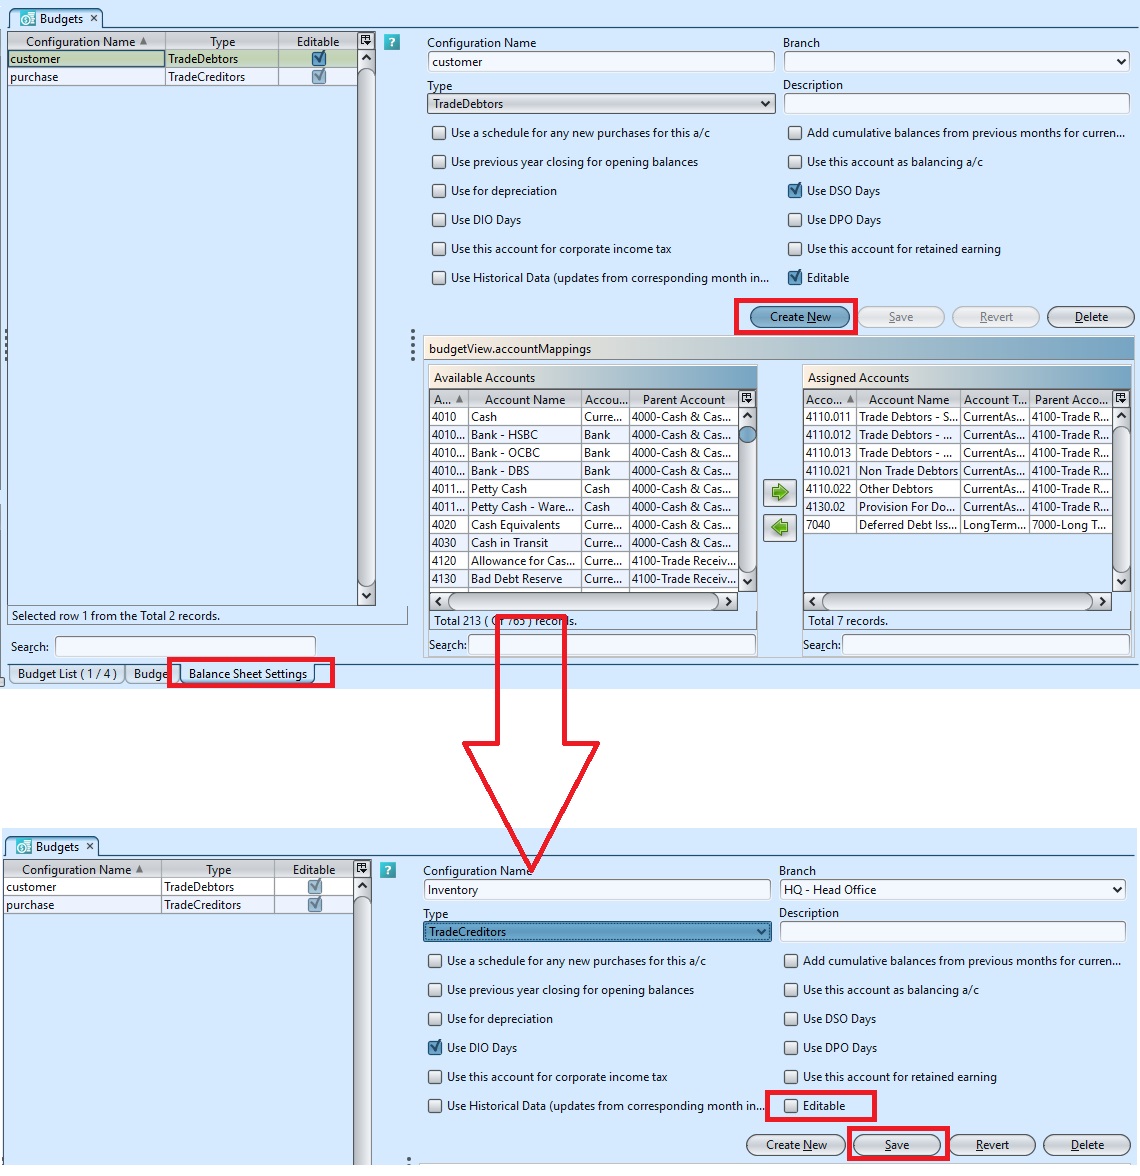 *The balance sheet amount is able to edit on the “Balance Sheet” tab after Derived Balance Sheet.
Update Balance Sheet Settings Details
1. Click “Balance Sheet Settings” tab at the bottom of screen. Double click on a balance sheet setting to be updated, it will bring up the configuration on the right side of the screen.
2. Click “Save” button at the bottom of the screen when done with the updates
Delete Balance Sheet Settings
1. Click “Balance Sheet Settings” tab at the bottom of screen. Double click on a balance sheet setting to be deleted, it will bring up the configuration on the right side of the screen.
2. Click on “Delete” button at the bottom right side of screen
3. Click on “Yes” button on the pop-up window to confirm balance sheet setting deletion.
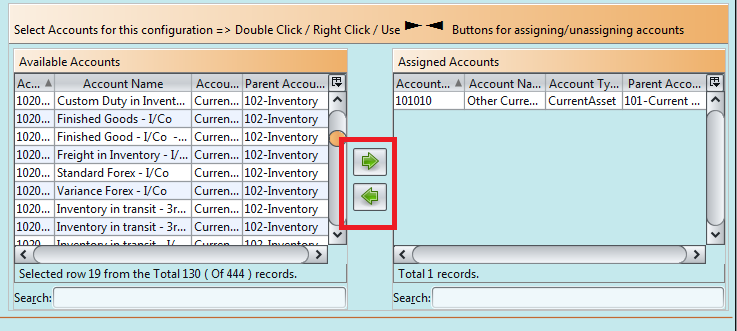
Assign & Un-assign Account to / from Balance Sheet Settings
1. Click “Balance Sheet Settings” tab at the bottom of screen. Click on configuration settings to modify, it will bring up the selected configuration on the right side of screen
2. Click an un-assigned / available account from bottom left table, then click ![]() button at the bottom middle of the screen to assign it to the configuration settings
button at the bottom middle of the screen to assign it to the configuration settings
3. Click an assigned account from bottom right table, then click ![]() button at the bottom middle of the screen to un-assign it from the configuration settings.
button at the bottom middle of the screen to un-assign it from the configuration settings.


