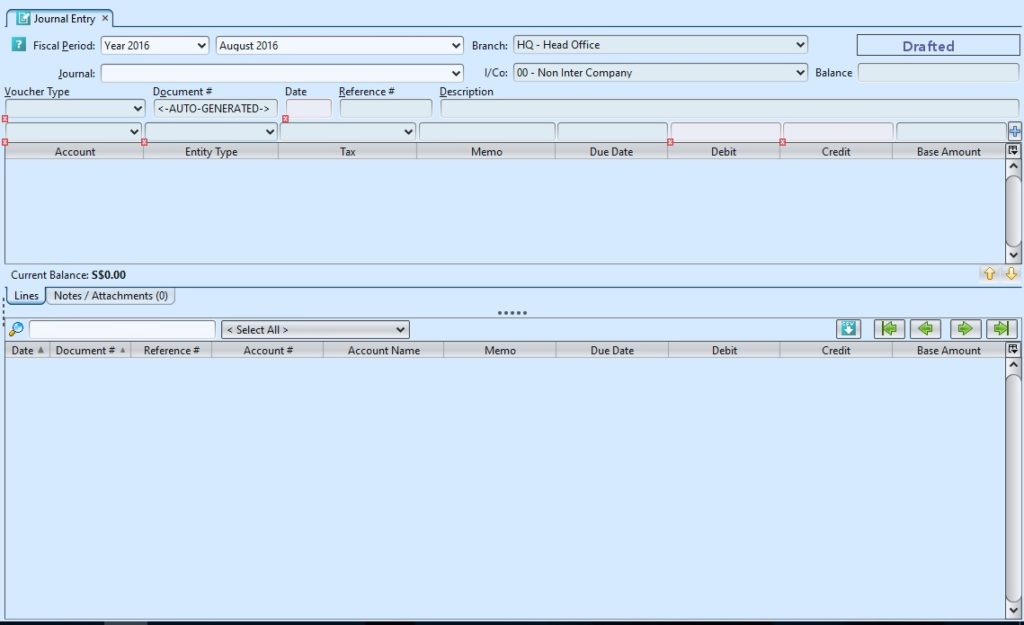
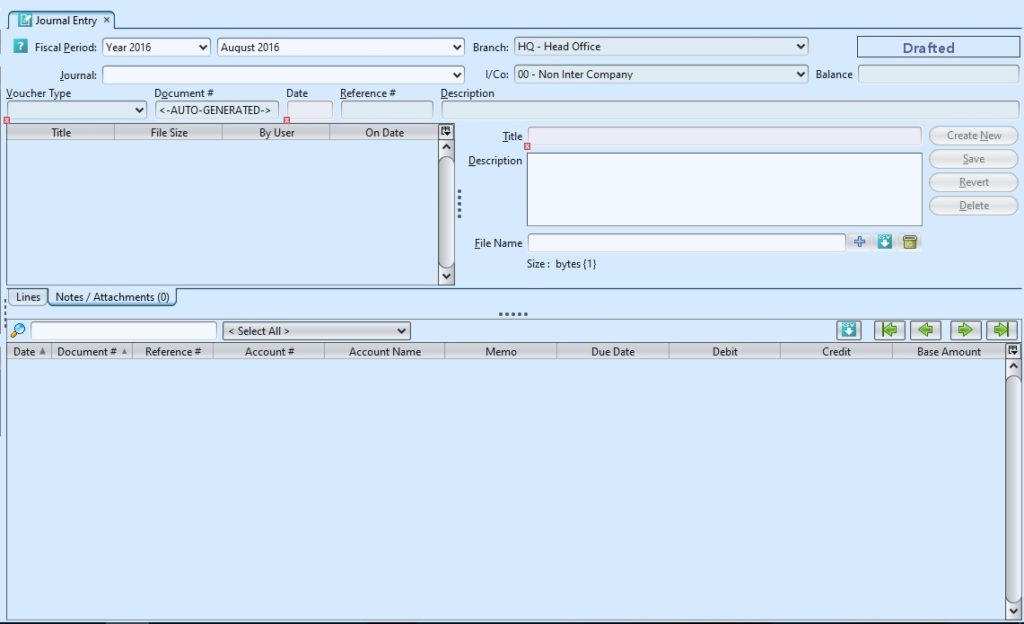
Journal entry is a record in a journal that keeps accounting transactions in chronological order, i.e. as they occur. Below actions are available from “Journal Entry”:
![]() Create new journal entry, update, delete, view and search for entry details
Create new journal entry, update, delete, view and search for entry details
1. Import from CSV file
Field Name |
Description |
Mandatory Information |
| Fiscal Period | Select the financial year and month |
Y |
| Branch | Company’s branch |
Y |
| Journal | Select the bank journal, created in Account – (Masters) Account Document’s Base Category |
Y |
| Voucher Type | Type of journal voucher, created in Account – (Masters) Account Document’s Sub Category |
Y |
| Document | Auto generated or custom create the document’s number |
Y |
| Date | Date of journal entry |
Y |
| Reference | Reference code for easy search |
N |
| Description | Description |
N |
| Account | Select the account for the journal entry |
Y |
| Entity Type | Entity Type group in Analytical Groups |
Y |
| Tax | A compulsory contribution to state revenue, levied by the government on workers’ income and business profits, or added to the cost of some goods, services, and transactions. |
N |
| Memo | A memorandum for the account |
N |
| Due Date | Due date to invoice |
N |
| Debit/Credit | Debit / Credit value of the journal entry |
Y |
Create New Journal Entry
1. Select a “Fiscal Period” and month from the drop-down lists at the top left side of screen
2. Select a “Journal” from the drop-down list at the top left side of screen. More journals can be created from “Accounts – (Masters) Journal”

3. Select a “Voucher Type” from the drop-down list at the top left side of screen. More voucher types can be created from “Accounts – (Masters) Account Document”
4. Fill up journal entry’s information on “Lines” tab. Date value is date only; month and year were defined above on drop-down list next to Fiscal Period. Journal entry must have either “Debit” or “Credit” amount, not both
5. Click ![]() button at the right side of screen to add a journal entry
button at the right side of screen to add a journal entry

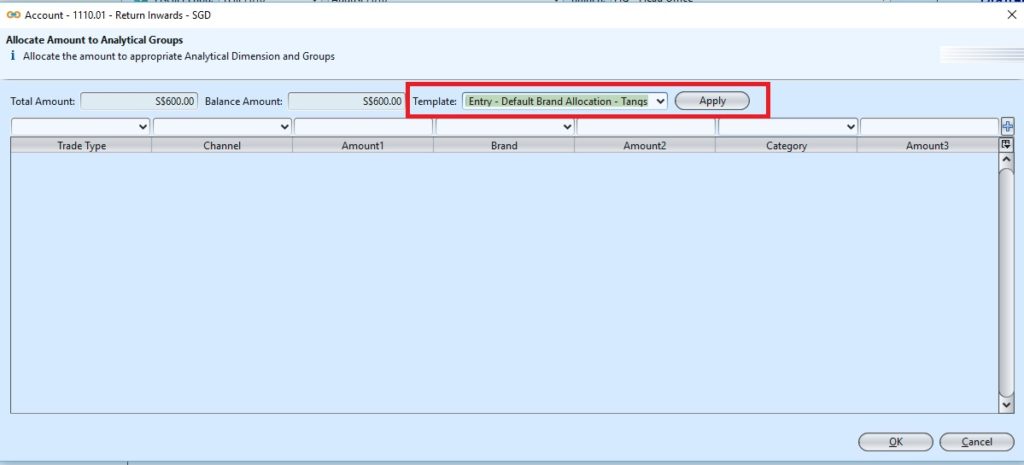
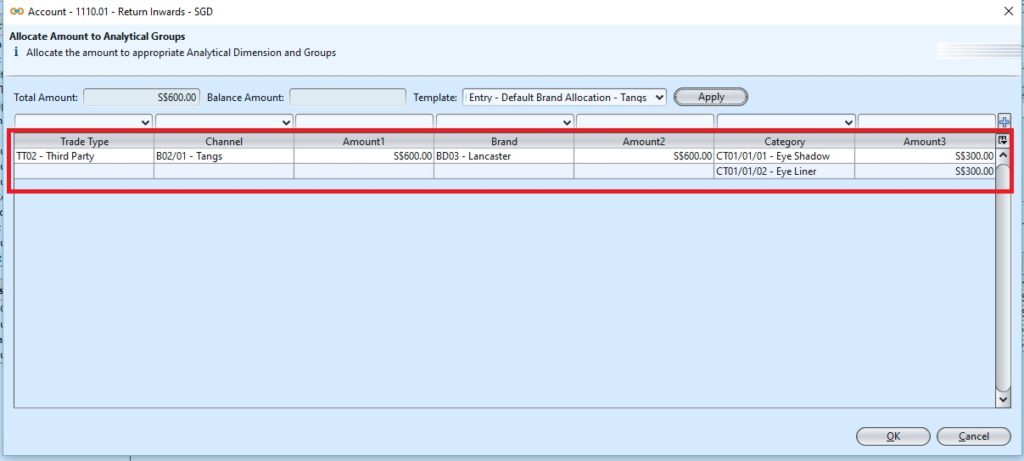
User will need to allocate the amount for split mode (analytical / cost center type) entry. User can select from available entry template in the pop-up window to auto-allocate the amount (see below images for Cost Center entry example)
6. Repeat steps 3-5 until debit total amount matches with credit total amount (reconciled double-entries). Balance field on top right side of screen will be empty when the journal entries are all reconciled, otherwise it will show the remaining balance value (debit / credit)
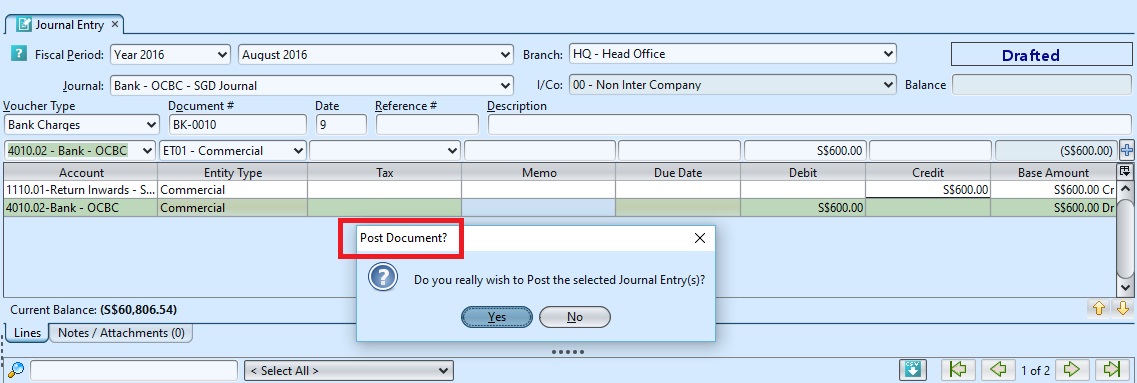
7. When the journal entries are reconciled, right click on an entry and select “Post Journal Entry” option and click “Yes” button to post the journal entry
Update Journal Entry
1. Select a “Fiscal Period” and month from the drop-down lists at the top left side of screen
2. Select a “Journal” from the drop-down list at the top left side of screen
3. At the table on bottom half of screen, right click on journal entry to be updated, it will bring up options to select and the selected journal details on the table on top half of screen. Select “Undo Journal Entry Posting” option and click “Yes” button, now the journal entry is editable on the table on top half of screen
4. Click ![]() button at the bottom right side of screen when done with the updates
button at the bottom right side of screen when done with the updates
5. On the journal entry at the table on bottom half of screen, right click on an entry and select “Post Journal Entry” option and click “Yes” button to post the journal entry
Delete Journal Entry
1. Select a “Fiscal Period” and month from the drop-down lists at the top left side of screen
2. Select a “Journal” from the drop-down list at the top left side of screen
3. At the table on bottom half of screen, right click on journal entry to be deleted, it will bring up options to select and the selected journal details on the table on top half of screen. Select “Undo Journal Entry Posting” option and click “Yes” button
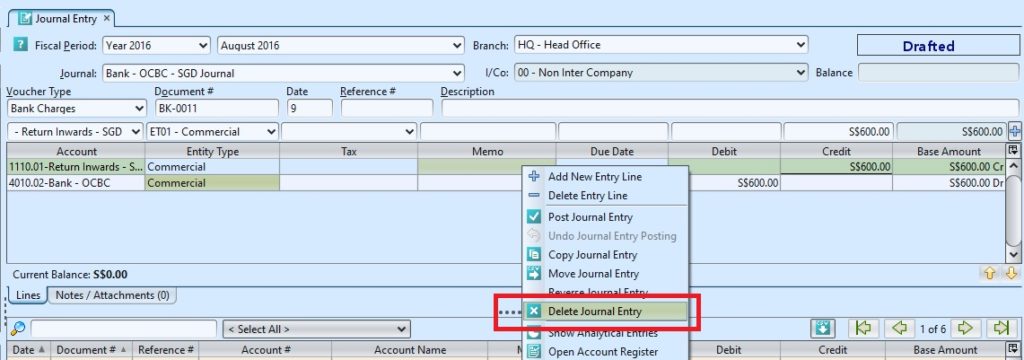
4. Right click on journal entry to be deleted, select “Delete Journal Entry” and click “Yes” to confirm deletion of the entry
View and Search for Journal Entry Details
1. Enter search parameter to filter the result, i.e. type in the journal entry account in the search textfield box on the left of screen
2. Select option to view all, or show only drafted / posted journal entry from the drop-down list in middle of the screen
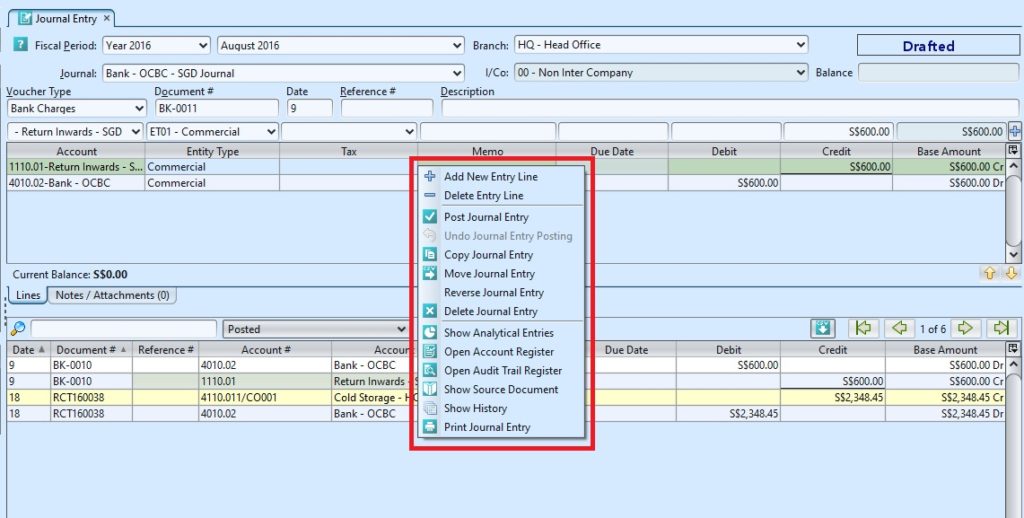
3. Right click on journal entry to view, it will bring up options for the selected journal entry to see more details (if any), print, etc
Import of Journal Entry Data
1. Click “Import from CSV” ![]() button at the middle right side of the screen to import journal entry data. Use “Export to CSV” feature to get the file template with example.
button at the middle right side of the screen to import journal entry data. Use “Export to CSV” feature to get the file template with example.


