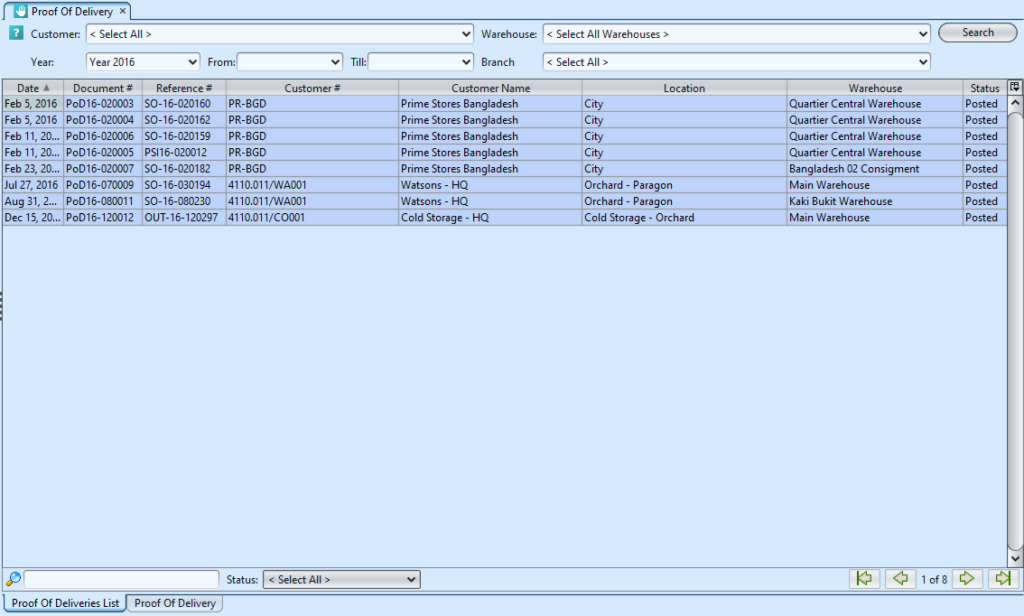
It refers to receipt signed by a consignee or recipient, confirming delivery of a shipment in good order and condition. The proof of deliveries view allows the user to view the list of all deliveries that has been completed.
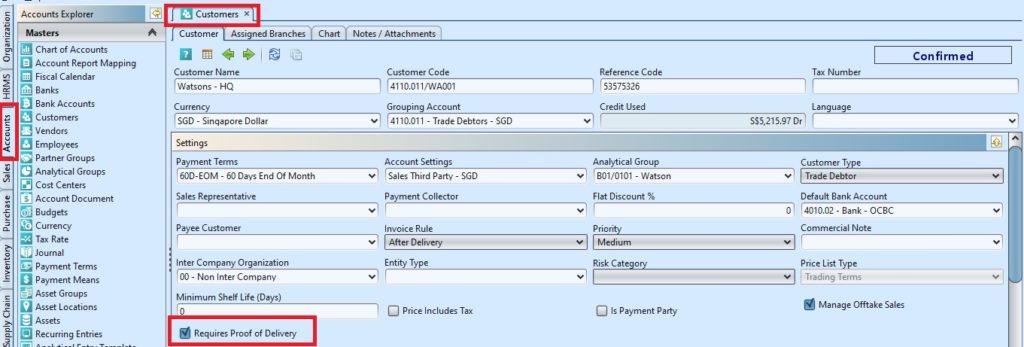
*Note: Proof of Delivery process is optional, it depend on whether this is set as requirement in the customer’s record, “Account – (Masters) – Customers“. Tick “Requires Proof of Delivery” checkbox if the customer requires it.
Below are available actions for the user from “Proof Of Deliveries” :
![]() Confirm, save, revert and delete the proof of delivery.
Confirm, save, revert and delete the proof of delivery.
![]() View and search proof of delivery details
View and search proof of delivery details
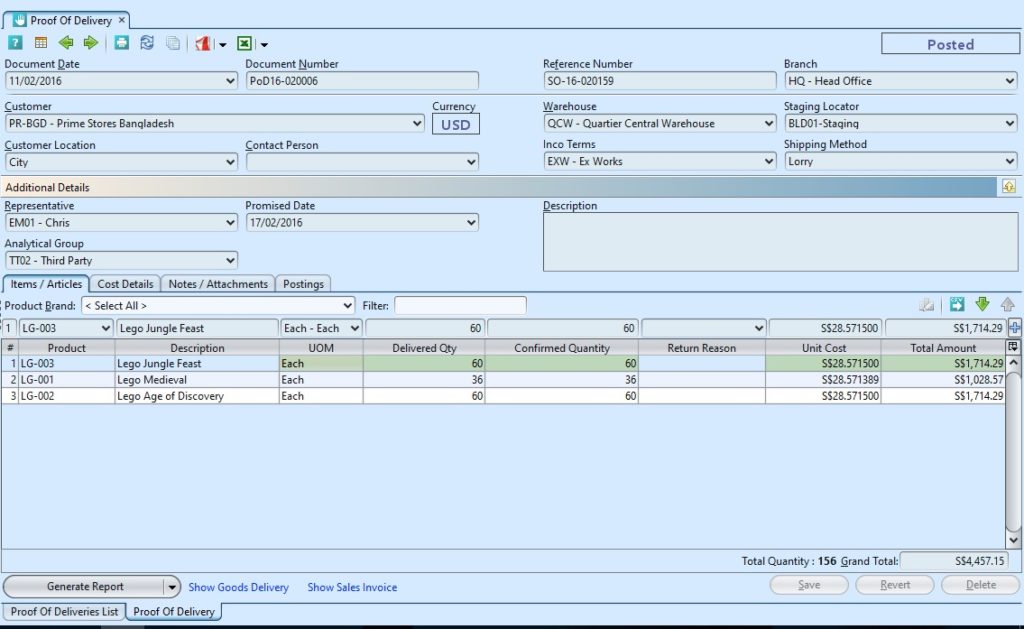
| Field Name | Description | Mandatory Information |
| Document Date | Specify the date | Y |
| Document Number | Self-explanatory | Y |
| Reference Number | Reference code for easy search | N |
| Branch | Self-explanatory | Y |
| Customer | Self-explanatory | Y |
| Currency | Currency used by the customer | Y |
| Warehouse | Self-explanatory | Y |
| Staging Locator | Staging location of the item(s) in the warehouse | Y |
| Customer Location | Self-explanatory | Y |
| Contact Person | Self-explanatory | N |
| Inco Terms | Self-explanatory | Y |
| Shipping Methods | Self-explanatory | N |
| Representative | Self-explanatory | N |
| Promised dates | Self-explanatory | N |
| Description | Free text | N |
| Analytics Group | Group Reporting | N |
Generate Proof of Deliveries:
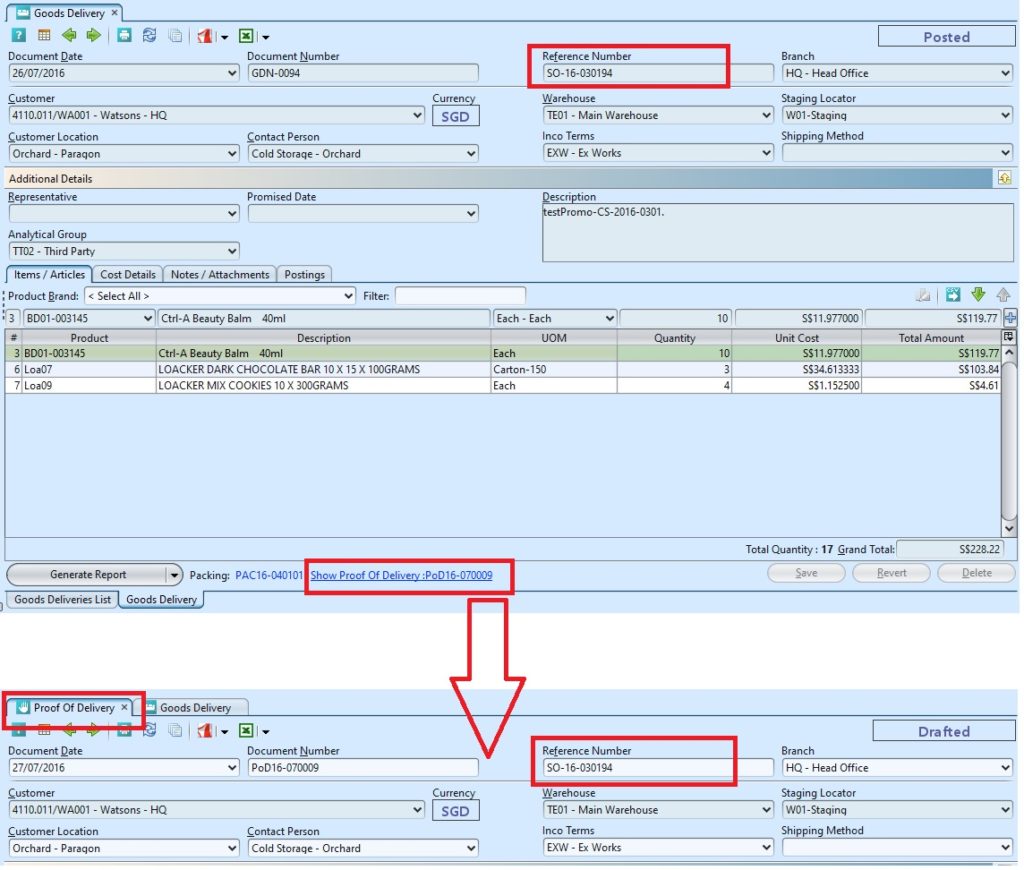
1. The proof of delivery will be generated automatically through “Inventory – (Outbound) Goods Delivery” after approval of the goods delivery document. Open the proof of delivery document by clicking the “Show Proof of Delivery” link in the goods delivery document at the bottom of screen.
*Note: The Proof of Delivery will generate automatically only if the “Requires Proof of Delivery” checkbox under the “Customer (Accounts-Master)“ module have been ticked.
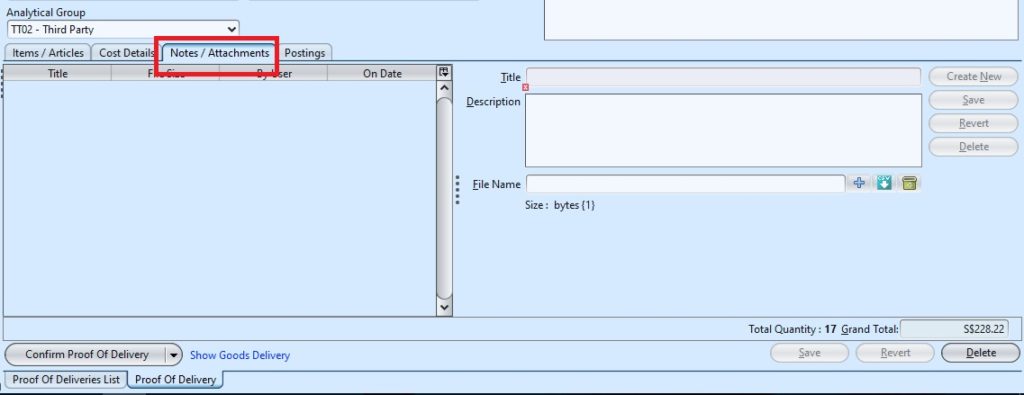
2. In the “Note / Attachment” tab the user is allowed to attached electronic form of note to the record.
3. Click “Save” button at the bottom right side of screen to save
4. Click on “Confirm Proof of Delivery” button at the bottom of screen to confirm it.
5. Click on “Post to Inventory” button at the bottom of screen to post the proof of delivery.
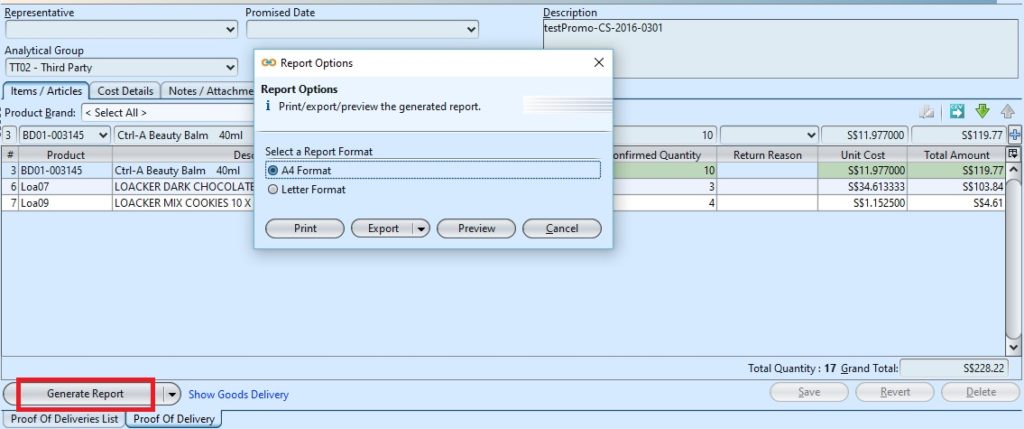
6. Click on “Generate Report” button at the bottom of screen to generate report, export or print the document.
Update Proof of Delivery Details:
1. Click on “Proof of Deliveries List” tab at the bottom of screen
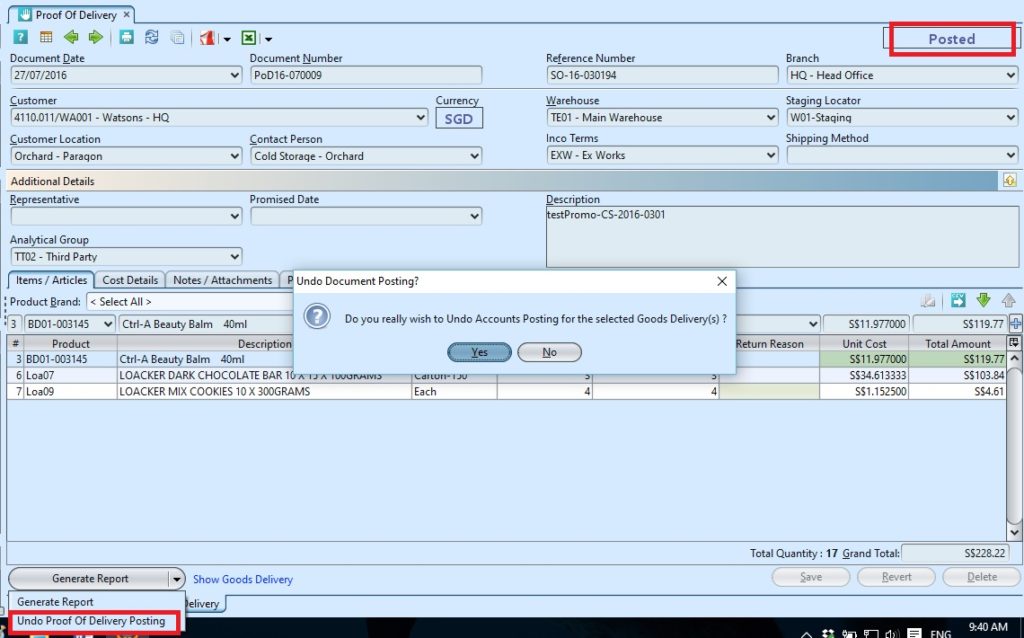
2. Double click on Proof of Delivery to be updated, it will bring up the details on “Proof of Delivery” tab for the selected document. If a proof of delivery’s status is “Confirmed” or “Posted”, click the “Generate Report” button at the bottom left of screen and select reopen / undo approval of the proof of delivery first.
3. Make change(s) on the information
4. Click on “Save” button at the bottom right of screen to save
5. Click on “Confirm Proof of Delivery” button at the bottom of screen to confirm it.
6. Click on “Post to Inventory” button at the bottom of screen to post the proof of delivery.
Delete Proof of Delivery:
1. Click on “Proof of Deliveries List” tab at the bottom of screen
2. Double click on proof of delivery to be deleted, it will bring up the details on “Proof of Delivery” tab for the selected document. If a proof of delivery’s status is “Confirmed” or “Posted”, click the “Generate Report” button at the bottom left of screen and select reopen / undo approval of the proof of delivery first.
3. Click on “Delete” button at the bottom right side of screen to save
4. Click on “Yes” button on the pop-up window to confirm deletion of the document
View and Search for Proof of Delivery Details:
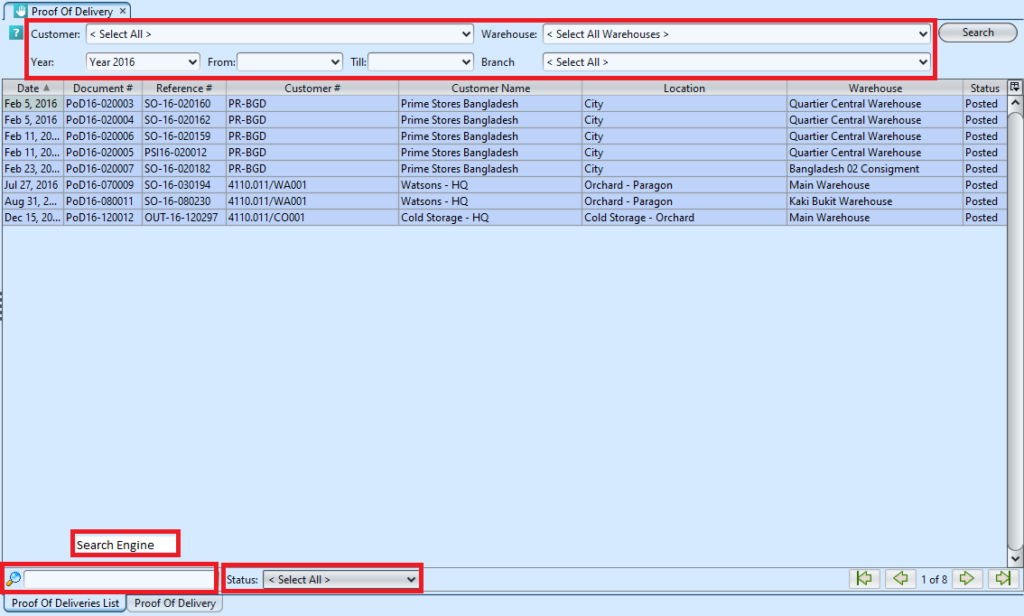
1. Click on “Proof of Delivery List” tab at the bottom of screen
2. Enter search parameter to filter the result, i.e. type in which customer to search for in the “Customer” text field box or select from drop-down list
3. Result can be sorted alphabetically by clicking the fields’ columns
4. Double click on proof of delivery to view full details of the document, it will bring up the details on “Proof of Delivery” tab for the selected document


