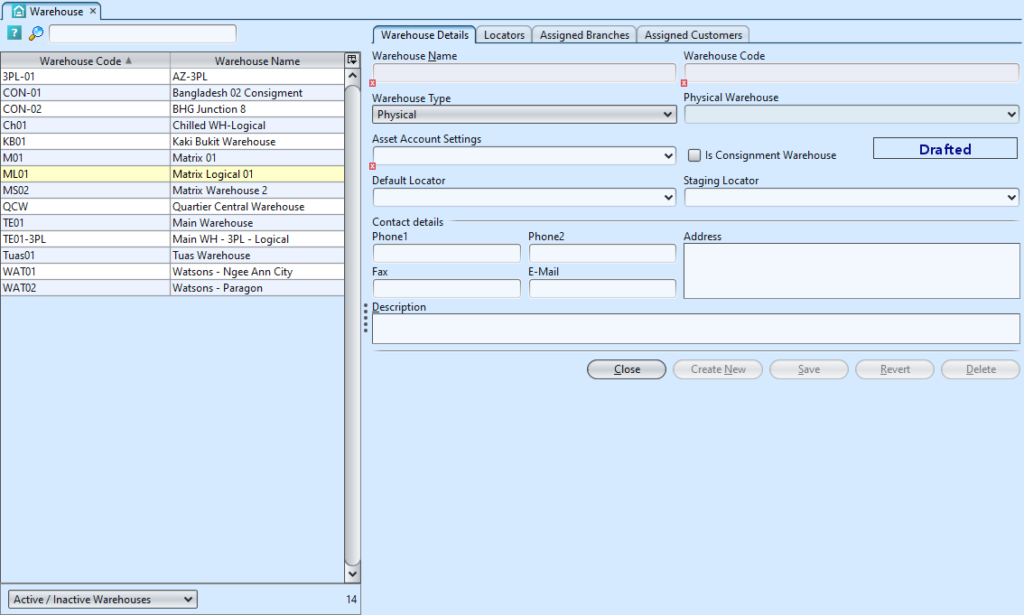
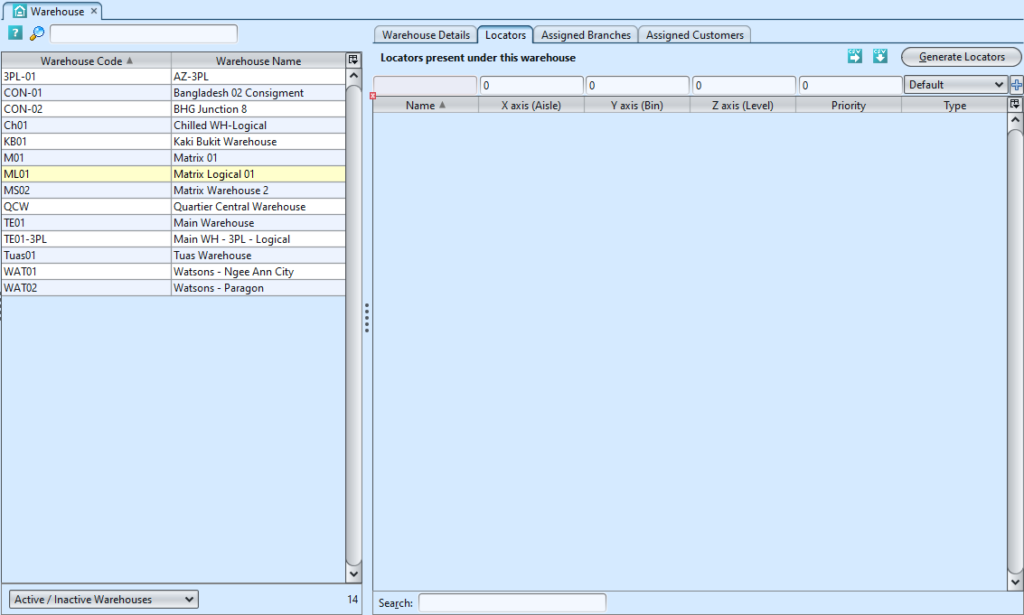
In the Warehouse Master the user is able to create and manage a warehouse. By selecting the Locator tab the user is able to create new locations in the racks; for locating products. Below are available actions for the user from “Warehouse” :
![]() Create new, save, revert, delete, close and reopen a warehouse.
Create new, save, revert, delete, close and reopen a warehouse.
![]() Create new, edit and delete the location in the racks; to help more efficiently locate products.
Create new, edit and delete the location in the racks; to help more efficiently locate products.
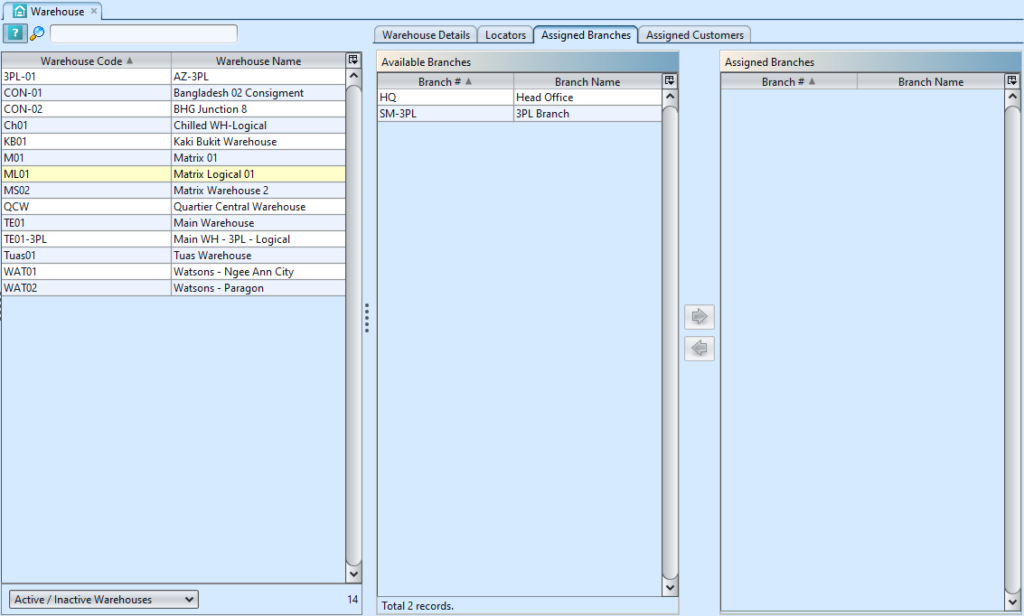
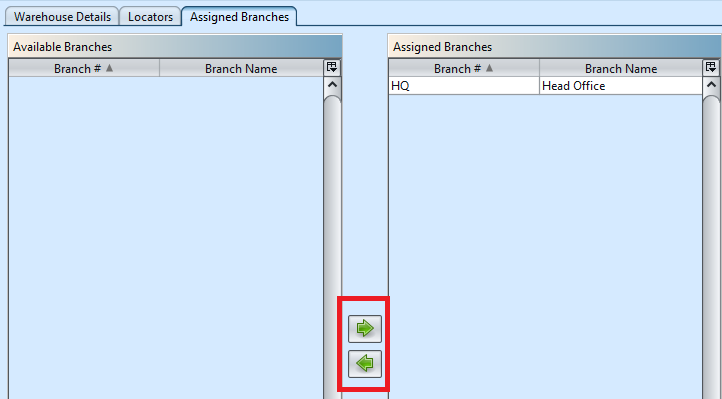
![]() The “Assigned Branches” tab allow the user to assign branch (i.e. stores or sister companies) to a warehouse for separate branch’s access / operation.
The “Assigned Branches” tab allow the user to assign branch (i.e. stores or sister companies) to a warehouse for separate branch’s access / operation.
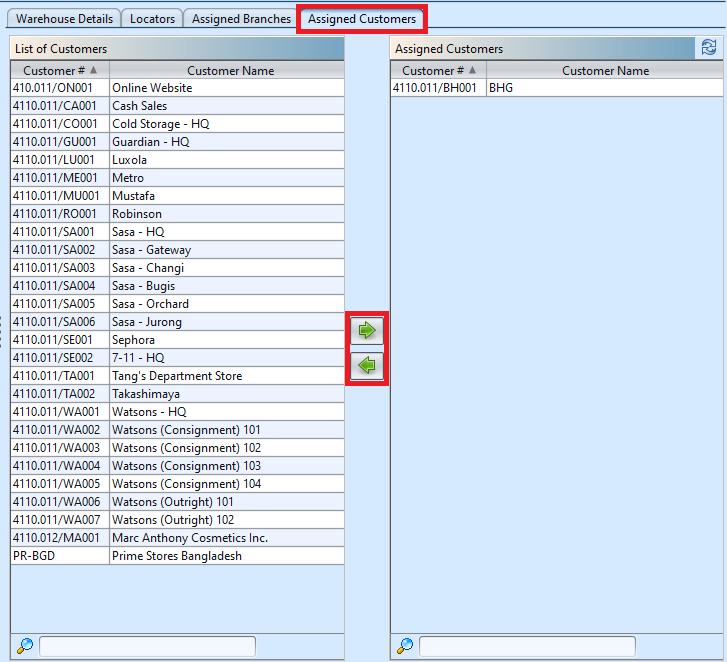
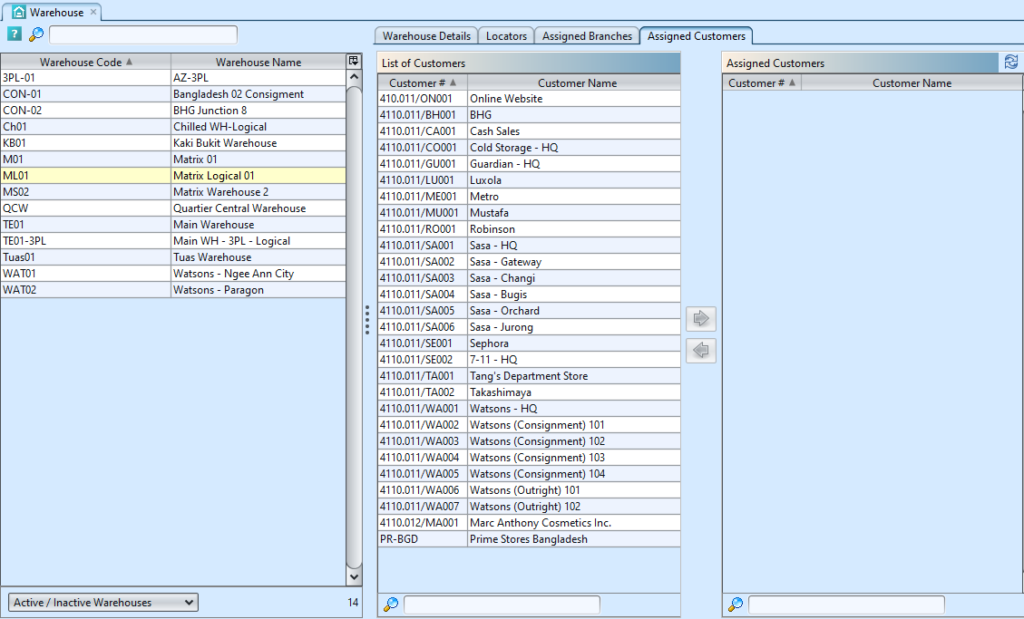
![]() The “Assigned Customers” tab allow the user to assign customer(s) to consignment warehouse for consignment related transactions.
The “Assigned Customers” tab allow the user to assign customer(s) to consignment warehouse for consignment related transactions.
![]() Update product balances for the warehouse (after Stock Import)
Update product balances for the warehouse (after Stock Import)
Field Name |
Description |
Mandatory Information |
| Warehouse Name | Name given to the warehouse |
Y |
| Warehouse Code | Alphanumeric Code |
Y |
| Warehouse Type | Select the type of warehouse: Physical or Logical |
Y |
| Physical Warehouse | Select the physical warehouse for Logical warehouse type |
N |
| Asset Account Setting | Account for assets |
Y |
| Is Consignment Warehouse | Tick if this is consignment warehouse type |
Y |
| Status of the Warehouse | Drafted, Confirmed, or Closed |
Y |
| Default Locator | Default locator code and name |
Y |
| Staging Locator | Default staging locator code and name |
Y |
| Phone 1 / 2 | Contact number |
N |
| Fax | Fax Number |
N |
| Email address of the contact person |
N |
|
| Address | Address of the warehouse |
N |
Create New Warehouse:
1. Click “Create New” button at the right side of screen
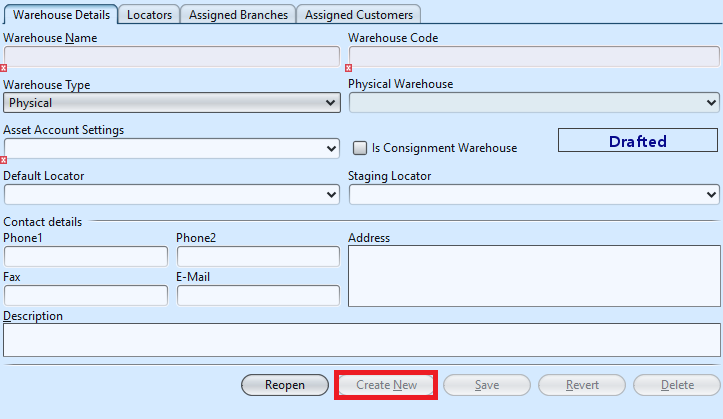
2. Fill up the information on the form on the right side of the screen
3. If this warehouse is for consignment purpose (i.e. consignment store warehouse), tick on the “Is Consignment Warehouse” checkbox. This will allow user to assign consignment customer to this warehouse and enables the following for the warehouse:
- Consignment Order; for consignment transfer / return
- Sell Out Store; creation of store to manage and track store sales
- Sell Out Transactions module; to record store sales & returns, and track stores’ inventories
Note: user must assign at least one customer for consignment warehouse type, before they are able to save the warehouse master record (see step #4 below).
4. On “Assigned Customers” tab, to assign a customer to the warehouse, select available customer from the bottom left table list and click ” ![]() ” button in middle of screen. In consignment related transactions, like Consignment Order and Store Sales, system will filter to show only consignment warehouse(s) assigned to the customer (plus non-consignment warehouses).
” button in middle of screen. In consignment related transactions, like Consignment Order and Store Sales, system will filter to show only consignment warehouse(s) assigned to the customer (plus non-consignment warehouses).
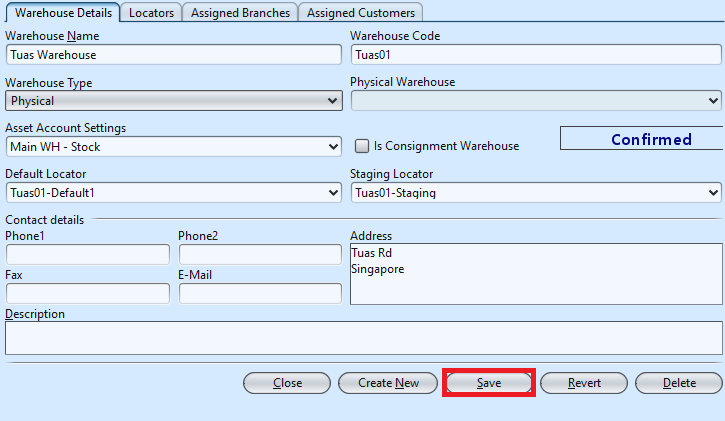
5. Click “Save” button at the right side of screen when done, it will automatically generate default locator and staging locator.
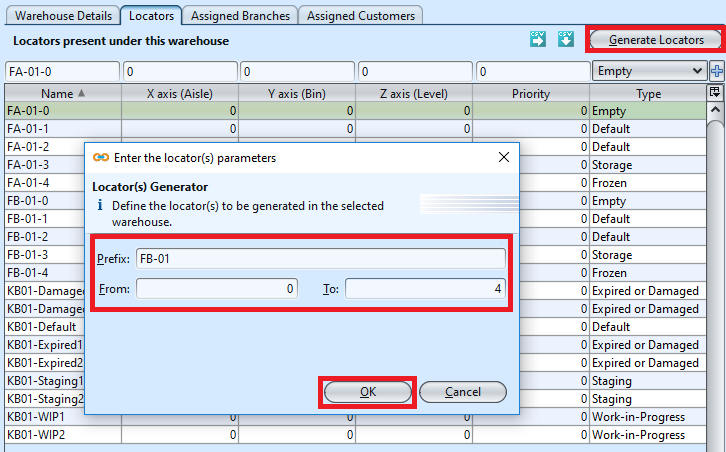
6. Click the “Locators” tab, enter the locator’s info and click ” ![]() ” button or “Enter” to add the information.
” button or “Enter” to add the information.
There are 7 types of locators in Samooha Warehouse:
- Default: default locator type to store stock for distribution / logistics transactions
- Storage: stock stored / moved into this locator can only be move out using “Internal Transfer“
- Staging: stock in staging process (Picking / Packing / Putaway, etc.)
- Work-in-Progress
- Expired or Damaged: storage for stock that has expired or damaged, stock stored in this locator cannot be use, aside from Stock Adjustment (-Qty) transaction to discard the stock (see “Inventory module – (Transactions) Stock Adjustment“)
- Frozen: stock stored / moved into this locator can only be move out using “Internal Transfer“
- Empty: not to be use / reserved to be empty
7. Click the ” ![]() ” button, enter the prefix and number of locators to generate in the pop up window, click “OK” in order to generate the locator(s).
” button, enter the prefix and number of locators to generate in the pop up window, click “OK” in order to generate the locator(s).
Alternatively, user can import the warehouse locators data by using “import locators from csv file” ![]() feature. Use “export locators to csv file”
feature. Use “export locators to csv file” ![]() feature to export sample file to be use as the import template.
feature to export sample file to be use as the import template.

8. On “Assigned Branches” tab, a default branch (e.g. HQ) has been automatically assigned for the new customer. To assign another branch for the customer, select available branch from the bottom left table and click ” ![]() ” button in middle of screen
” button in middle of screen
Update Warehouse Details
1. Click on warehouse to be updated, it will bring up the selected warehouse details on the right side of the screen
Note: user must assign at least one customer if they are changing the warehouse type to consignment warehouse.
2. Click “Save” button at the right side of the screen when done with the update
3. Click “Revert” button at the right side of the screen to reverse any changes
Delete Warehouse Details
1. Click on warehouse to be deleted, it will bring up the selected warehouse on the right side of the screen
2. Click on “Delete” button at the right side of screen
3. Click on “Yes” button on the pop-up window to confirm warehouse deletion
4. On “Locators” tab, select a locator, right click on the mouse and select “Delete Selected Locator(s)”
5. Click on “Yes” button on the pop-up window to confirm locator’s record deletion
Close and Reopen Warehouse Details
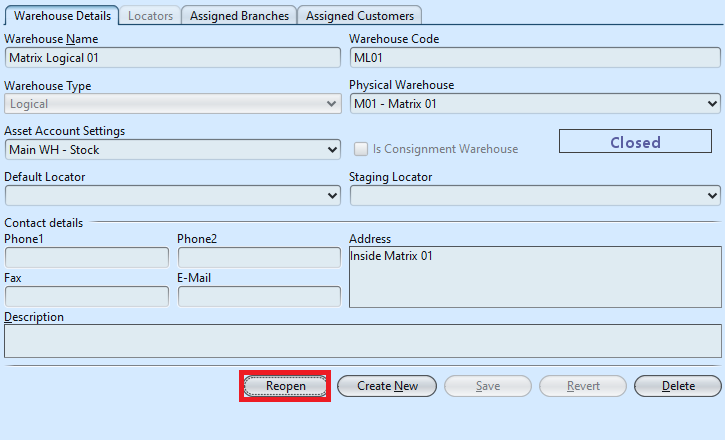
User able to close a warehouse to deactivate / suspend it from being use in transactions. To close a warehouse, it must not have any stock present in the warehouse. User able to reopen the warehouse to use it again.
1. Click on warehouse to be close, it will bring up the selected warehouse on the right side of the screen
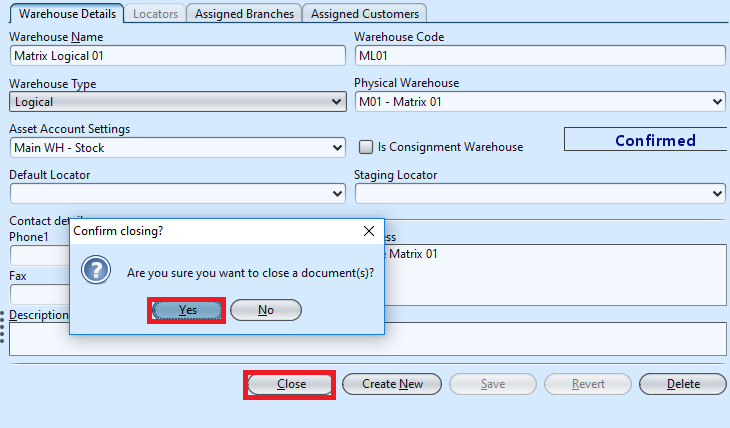
2. Click on “Close” button at the right side of screen
3. Click on “Yes” button on the pop-up window to confirm warehouse closing. This will deactivate the warehouse.
NOTE: if user tries to close a warehouse which still have stock present inside, system will trigger error message to remind user to clear the existing stock from the warehouse first before deactivating it.
4. Click on “Reopen” button at the right side of screen
5. Click on “Yes” button on the pop-up window to confirm warehouse reopening. This will re-activate the warehouse.
View and Search for Warehouse Details
1. Enter search parameter to filter the result, i.e. type in the warehouse name in the search textfield box at the top of the screen.
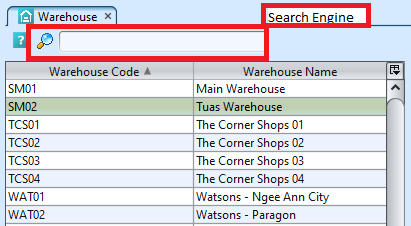
2. Click on warehouse to view, it will bring up the details on the right side of the screen.
Update Product Balances for the Warehouse
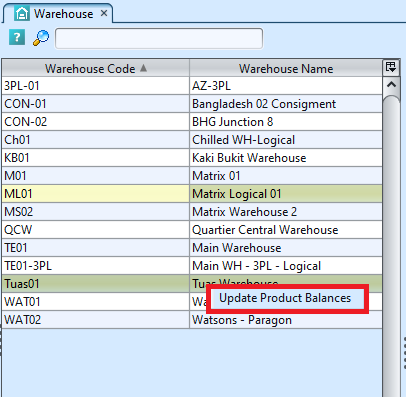
After Stock Import was completed for the warehouse, user will need to update opening balances for the warehouse, to update the opening quantity and values in some of the inventory reports.
1. Open “Inventory – Warehouse (Master)”.
2. Right-click on the warehouse (of the completed Stock Import) from the list of warehouse on the left, and select option “Update Product Balances” for the warehouse.


