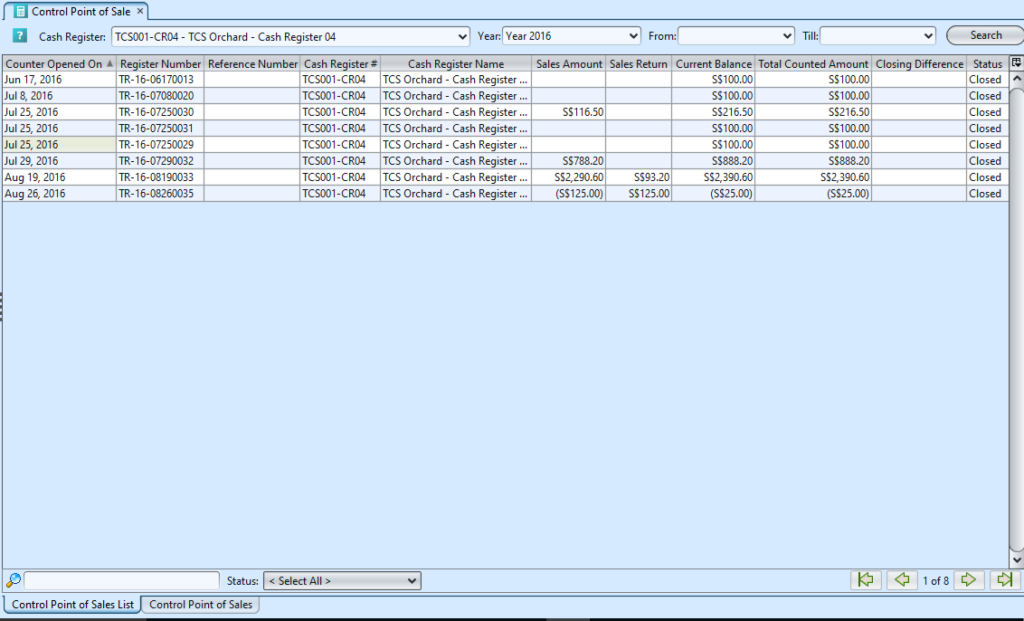
Control Point Of Sale (POS) view allow user to view POS Entry (cash register) status and daily closing balances. User also able to confirm the POS (cash register) closing balance and close the POS (cash register) from this view.
Below actions are available under Control Point Of Sale:
![]() View, search, and print POS Closing report
View, search, and print POS Closing report
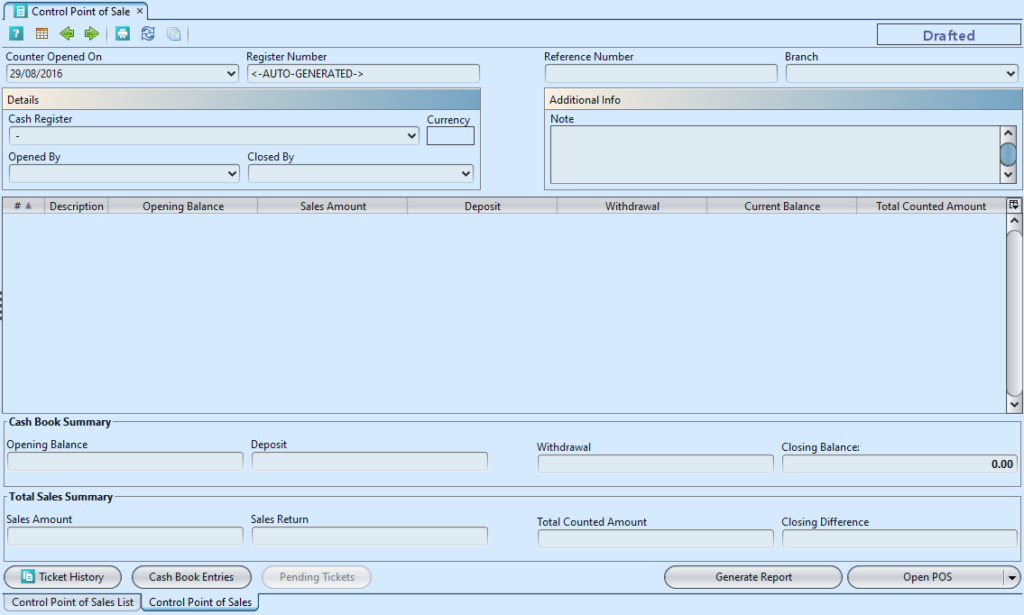
Field Name |
Description |
Mandatory Information |
| Counter Opened On | Date of the POS Entry (cash register) is opened |
Y |
| Register Number | Ticket grouping number for a session of opened cash register until it is closed. This is used as reference number for Point of Sale invoice posting |
Y |
| Reference Number | Code for easy search reference |
Y |
| Branch | Company’s branch name |
N |
| Cash Register | Cash register code and name |
Y |
| Currency | Currency used by the cash register for transactions |
Y |
| Opened By | Name of staff who opened the cash register |
Y |
| Closed By | Name of staff who closed the cash register |
N |
| Note | Additional note on the sales transactions |
N |
| Description | Type of payment mean(s) used during sales transactions |
Y |
| Opening Balance | Starting amount when POS was opened |
N |
| Sales Amount | Sales amount collected for the payment mean(s) |
Y |
| Deposit | Total amount of manual deposit (Cash In) made for the payment mean(s) |
Y |
| Withdrawal | Total amount of manual withdrawal (Cash Out) made for the payment mean(s) |
Y |
| Current Balance | System count total amount of the received payment mean(s) |
Y |
| Total Counted Amount | Manual counted total amount of the received payment mean(s) |
Y |
Confirm POS Day Closing
1. Double-click a drafted cash register record to view more details of its daily transaction records, it will be shown on “Control Point of Sales” tab
2. Enter “Total Counted Amount” for each payment means line, then press ENTER key

3. Click on “Confirm Day Closing” button at the bottom right of screen of “Control Point of Sales” tab to confirm the cash register
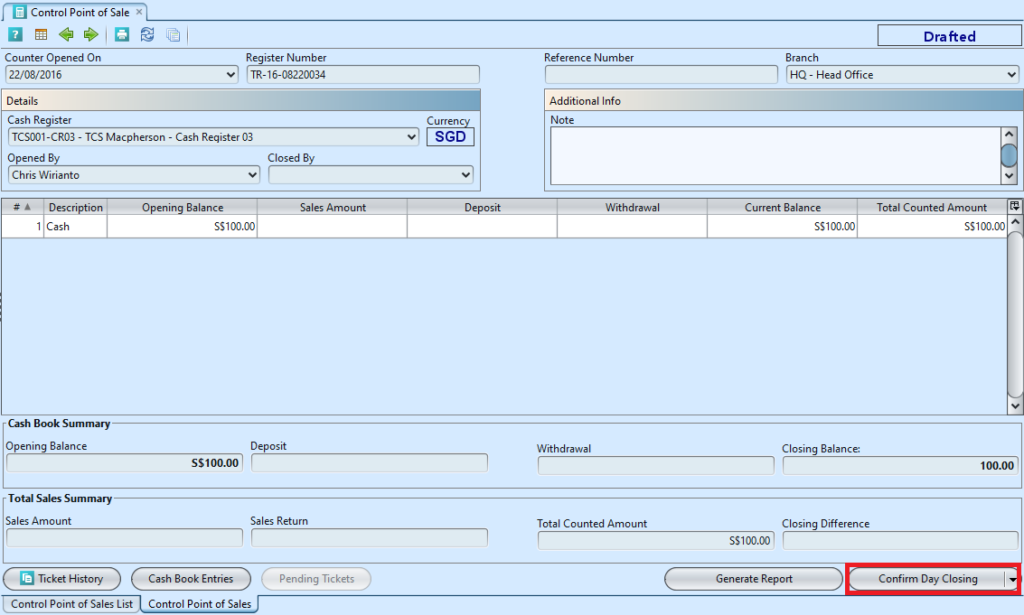
4. Click on “Close POS” button at the bottom right of screen of “Control Point of Sales” tab to close the cash register. Once closed, this session cannot be reopened.
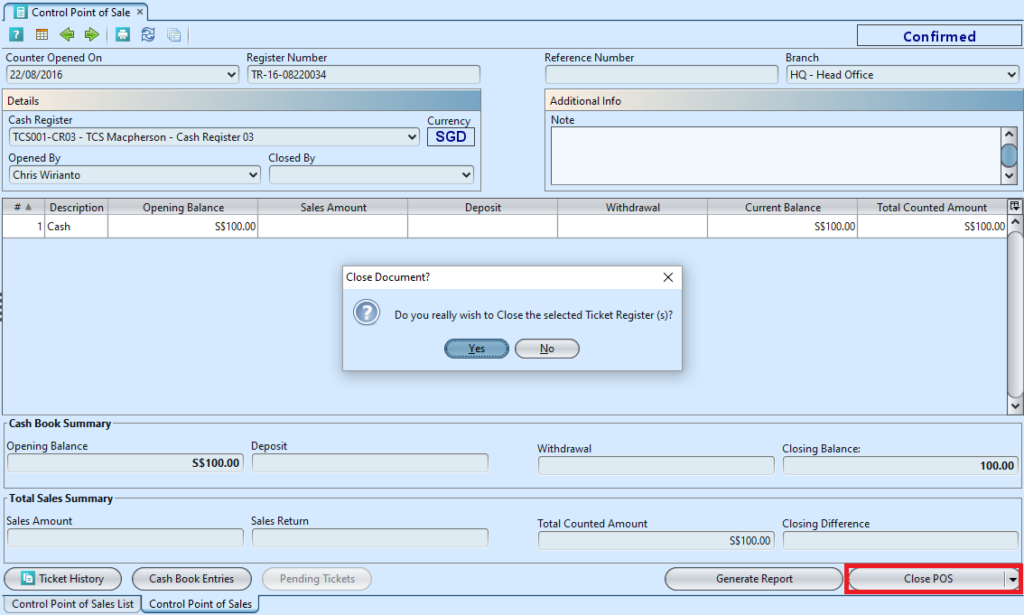
View, Search, and Print POS Closing Report
1. Select search parameter from drop down list or enter search parameter to filter the result at “Control Point of Sales List” tab, i.e. type in cash register name in the search textfield box, at bottom of screen
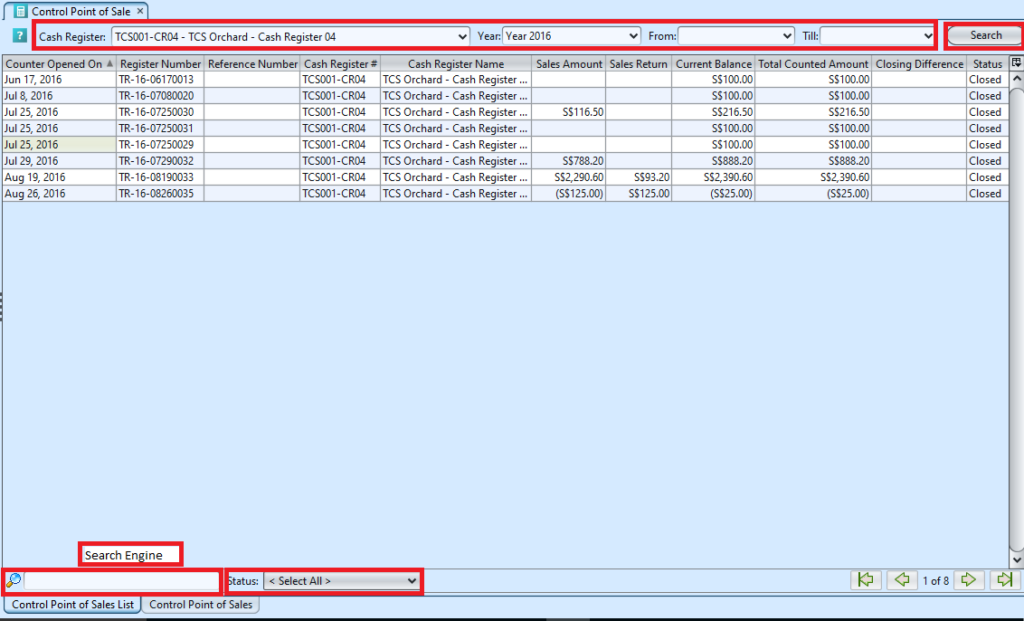
2. Result can be sorted alphabetically by clicking the fields’ columns
3. Double-click a cash register record to view more details of its daily transaction records, it will be shown on “Control Point of Sales” tab
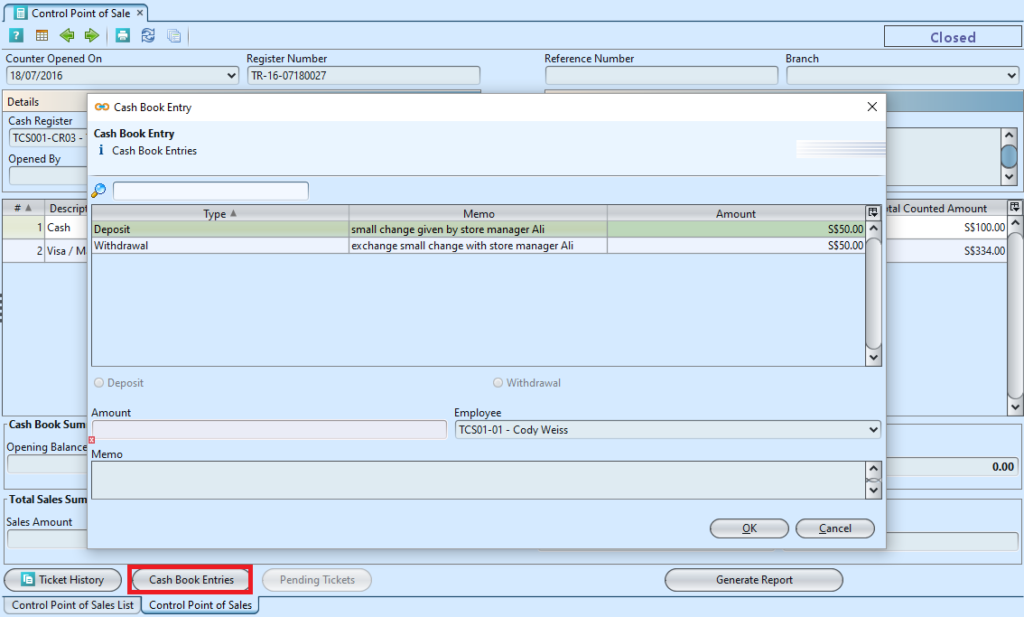
4. Click on “Ticket History” button at the bottom left of screen of “Control Point of Sales” tab to view ticket history of the cash register
5. Click on “Cash Book Entries” button at the bottom left of screen of “Control Point of Sales” tab to view cash book log history of the cash register
6. Click “Generate Report” button at the bottom right of screen to print POS Closing Report, a window will show up with options to:
![]() Select a Report Format: A4 or Letter format
Select a Report Format: A4 or Letter format
![]() Print: print the POS Closing report
Print: print the POS Closing report
![]() Export: select option to export as PDF or Excel file
Export: select option to export as PDF or Excel file
![]() Cancel: cancel print and close the window
Cancel: cancel print and close the window


