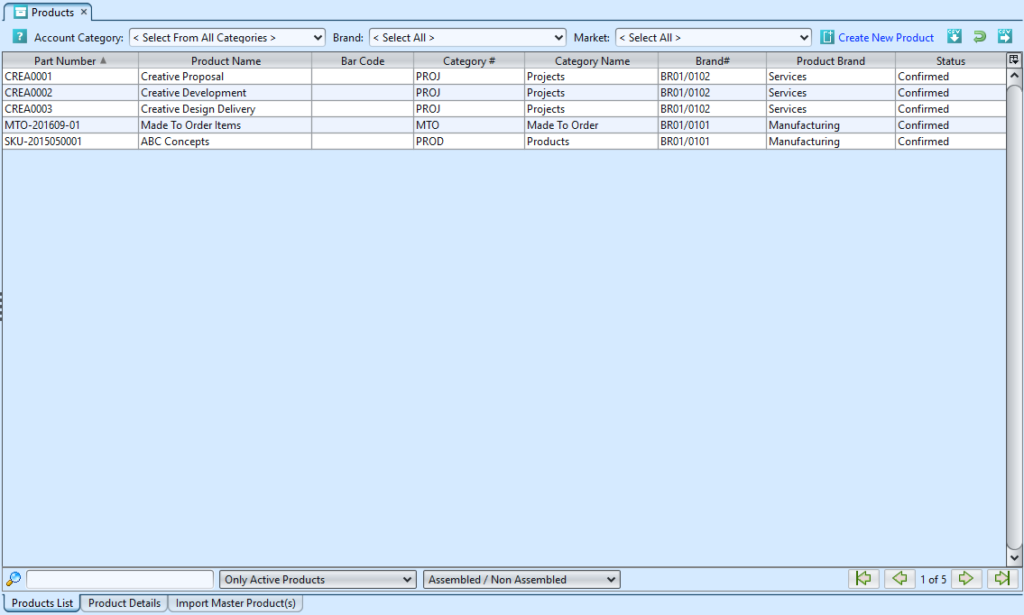
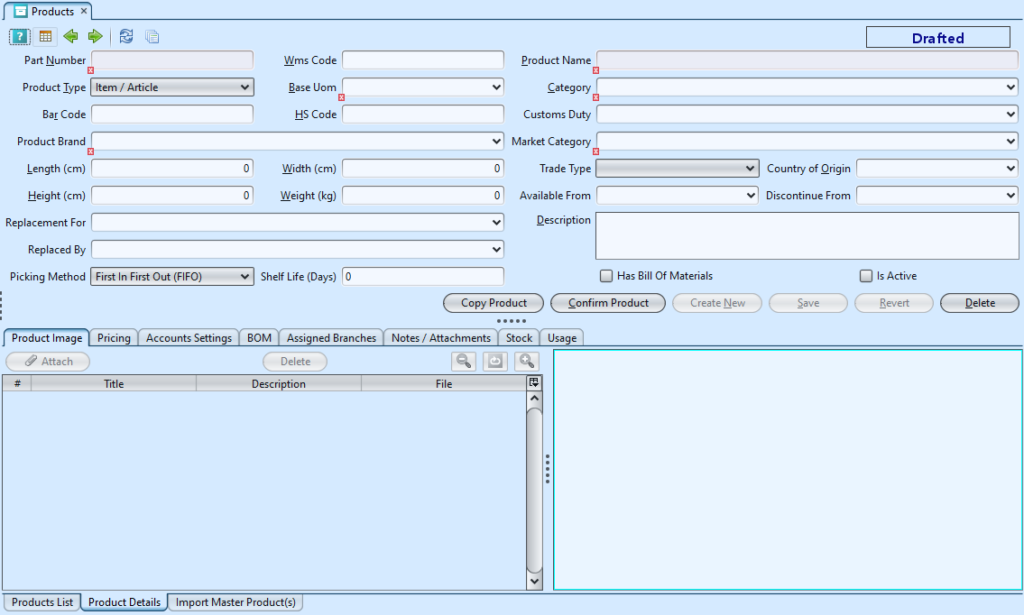
Products view allows user to create record of product’s (master) details and view it’s accounts settings. User can also see price lists associated with the product and usage. Below actions are available under “Products”:
![]() View the list of products by Account Category, Brands and Market
View the list of products by Account Category, Brands and Market
![]() Create, edit and delete products.
Create, edit and delete products.
![]() Copy and close the product
Copy and close the product
![]() Import master product(s)
Import master product(s)


Field Name |
Description |
Mandatory Information |
| Part Number | Code that uniquely identifies the product |
Y |
| WMS Code |
N |
|
| Product Name | Name of the product |
Y |
| Product Type | Select the type of product:
|
Y |
| UOM | Type of the item – Unit of Measure |
Y |
| Category | Select the category of the product |
Y |
| Bar Code | Bar code number |
N |
| HS Code |
N |
|
| Customs Duty | Select the duty’s fees if there is any apply to the product |
N |
| Product Brand | Select the brand of product |
Y |
| Market Category | Select the market category |
N |
| Length (cm) | Self-explanatory |
N |
| Width (cm) | Self-explanatory |
N |
| Height (cm) | Self-explanatory |
N |
| Weight (kg) | Self-explanatory |
N |
| Trade Type | Select trade type: Sales, Purchase, or both |
N |
| Country of Origin |
The country of manufacture or production where the product comes from. |
N |
| Available From | Start date of the product |
N |
| Discontinue From | End date of the product |
N |
| Replacement For | Self-explanatory |
N |
| Replaced By | Self-explanatory |
N |
| Description | Additional information for the product |
N |
| Has Bill of Materials | Tick the checkbox, if the item is a BOM / assembled product |
N |
| Is Active |
Tick the checkbox, if the product is active in the system and in use. |
N |
Create New Product:
1. Click on “Create New Product” at the top right of screen of “Products List” tab, it will open “Product Details” tab with empty form

2. Fill up product’s information on the top half of screen.

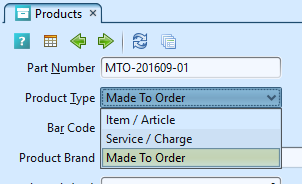
There are 3 product types:
- Item / Article: item type that may have both revenue and / or expense
- Service / Charge: service / charge rendered to customer / by vendor
- Made To Order: manufactured type of product, made order to be deliver to project customer

3. Click “Save” button at the bottom right side of screen to save
4. On “Pricing” tab, any price lists associated with the product will be automatically shown here when the price list was created, e.g. “Sales Price List”, “Purchase Price List”, etc.

5. Accounts settings for the product will be shown on “Account Setting” tab, these define the accounts to use for posting of sales & purchase transactions for this product

6. If the product is an assembled product type (“Has Bill of Materials” checkbox was ticked),“BOM” tab will be available for selection to add the BOM items (product’s parts). Enter the product’s info and click ![]() button to add the product into the BOM list for product assembly.
button to add the product into the BOM list for product assembly.
7. On “Assigned Branches” tab, a default branch (e.g. HQ) has been automatically assigned for the new product. To assign another branch for the product, select available branch from the bottom left table and click ” ![]() ” button in middle of screen
” button in middle of screen

8. Click on “Notes / Attachments” tab at the middle of screen to add notes or files attachment for the product
9. On “Stock” tab, the stock’s availability and movement will be updated automatically once there is any movement to the product’s inventory.
10. On “Usage” tab, the usage of the product will updated automatically if there is any usage for BOM / product assembly.
11. Click on “Confirm Product” button at the middle of the screen to confirm the item.
12. Optional: Click on “Copy Product” button at middle of the screen to quickly create a copy of product record.

13. User can close or reopen a product record. However, user is not allowed to edit product information when the product record is closed. Click on “Close Product” or “Reopen Product” button at middle of the screen in order to close or reopen the product.
Update Product Details:
1. On “Products List” tab, double click on product to be updated, it will bring up the details on “Product Details” tab for the selected product.
2. Make change(s) on the product’s information
3. Click on “Save” button at the bottom of screen to save
4. Click on “Revert” button at the bottom of screen or refresh icon at the top of the screen to roll back the changes
Delete Product:
1. On “Products List” tab, double click on product to be deleted, it will bring up the details on “Product Details” tab for the selected product.
2. Click on “Delete” button at the bottom of screen
3. Click on “Yes” button on the pop-up window to confirm record deletion

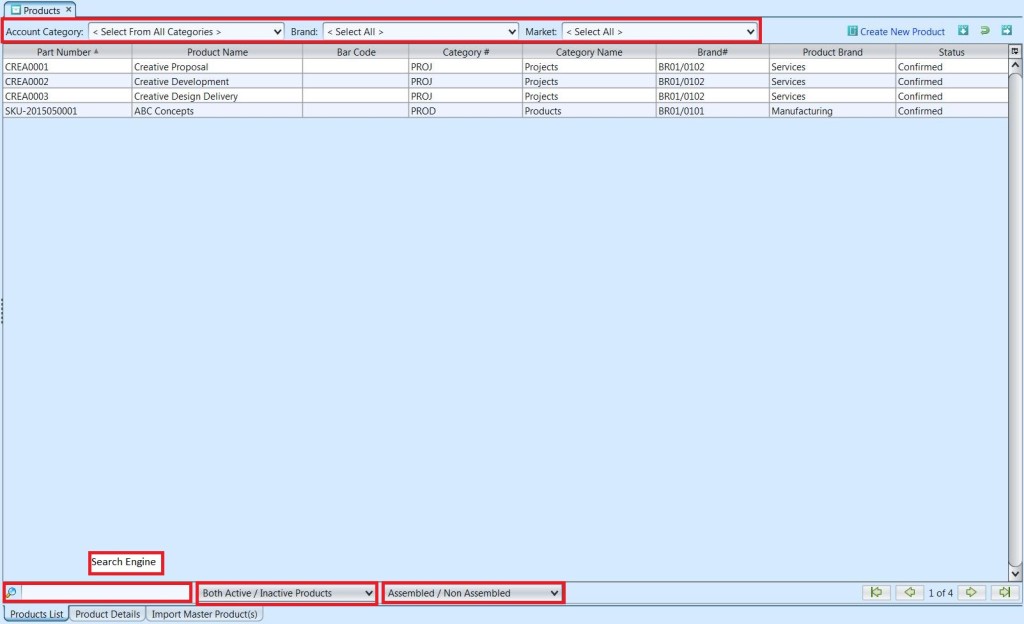
View and Search for Product Details:
1. Click on “Product List” tab at the bottom of screen
2. Enter search parameter to filter the result, i.e. type in which product to search for in the “Product” text field box or select from drop-down list
![]() Both Active / Inactive Products
Both Active / Inactive Products
![]() Assembled / Non Assembled Products
Assembled / Non Assembled Products
3. Result can be sorted alphabetically by clicking the fields’ columns
4. Double click on product to view full details of the product, it will bring up the details on “Product Details” tab for the selected product
5. In the products list view if you select a product (row) and right-click on the mouse, a menu will pop-up with options available for the selected product

The users will have the following options:
![]() Show Product Purchase Analysis
Show Product Purchase Analysis
![]() Make Selected Product(s) Active
Make Selected Product(s) Active
![]() Make Selected Product(s) Inactive
Make Selected Product(s) Inactive
![]() Confirm Product (if product status is drafted / not yet confirmed)
Confirm Product (if product status is drafted / not yet confirmed)


