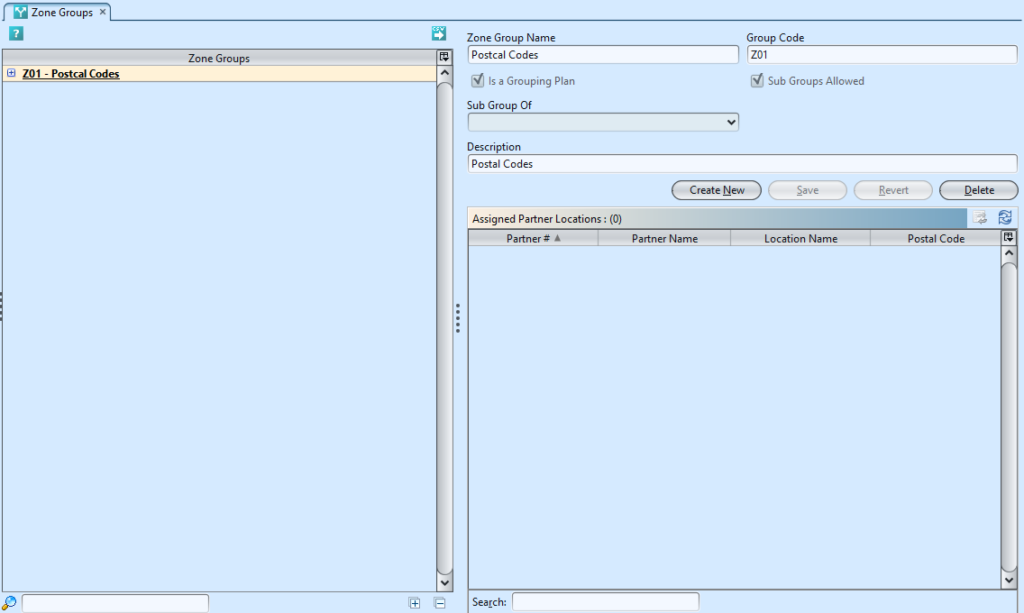
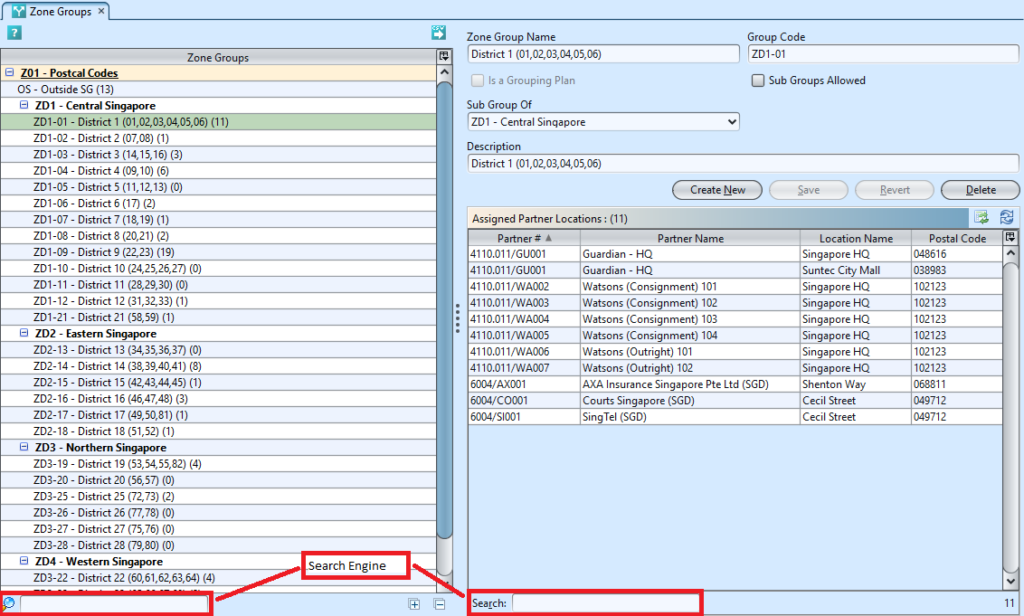
The purpose of Zone Groups view is to manage company’s partners’ locations (e.g. vendors, customer, and employees) into zones. By managing partners’s delivery locations into certain zones or districts, it allows users to quickly sort their order to cash transactions documents according to the defined areas and take actions on these more efficiently, i.e. manage processing time / delivery management.
Below actions are available under “Zone Groups”:
![]() Create new group; update, delete, view and search for details.
Create new group; update, delete, view and search for details.
Field Name |
Description |
Mandatory Information |
| Zone Group Name | Name of the zone group |
Y |
| Group Code | Custom code for the group |
Y |
| Is a grouping plan | Tick the checkbox if it is a grouping plan |
N |
| Subs groups allowed | Tick the checkbox if it allows subs group |
N |
| Sub Group of | Select the main/parent zone group |
N |
| Description | Description |
N |
Create New Group
1. Click “Create New” button at the right side of screen
2. Fill up zone group’s information
3. Tick on “Is a Grouping Plan” box if it is a master group plan. The “Sub Groups Allowed” box will be automatically ticked to allow creation of sub groups under the group
4. Tick on “Sub Groups Allowed” box to allow creation of sub groups under the group
5. Choose a (parent) group from “Sub Group Of” drop-down list to assign the group under the selected (parent) group
6. Click “Save” button at the bottom of screen to save
Assigned Zone Groups
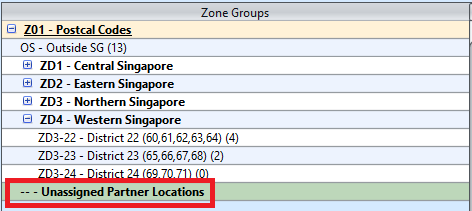
1. Click the “Unassigned Partners Locations” at the list of Zone Group
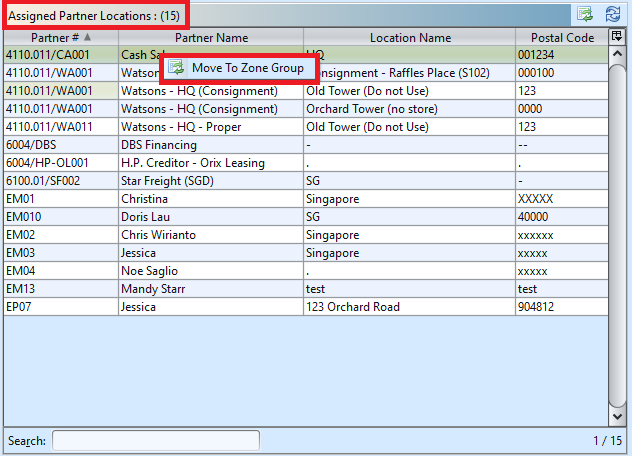
2. Right click on the mouse on a partner location in the “Assigned Partners” table and select “Move to Zone Group”.
User can sort the partner locations list accordingly, i.e. click on “Postal Code” to sort by the locations’ postal codes.
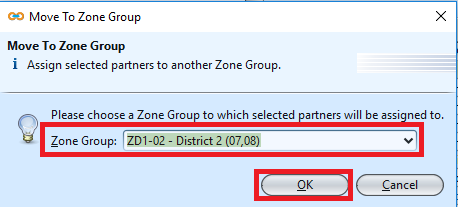
3. Choose a Zone Group and click “Ok”
Update Group Details
1. Click on a group to be updated, it will bring up the selected group details on the right side of the screen
2. Right click on assigned partner in “Assigned Partners Locations” table at the bottom right of screen, and select “Move to Zone Group” to reassign it to another group. It will pop up a window with list of available zone groups to choose from
3. Click “Save” button at the bottom of the screen when done with the updates
Delete Group
1. Click on a group to be deleted, it will bring up the selected group on the right side of the screen
2. Click on “Delete” button at the right side of screen
3. Click on “Yes” button on the pop-up window to confirm group deletion
View and Search for Group Details
1. Enter search parameter to filter the result, i.e. type in the group name in the search textfield box at the bottom of the screen.
2. Click on a group to view, it will bring up the selected group details on the right side of the screen
3. Click ![]() button on top of screen to export the zone groups as CSV file
button on top of screen to export the zone groups as CSV file


