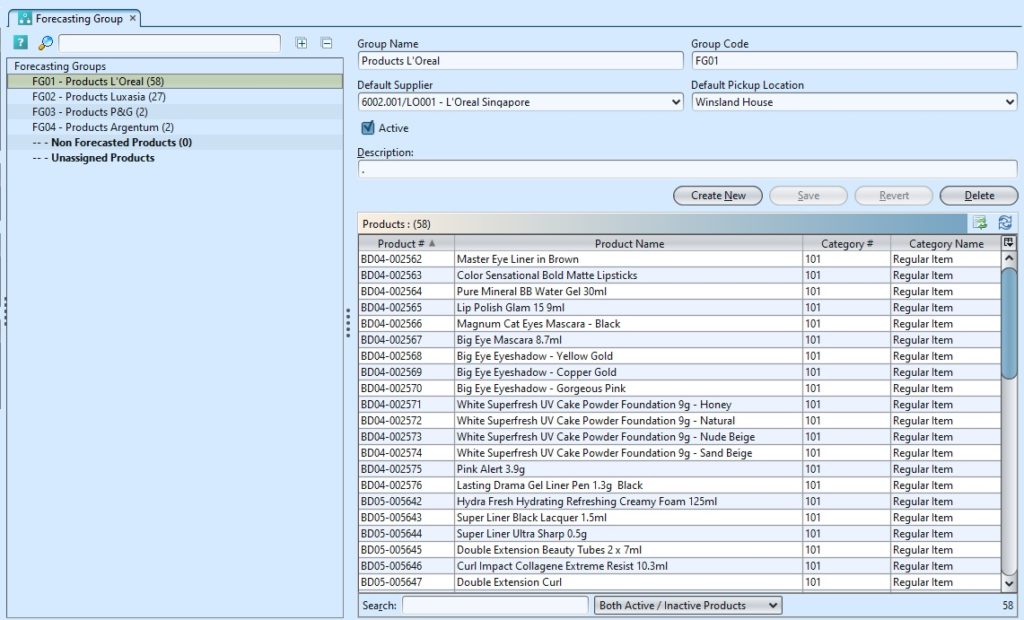
The purpose of the forecasting group is to allow the user to create forecast for the group of products, which will be analyzed in order to create the supply requirements. Below are available actions for the user from “Forecasting Group” :
![]() Create new, revert and delete the forecasting group
Create new, revert and delete the forecasting group
![]() View and search group details
View and search group details
Field Name |
Description |
Mandatory Information |
| Group Name | Name for the group |
Y |
| Group Code | Alpha Numeric Code |
Y |
| Default supplier | Self-explanatory |
Y |
| Default picking location | Self-explanatory |
Y |
| Description | Self-explanatory |
N |
Create New Forecasting Group
1. Click “Create New” button at the right side of screen
2. Fill up the information on the form on the right side of the screen
3. Click “Save” button at the right side of screen when done.
Update Forecasting Group Details
1. Double click on group to be updated, it will bring up the selected group details on the right side of the screen
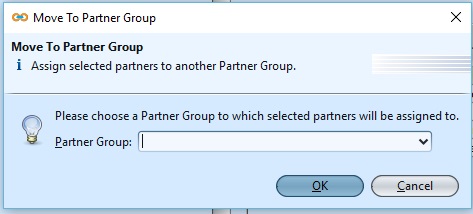
2. Right click on assigned partner in “Products” table at the bottom right of screen, and select “Move to Forecasting Group” to reassign it to another group. It will pop up a window with list of available partner group to choose from
3. Alternatively, user is allows to move the partner group by click the ![]() icon at the right site of the screen.
icon at the right site of the screen.
4. Click “Save” button at the bottom of the screen when done with the updates
Delete Forecasting Group
1. Double click on group to be deleted, it will bring up the selected group on the right side of the screen
2. Click on “Delete” button at the right side of screen
3. Click on “Yes” button on the pop-up window to confirm group deletion
*Note: Please make sure that don’t have any products assigned under the particular forecasting group, or else it will move to unassigned group automatically.
View and Search for Forecasting Group Details
1. Enter search parameter to filter the result, i.e. type in the group name in the search textfield box at the bottom left of the screen.
2. The drop down menu Both Active/Inactive Products allows the user to select and work with the statuses of the products.
2. Double click on group to view, it will bring up the selected group details on the right side of the screen
3. Right click on assigned products in the bottom right table to open and view it’s details.


