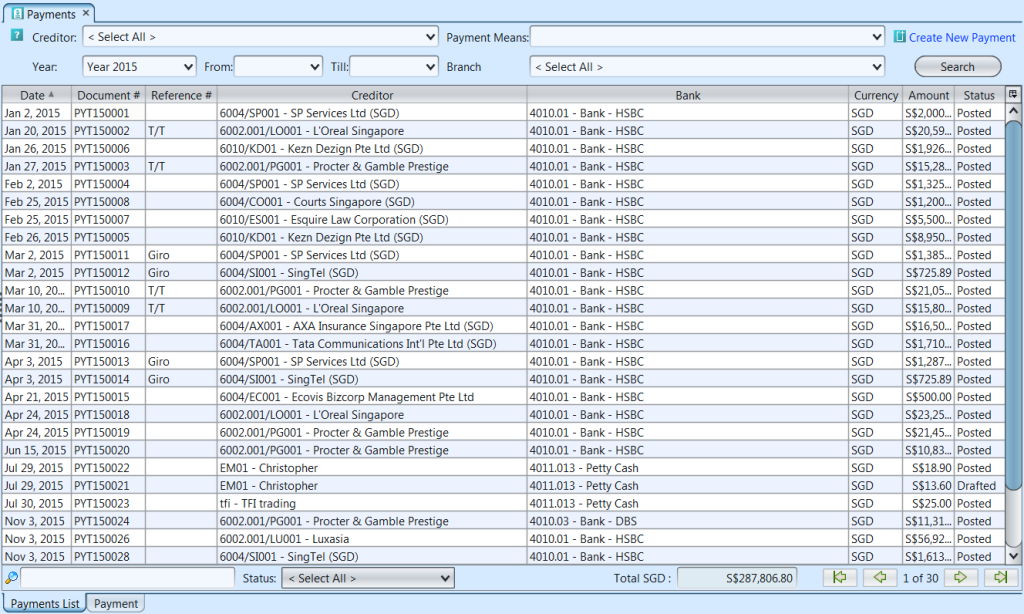
A payment is the transfer of an item of value from one party (such as a person or company) to another in exchange for the provision of goods, services. Below actions are available from “Payments”:
![]() Create new payment; update, delete, view and search for payment details
Create new payment; update, delete, view and search for payment details
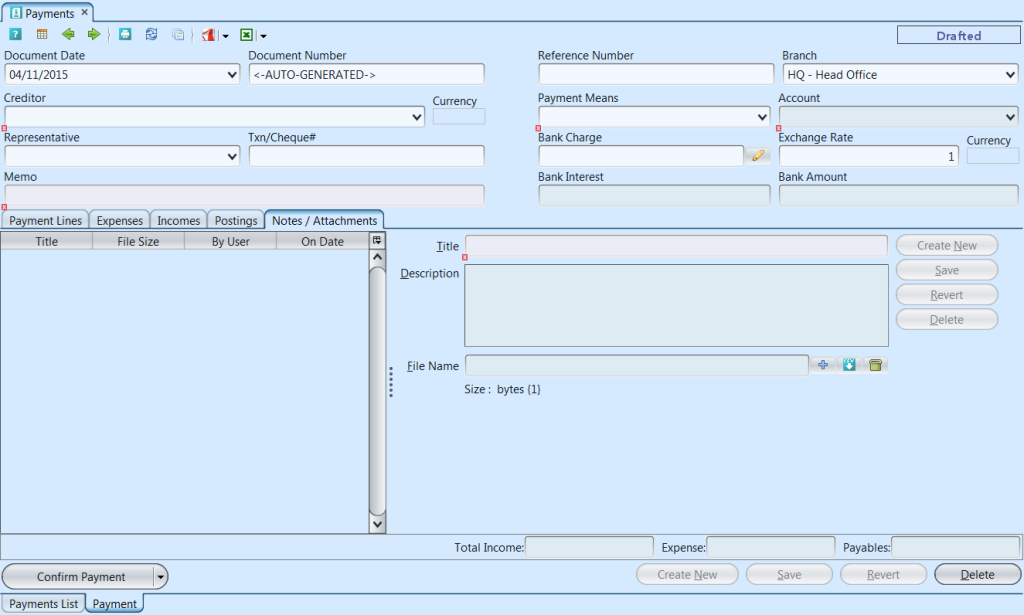
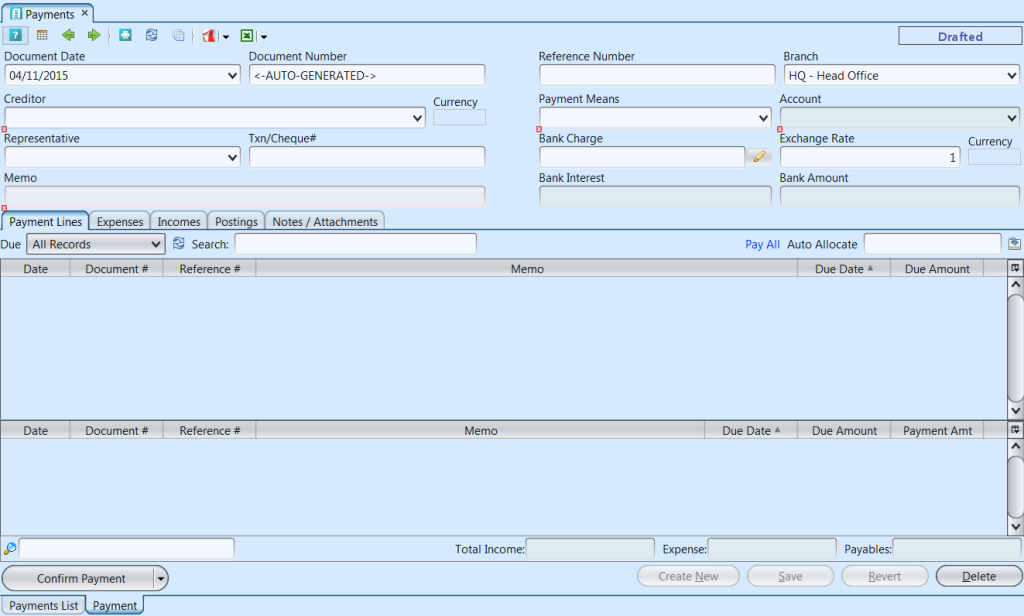
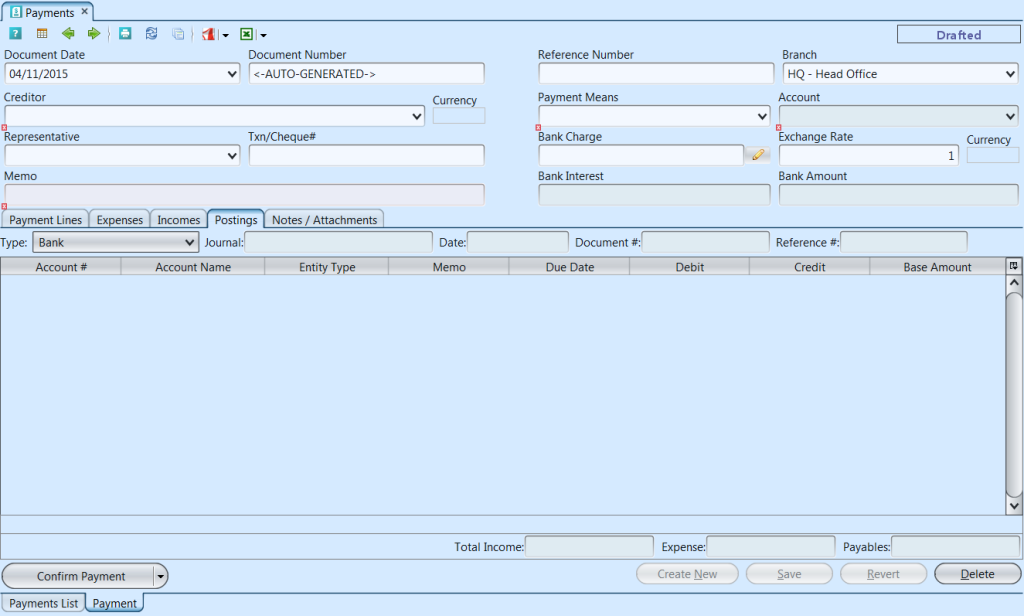
Field Name |
Description |
Mandatory Information |
| Document Date | Date of the payment |
Y |
| Document Number | Document number for the payment |
Y |
| Reference Number | Reference code for easy search |
N |
| Branch | Company’s branch |
Y |
| Creditor | Select the creditor to issue the payment. (Once user select a creditor, the creditor’s base currency will automatically show up) |
Y |
| Payment Means | Select the payment means. (Once user select a payment means, the account and currency info will automatically fill up) |
Y |
| Account | Account for the payment |
Y |
| Representative | Internal representative |
N |
| Txn/Cheque # | Transaction / Cheque number |
Y |
| Memo | A memorandum for the payment |
Y |
| Bank Charge | A fee levied on an account by a financial institution. |
N |
| Bank Amount | Company’s bank amount |
N |
Create New Payment
1. Click on “Create New Payment” at the top right of screen of “Payments List” tab, it will open “Payment” tab with empty form
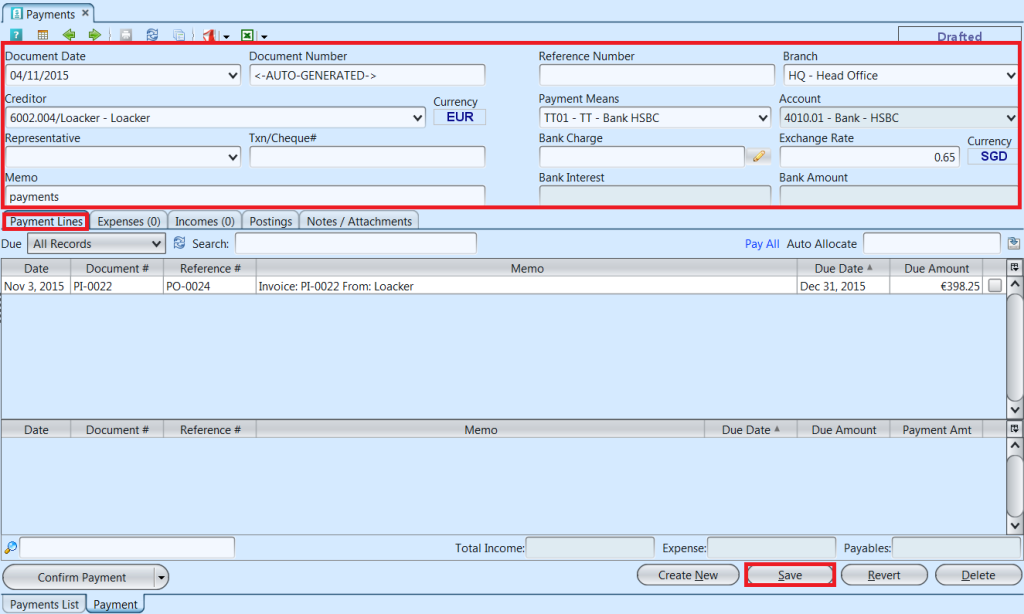
2. Select a creditor from the “Creditor” drop-down list on top right side of screen. It will pull up all payments due to the creditor on “Payment Lines” tab
3. Fill up payment’s information with payment means for the creditor (top right of screen) and click “Save” button
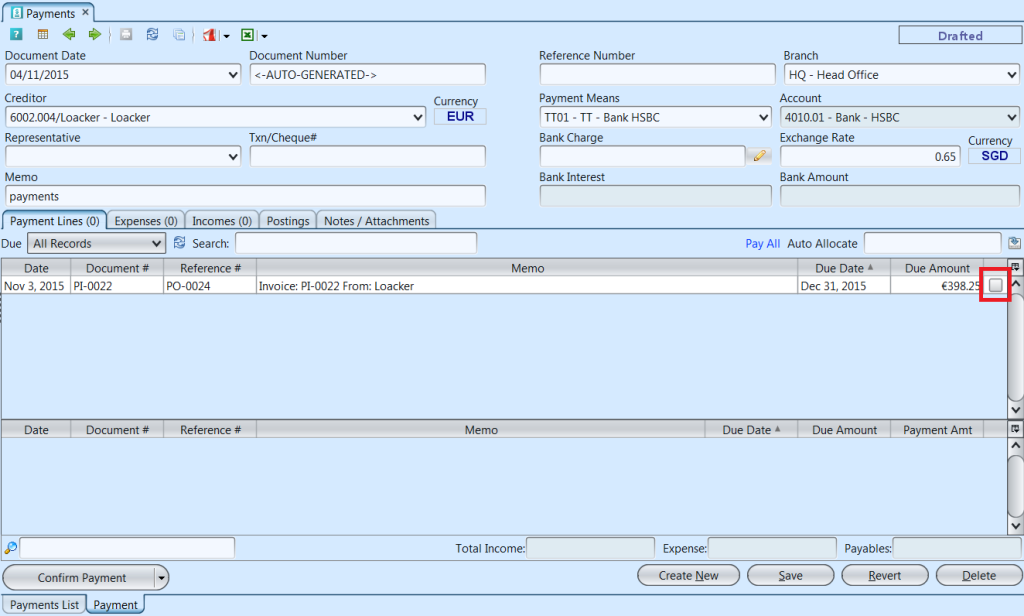
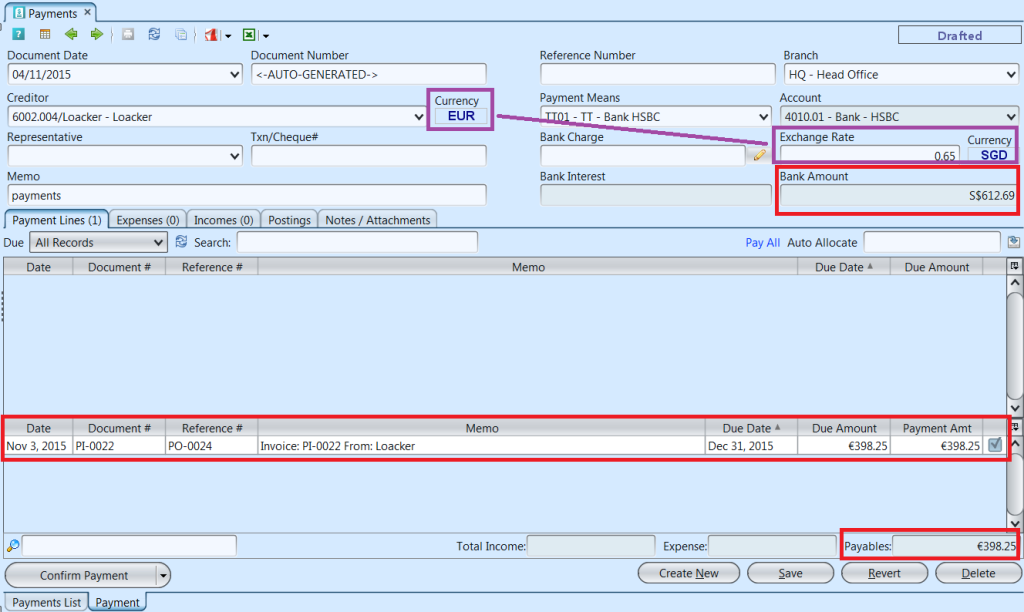
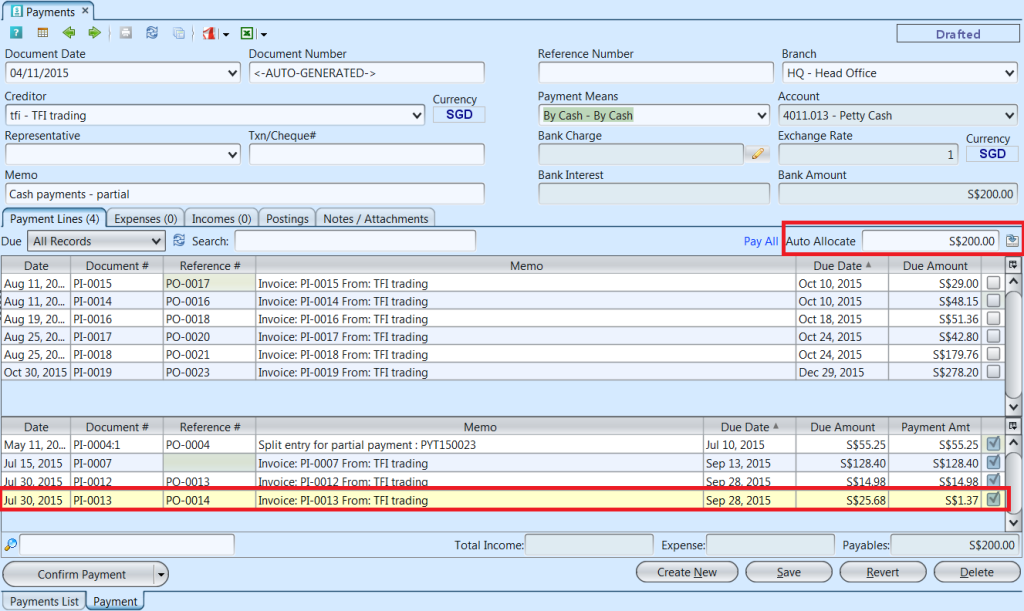
4. Tick the box behind a payment line to change the status to “paid” to acknowledge payment made for the payment(s) owed. It will move the payable(s) to the bottom table and update the “Bank Amount” balance (top right of screen). Payment using different currency will be converted based on the set “Exchange Rate”
User can make partial payment for the invoices, by entering the payment amount in the “Auto Allocate” textfield and clicking the ![]() button next to it. The system will automatically select oldest invoice(s) to be paid first. If there is any balance, one of the invoice will be paid partially and highlighted in yellow color. After posting the payment, this invoice will have memo indicating the partial payment made for it.
button next to it. The system will automatically select oldest invoice(s) to be paid first. If there is any balance, one of the invoice will be paid partially and highlighted in yellow color. After posting the payment, this invoice will have memo indicating the partial payment made for it.
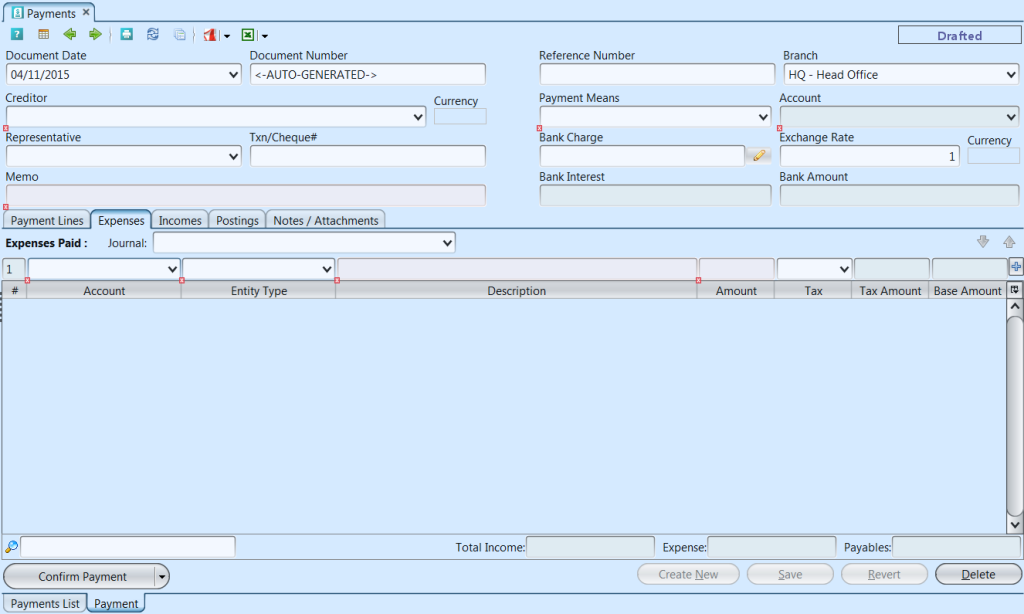
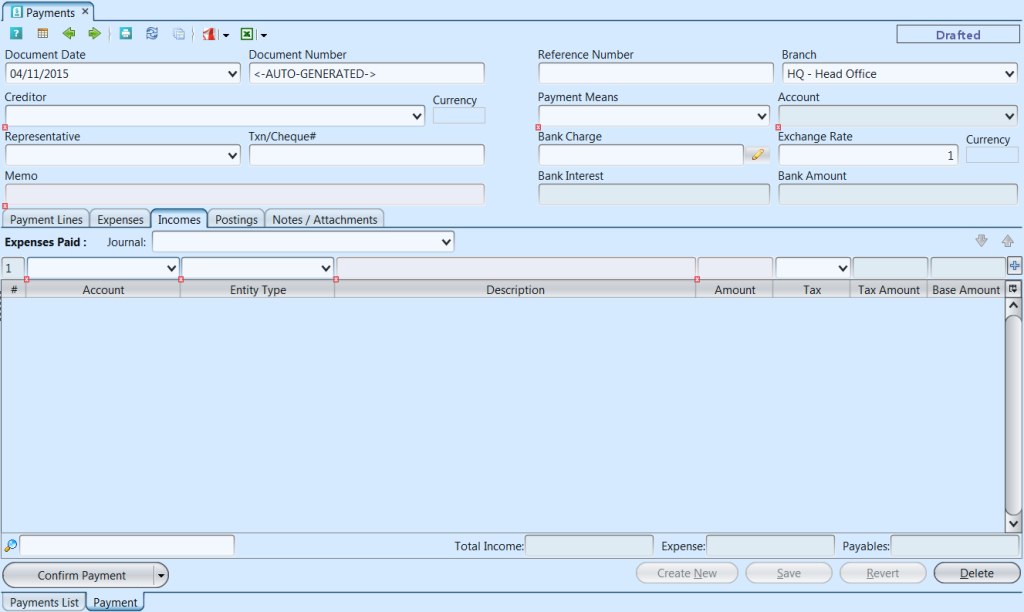
5. Click on “Expense” and / or “Income” tab at the middle of screen to add journal entry for the creditor if any
6. Click on “Notes / Attachments” tab at the top of screen to add notes or files attachment for the payment
7. Click on “Save” button at the bottom of screen to save
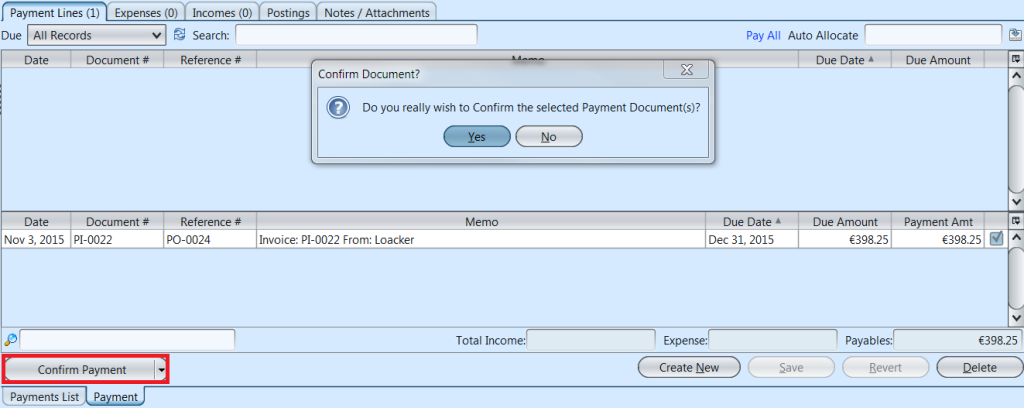
8. Click on “Confirm Payment” button at the bottom of screen to confirm the payment
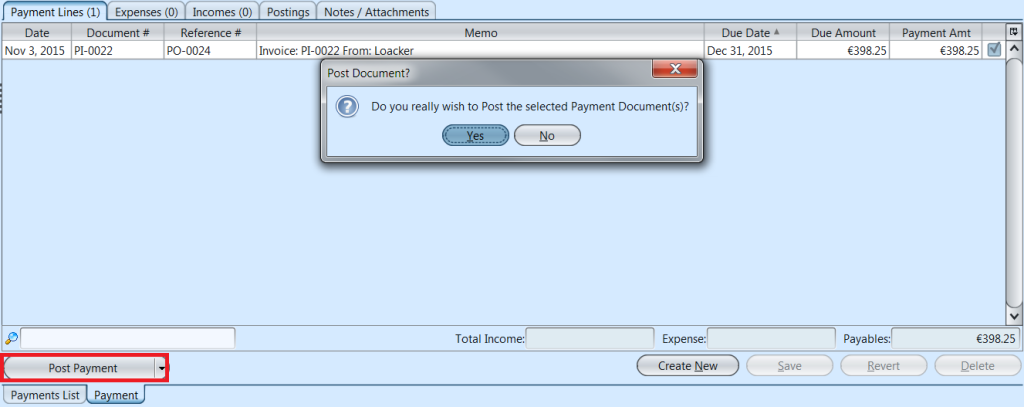
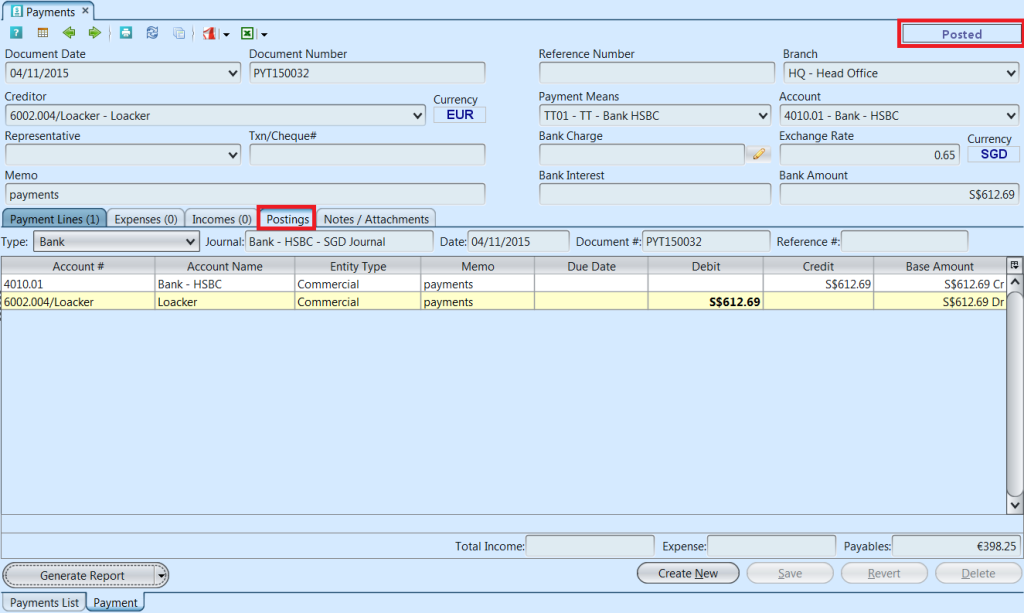
9. Click on “Post Payment” button at the bottom of screen to post the payment. Journal entries for the reconciled payments will be automatically created under “Postings” tab
Update Payment Details
1. Click on “Payments List” tab at the bottom of screen
2. Double click on payment to be updated, it will bring up the details on “Payment” tab for the selected payment. If a payment’s status is “Confirmed” or “Posted”, right click on the payment and reopen / undo posting of the payment first
3. Make change(s) on the payment information
4. Click on “Save” button at the bottom of screen to save
5. Click on “Revert” button at the bottom of screen or refresh icon at the top of the screen to roll back the changes
6. Click on “Confirm Payment” button at the bottom of screen to confirm the payment
7. Click on “Post Payment” button at the bottom of screen to post the payment
Delete Payment
1. Click on “Payments List” tab at the bottom of screen
2. Double click on payment to be deleted, it will bring up the details on “Payment” tab for the selected payment. If a payment’s status is “Confirmed” or “Posted”, right click on the payment and reopen / undo posting of the payment first
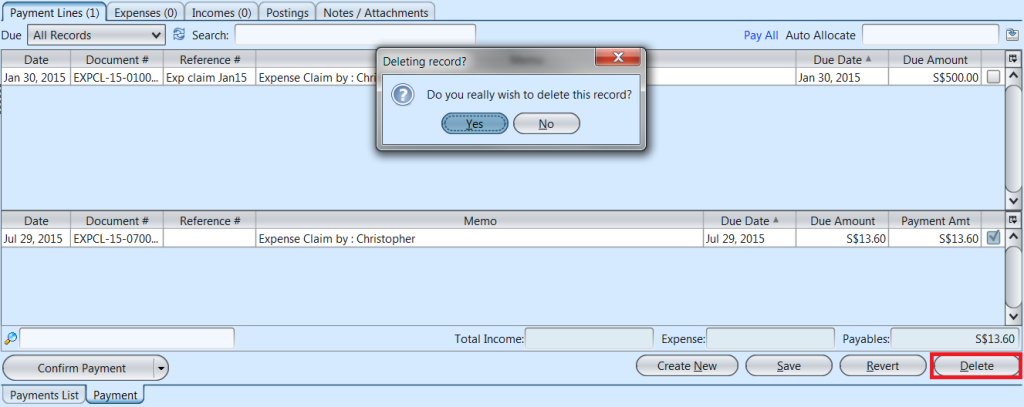
3. Click on “Delete” button at the bottom right side of screen
4. Click on “Yes” button on the pop-up window to confirm payment deletion
View and Search for Payment Details
1. Click on “Payments List” tab at the bottom of screen
2. Enter search parameter to filter the result, i.e. type in which creditor to search for in the “Creditor” text field box or select from drop-down list
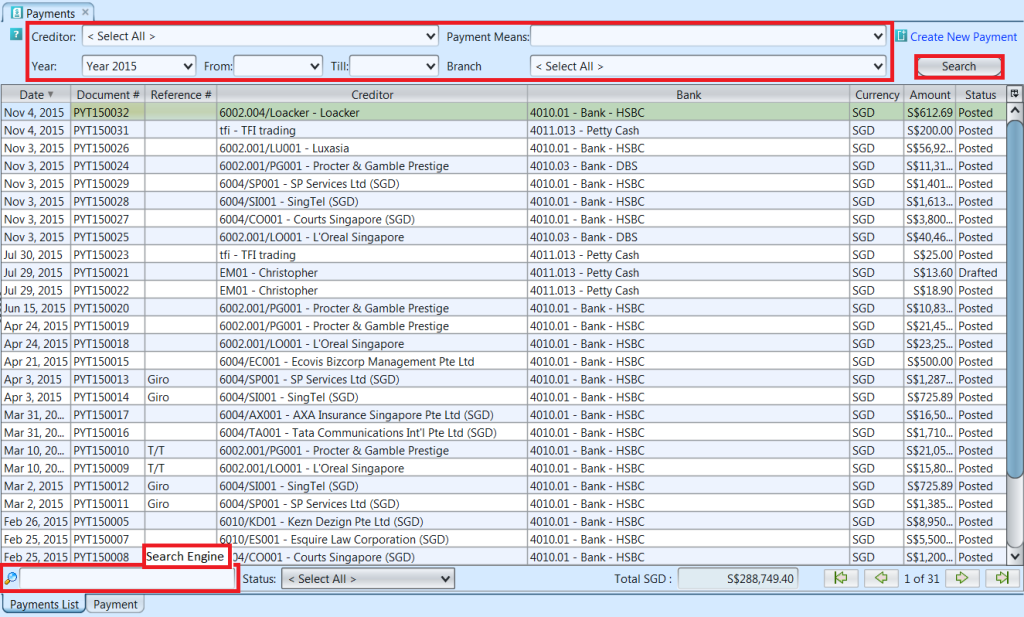
3. Result can be sorted alphabetically by clicking the fields’ columns
4. Double click on payment to view full details of the payment, it will bring up the details on “Payment” tab for the selected payment


