Goods Delivery view allows user to manage and process goods delivery for outbound items after packing process. User can also set date, time, and assign which employee to deliver the goods using “Delivery Planning” feature.
Below are available actions for the user from “Goods Delivery” :
![]() Confirm the goods delivery, save, revert and delete.
Confirm the goods delivery, save, revert and delete.
![]() View and search goods delivery details
View and search goods delivery details
![]() Manage the delivery planning
Manage the delivery planning
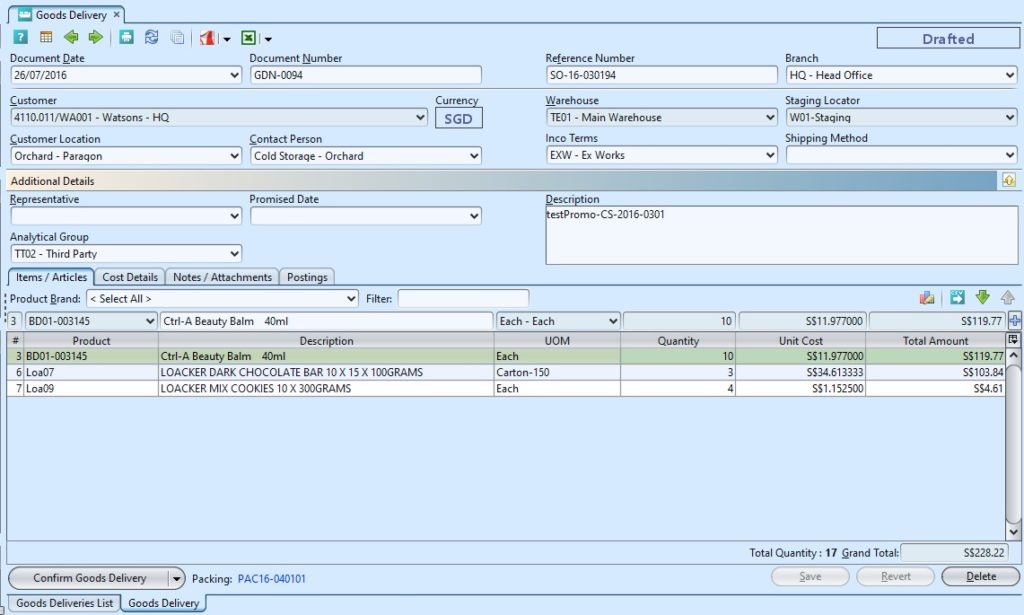
| Field Name | Description | Mandatory Information |
| Document Date | Specify the date | Y |
| Document Number | Self-explanatory | Y |
| Reference Number | Reference code for easy search | N |
| Branch | Self-explanatory | Y |
| Customer | Self-explanatory | Y |
| Currency | Currency used by the customer | Y |
| Warehouse | Self-explanatory | Y |
| Staging Locator | Staging location of the item(s) in the warehouse | Y |
| Customer Location | Self-explanatory | Y |
| Contact Person | Self-explanatory | N |
| Inco Terms | Self-explanatory | Y |
| Shipping Methods | Self-explanatory | N |
| Representative | Self-explanatory | N |
| Promised dates | Self-explanatory | N |
| Description | Free text | N |
| Analytics Group | Group Reporting | N |
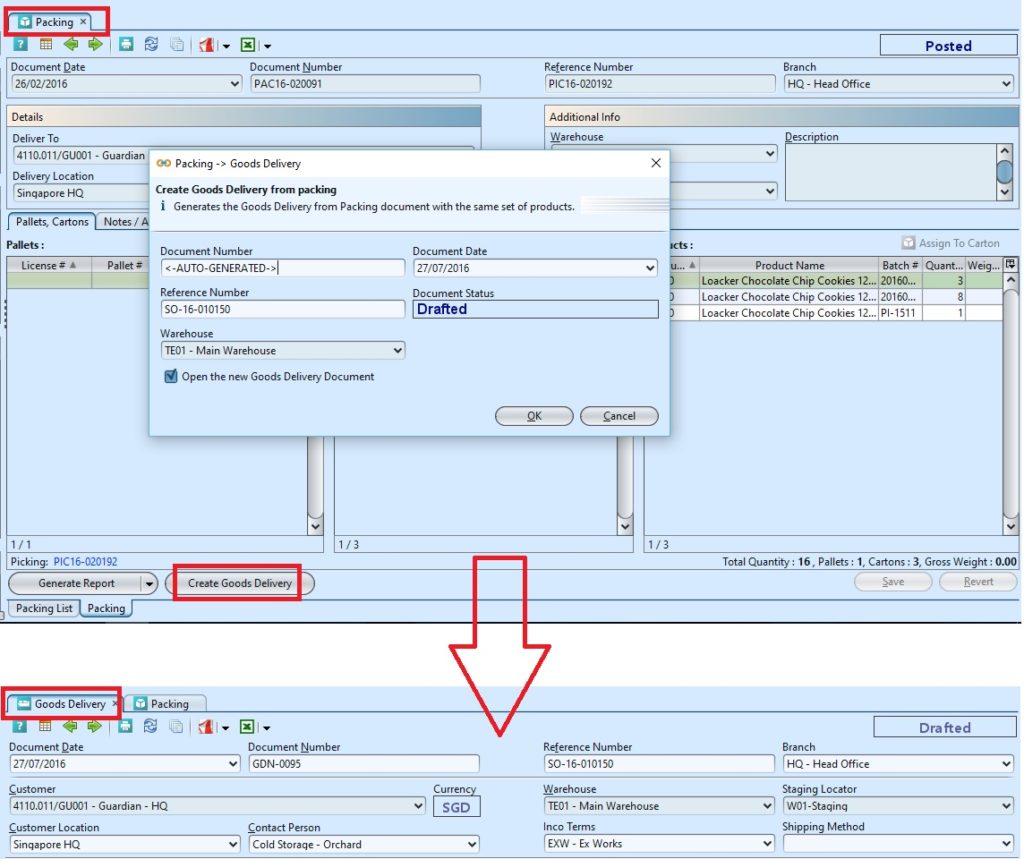
Generate Goods Delivery:
1. User generate goods delivery document through “Inventory – (Outbound) Packing” by clicking “Create Goods Delivery” button at the bottom left of screen of the packing document.
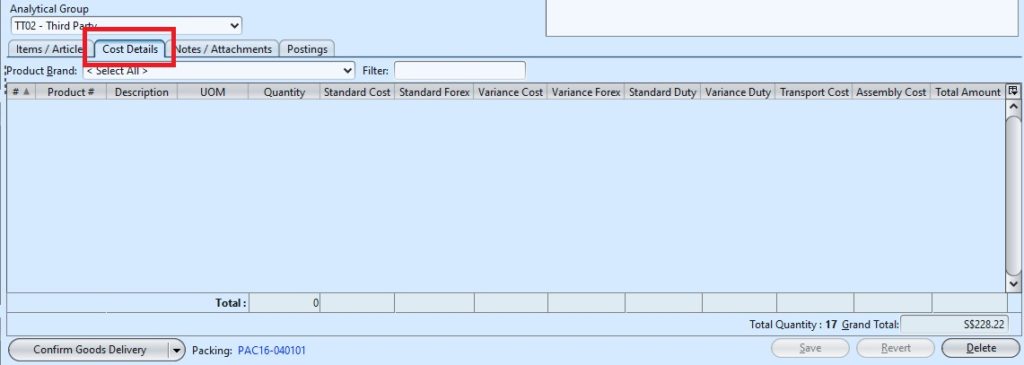
2. The cost details for the item will be automatically generated under “Cost Details” tab if there is any cost.
3. Optional: Click on “Notes / Attachments” tab at the middle of screen to add notes or files attachment
4. Click “Save” button at the bottom right side of screen to save
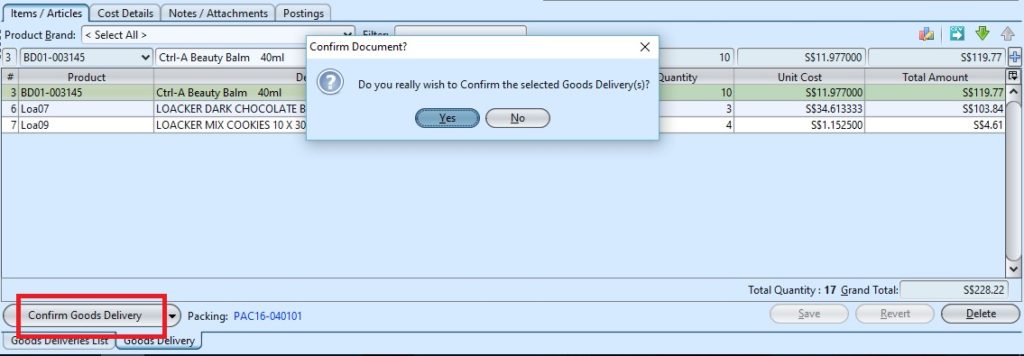
5. Click on “Confirm Goods Delivery” button at the bottom of screen to confirm the the goods delivery.
6. Click on “Post to Account” button at the bottom of screen to post to account.
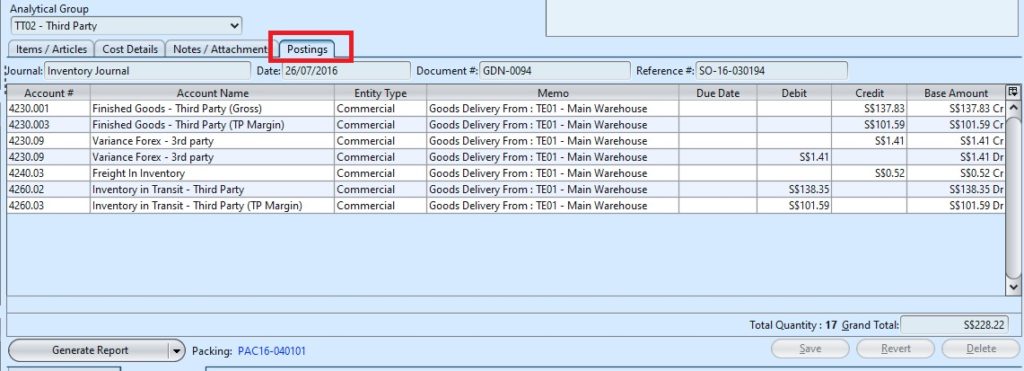
7. Click on “Posting” tab at the middle of screen to view the details.
8. Click arrow on ![]() button on bottom left screen to generate report.
button on bottom left screen to generate report.
Update Goods Delivery
1. Click on “Goods Deliveries List” tab at the bottom of screen
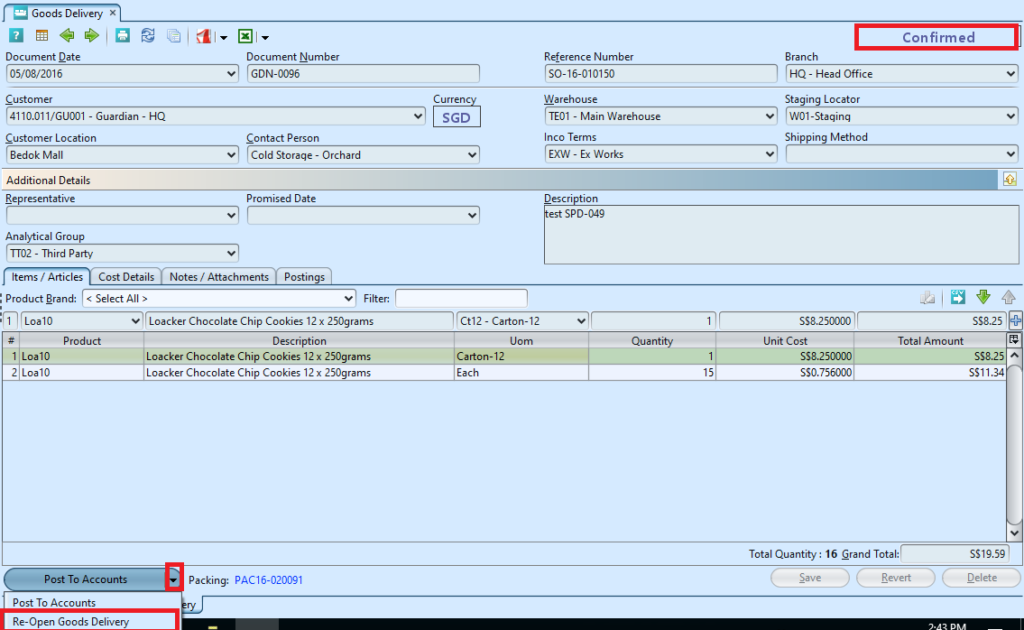
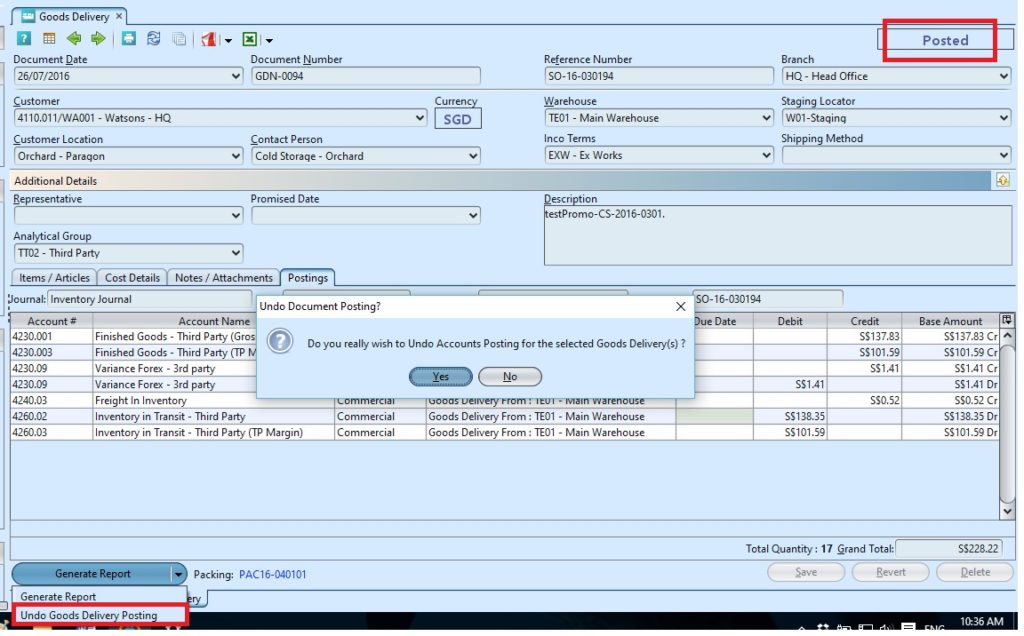
2. Double click on goods delivery document to be updated, it will bring up the details on“Goods Delivery” tab for the selected document. If the goods delivery’s status is “Posted” or “Confirm”, click arrow on “Generate Report” button at the bottom left of screen and reopen / undo approval of the document first.
3. Click “Save” button at the bottom right side of screen
4. Click on “Confirm Goods Delivery” button at the bottom of screen to confirm the the goods delivery.
5. Click on “Post to Account” button at the bottom of screen to post to account.
Delete Goods Delivery:
1. Click on “Goods Deliveries List” tab at the bottom of screen
2. Double click on goods delivery document to be deleted, it will bring up the details on“Goods Delivery” tab for the selected document. If the goods delivery’s status is “Posted” or “Confirm”, click arrow on “Generate Report” button at the bottom left of screen and reopen / undo approval of the document first.
3. Click on “Delete” button at the bottom right side of screen
4. Click on “Yes” button on the pop-up window to confirm goods delivery document deletion
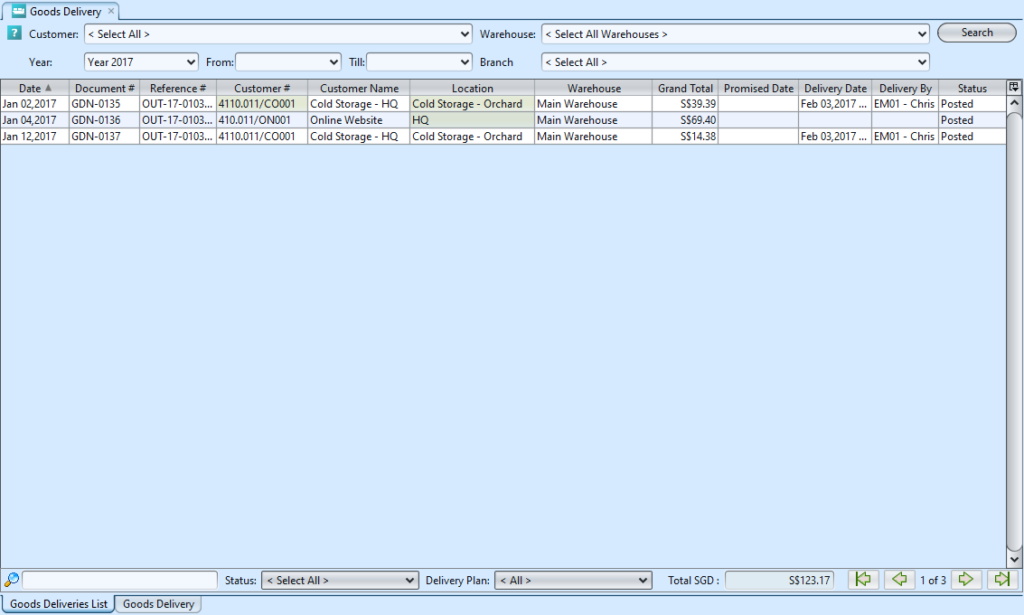
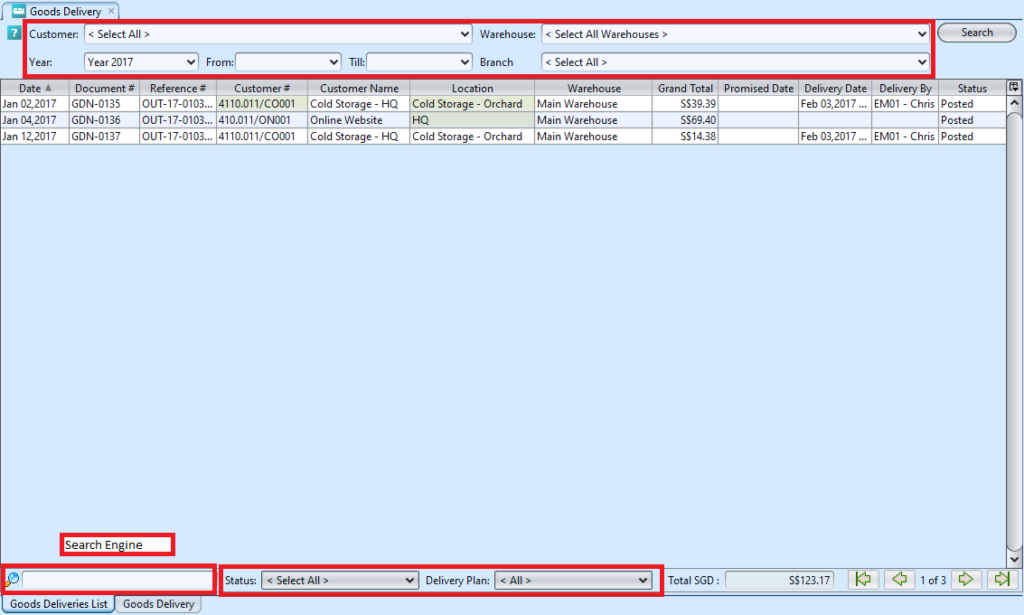
View and Search for Goods Deliveries Details:
1. Click on “Goods Deliveries List” tab at the bottom of screen
2. The user will be able to filter the list by Customer, Warehouse, Year and Date range and by Branch.
3. User can do a free style search of the delivery and also select the the records from the “Status” drop-down list for Drafted / Confirmed, Drafted, Confirmed and Posted.
4. Result can be sorted alphabetically by clicking the fields’ columns
5. Double click on goods delivery to view full details of the document, it will bring up the details on “Goods Delivery” tab for the selected document.
Update Goods Delivery’s Delivery Plan:
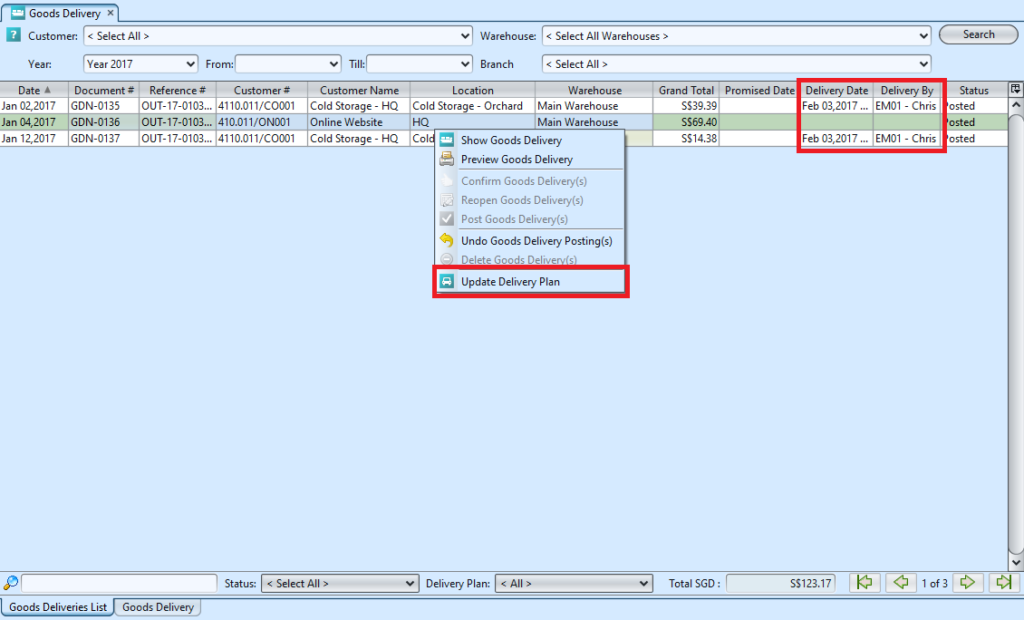
1. Select “Goods Deliveries List” tab at the bottom of screen. From the Goods Delivery List View, select the Goods Deliveries for which you want to update the delivery plan. Please note that this feature is access controlled and you need to have your administrator granting you the relevant access.
2. Select a document line, then right-click and select ‘Update Delivery Plan” option. User can select more than 1 document line to update delivery plan for multiple Goods Delivery documents. This will add “Delivery Date” and “Delivery By” values to the Goods Delivery document (see list view snapshot below)
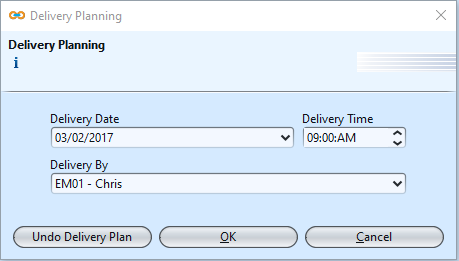
3. Enter “Delivery Date”, “Delivery Time”, and “Delivery By” then press OK button. This will set the status of the good delivery as “Planned”
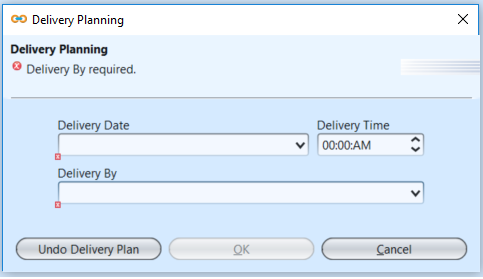
Optional: This can also be used to undo the Delivery Planning, to clear the delivery plan, if user need to cancel or postpone the goods delivery. This will set the status of the good delivery as “To Be Planned”
Click “Undo Delivery Plan” button to clear the delivery planning fields / values for the selected Goods Delivery document(s).
4. User can then filter the list of Goods Delivery document using the available filter or sort by the “Delivery Date” or “Delivery By” column.


