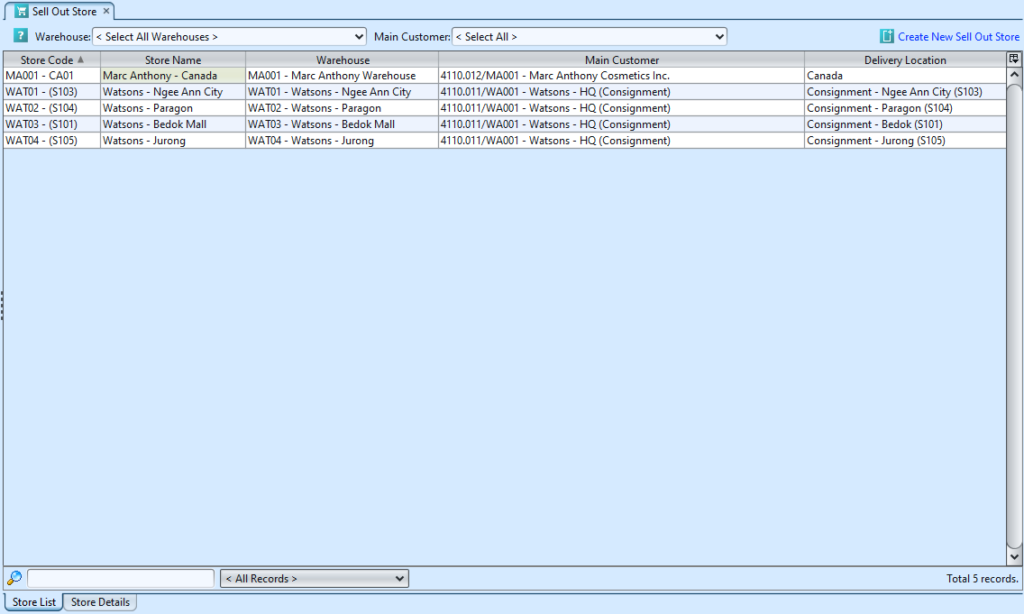
Sell Out Store is a store of agent / distributor who buys products from the company and sell them to other stores / customers e.g in a franchise / consignment operation; user can create records of stores in GOOMI for customers which manage offtake store sales (sales from retailers to the customers).
Sell Out Store will create links between the following:
- Warehouse
Warehouse that was defined as “Consignment Type” (see Inventory – (Masters) Warehouse) - Main Customer
Customer that was assigned to the selected Warehouse above and “Manage Store Sales” (see Accounts – (Masters) Customers) - Delivery Location
Delivery location that was defined in the selected Main Customer above (see Accounts – (Masters) Customers)
Below actions are available under “Sell Out Store”:
![]() Create records of sell-out stores for customers which manage offtake store sales
Create records of sell-out stores for customers which manage offtake store sales
![]() Update, delete, view and search for sell-out store details
Update, delete, view and search for sell-out store details
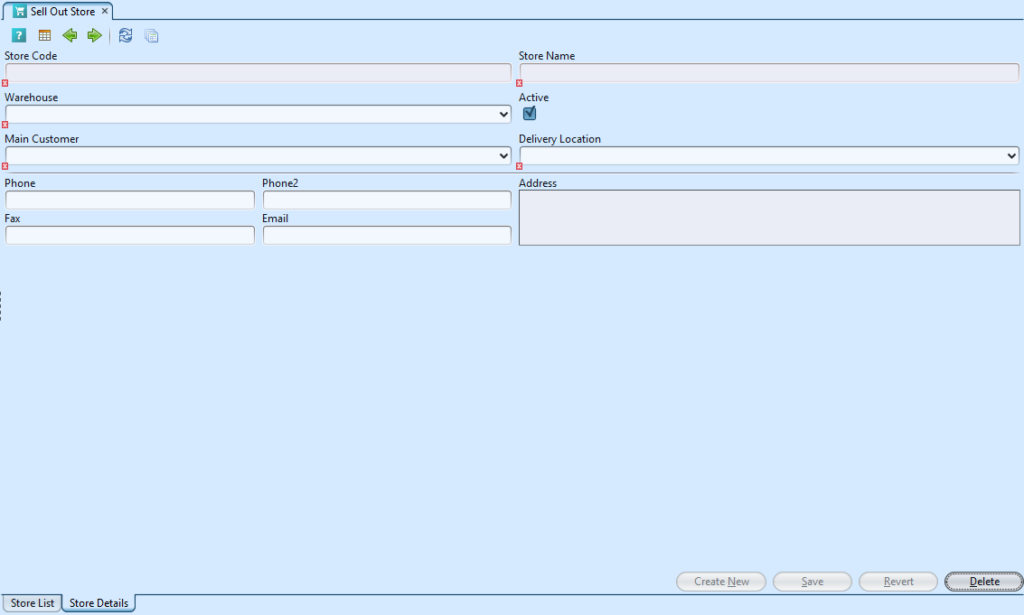
Field Name |
Description |
Mandatory Information |
| Store Code | Custom code for the store |
Y |
| Store Name | Name of store |
Y |
| Warehouse | Warehouse of the store |
Y |
| Active | Status of the store |
Y |
| Main Customer | Customer which manage offtake sales (for the selected Warehouse) |
Y |
| Delivery Location | Delivery Location of the Store (as defined in the selected Main Customer) |
Y |
| Phone / Phone2 | Contact number of store |
N |
| Fax | Fax number of store |
N |
| Email address of store |
N |
|
| Address | Store’s address |
Y |
Create New Store
1. Click “ Create New Sell Out Store” button on bottom right of “Store Details” tab to create a new store record, it will create new empty form
2. Fill up store’s information
*Note:
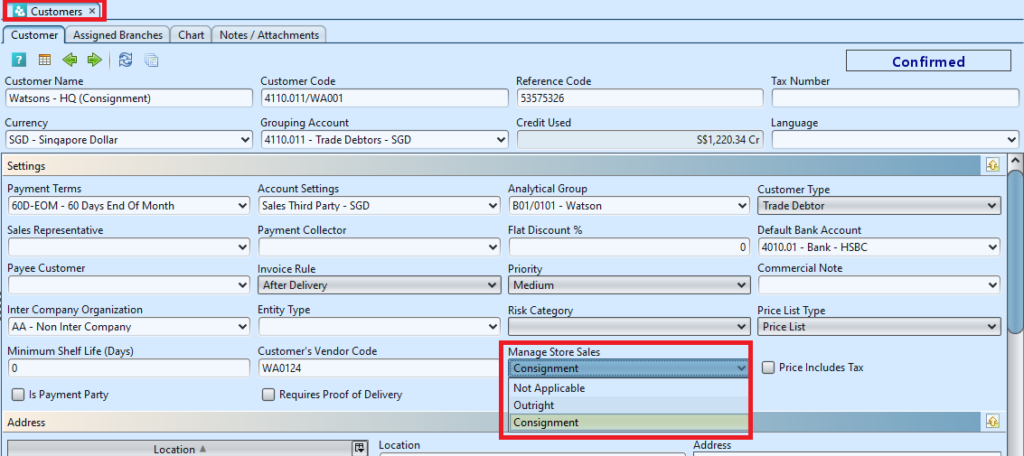
a. During customer’s record creation using “Accounts – (Masters) Customers”, user must select either “Outright” or “Consignment” option in the “Manage Store Sales” list for the customer to be available as selection for “Main Customer” in “Sales – (Masters) Sell Out Store”

b. In the Inventory – (Masters) Warehouse, warehouse must be set as “Consignment Type” and the customer must be assigned to the warehouse
3. Click “Save” button at the bottom of screen to save
Update Store Details
1. On “Store List” tab double click on store to be updated, it will bring up the details on “Store Details” tab for the selected store
2. Make change(s) on the store’s information
3. Click on “Save” button at the bottom of screen when done
4. Click on “Revert” button at the bottom of screen or refresh icon at the top of the screen to roll back the changes
Delete Store
2. Click on “Delete” button at the bottom of screen
3. Click on “Yes” button on the pop-up window to confirm record deletion
View and Search for Store Details
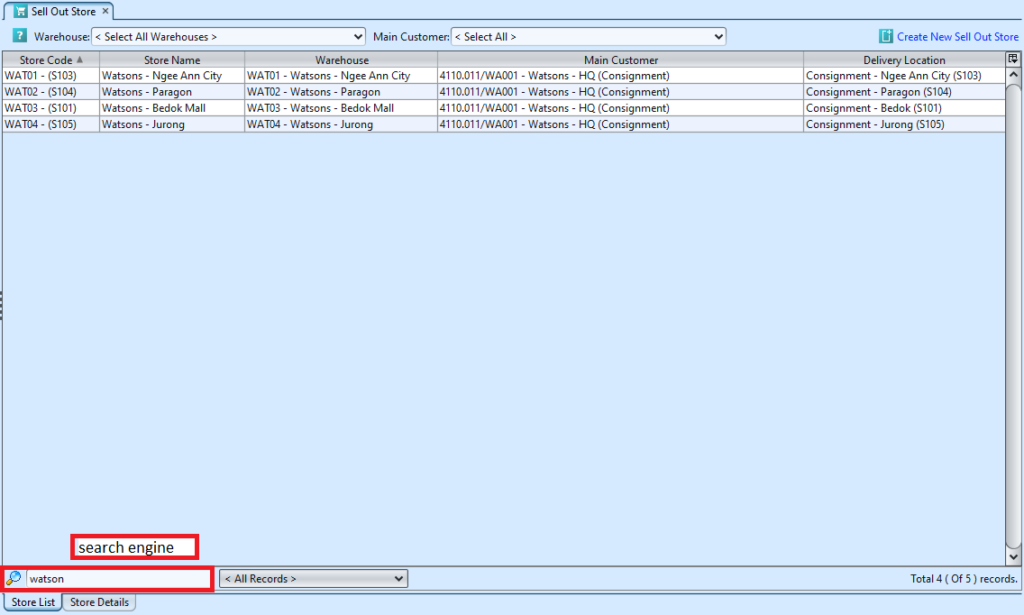
1. On “Store List” tab enter search parameter in the search text field box at bottom left of screen to filter the result, i.e. type in name of the store
2. Result can be sorted alphabetically by clicking the fields’ columns
3. Double click on store to view full details of the store, it will bring up the details on “Store Details” tab for the selected store


