


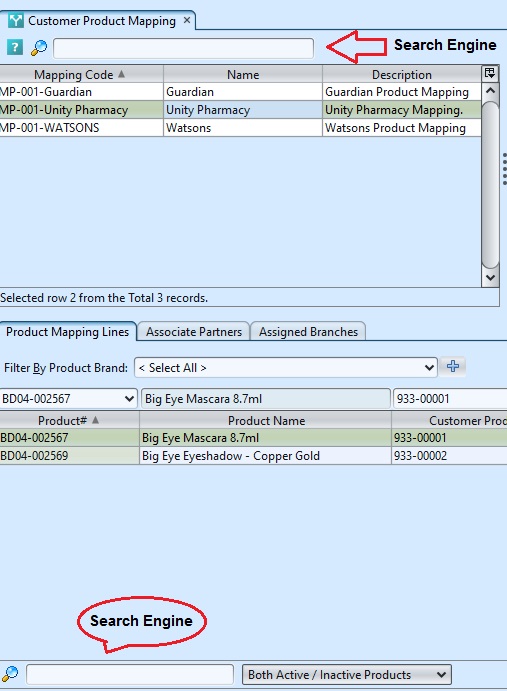
The customer product mapping allows user to create mapping scheme to associate customer’s products’ numbers with company’s products’ numbers. Below actions are available under “Customer Product Mapping”:
![]() Create new customer product mapping scheme; update, delete, view and search for customer product mapping details.
Create new customer product mapping scheme; update, delete, view and search for customer product mapping details.
Field Name |
Description |
Mandatory Information |
| Name | Name of the customers product mapping |
Y |
| Mapping Code | Custom code for the customer product |
Y |
| Description | Description |
N |
Create New Customer Product Mapping Scheme
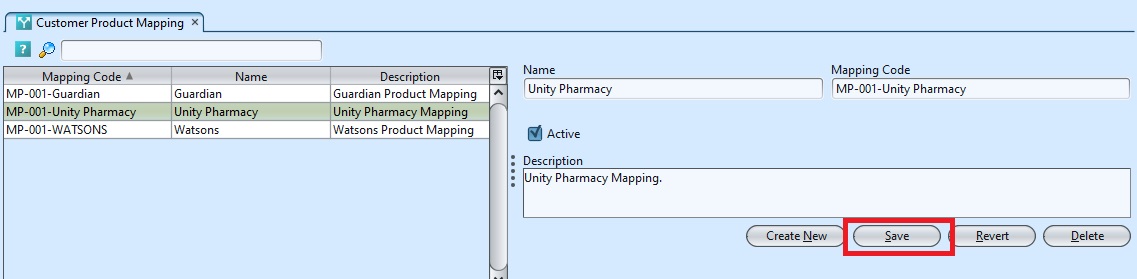
1. Click “Create New” button at the right side of screen, it will create new form for the scheme
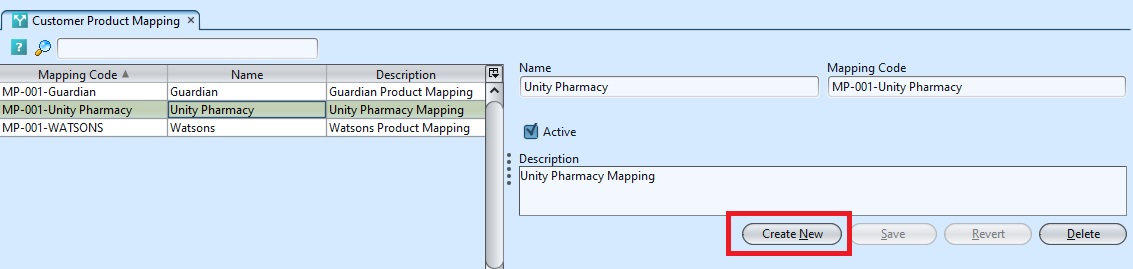
2. Fill up customer product mapping’s information on top right of screen
3. Click “Save” button at the right side of screen
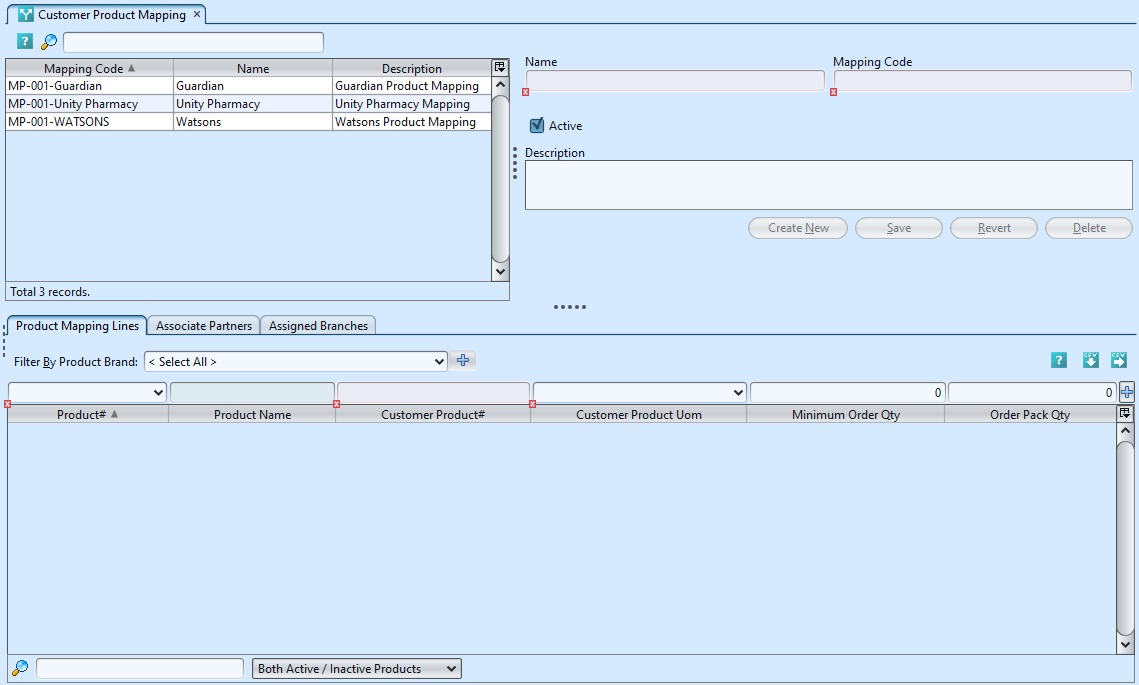
4. Filter the products list by selecting a brand from “Product Brand” drop-down list. Add product into the customer product mapping scheme by searching for the product from the product number drop-down list in the table on “Product Mapping Lines” tab
5. Enter the product’s “Customer Product#” and “Customer Product Uom” info and click ” ![]() ” button to add the product into the customer product mapping scheme
” button to add the product into the customer product mapping scheme

6. Repeat steps 4-5 to add more products into the customer product mapping scheme
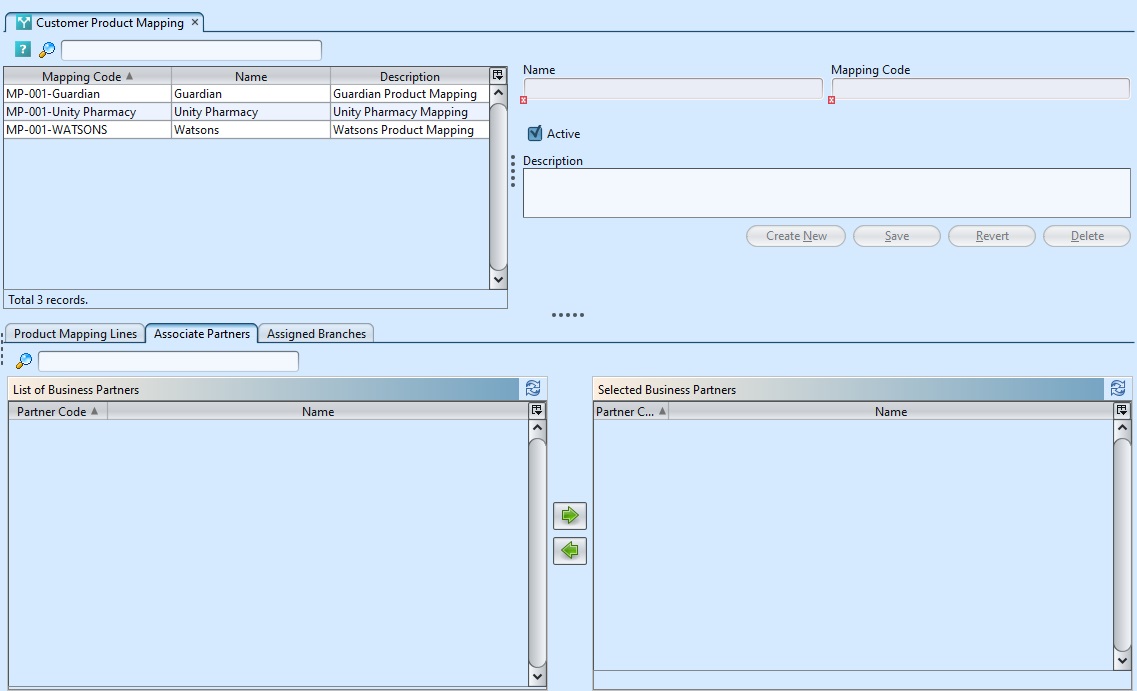
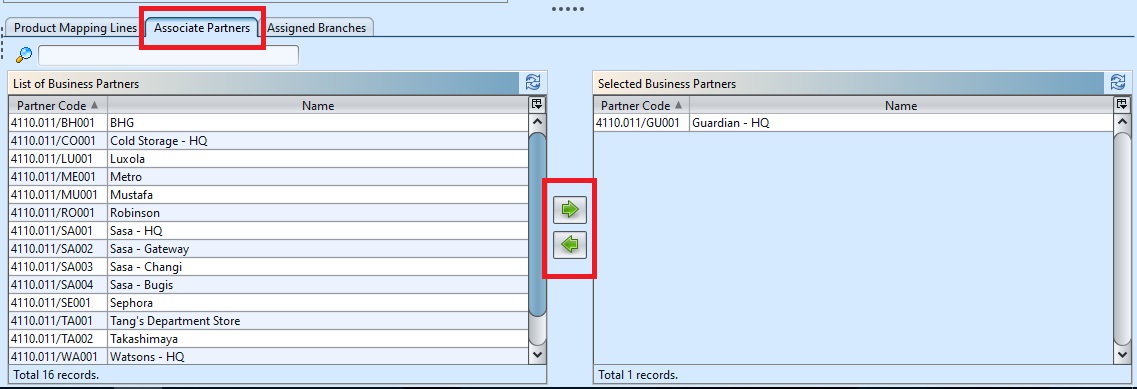
7. On “Associate Partners” tab, assign business partners for the customer product mapping scheme by selecting available partner(s) from the bottom left table and click ” ![]() ” button in middle of screen. Hold Ctrl or Shift key then mouse left-click to select multiple partners
” button in middle of screen. Hold Ctrl or Shift key then mouse left-click to select multiple partners
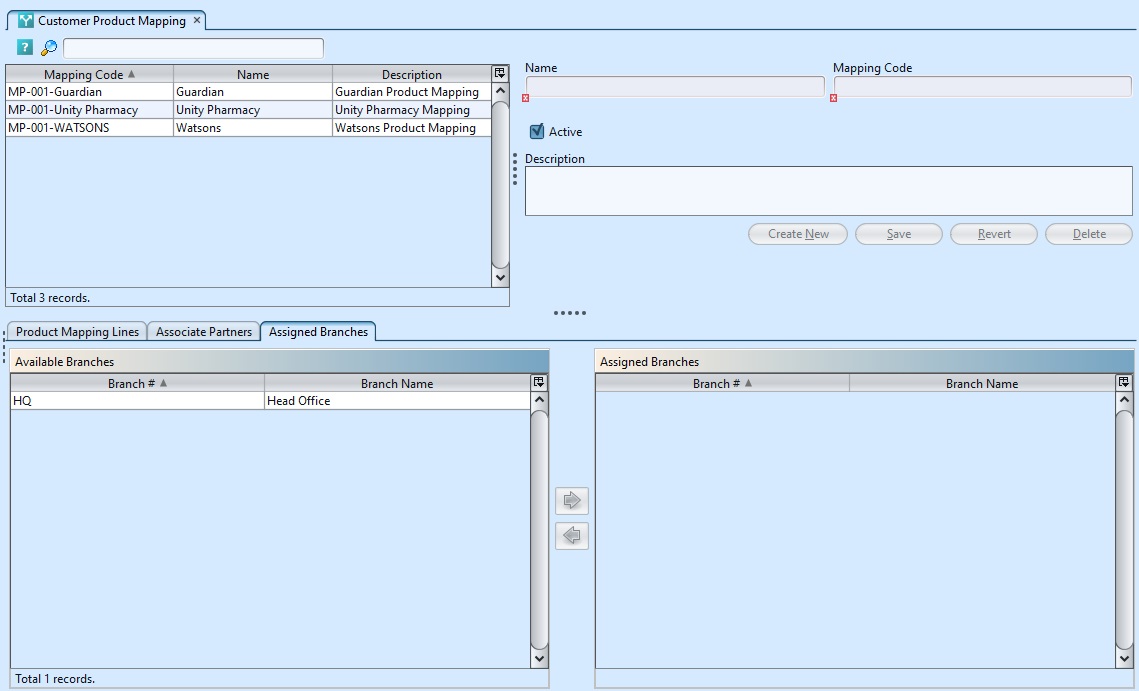
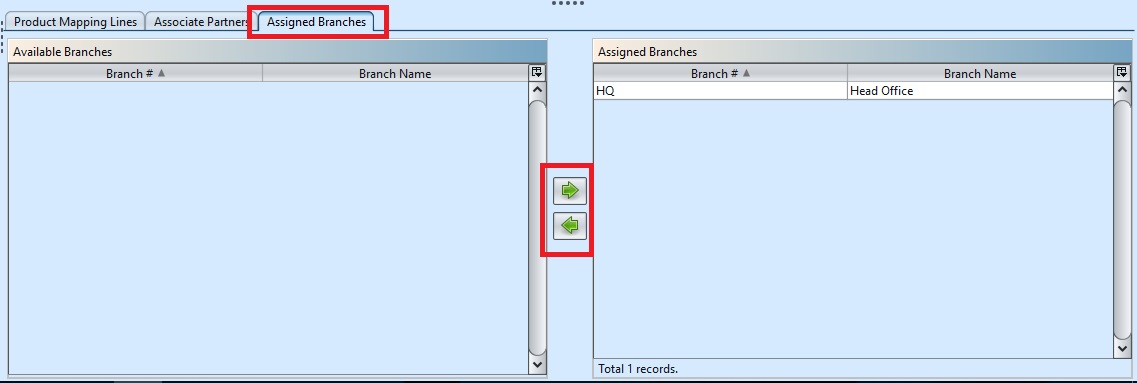
8. On “Assigned Branches” tab, a default branch (e.g. HQ) has been automatically assigned for the new customer product mapping. To assign another branch for the customer product mapping, select available branch from the bottom left table and click ” ![]() ” button in middle of screen
” button in middle of screen
9. Click “Save” button at the right side of screen when done
Update Customer Product Mapping Details
1. Click on customer product mapping scheme to be updated, it will show the selected customer product mapping details on top right of screen
2. Click “Save” button at the right side of the screen when done with the updates
Delete Customer Product Mapping Scheme
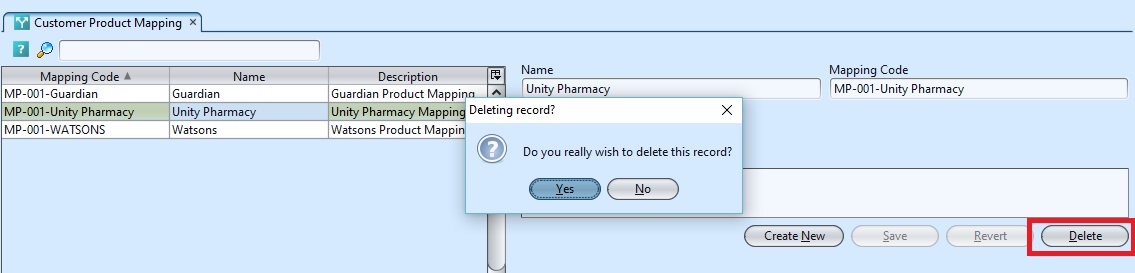
1. Click on customer product mapping scheme to be deleted, it will show the selected customer product mapping details on top right of screen
2. Click on “Delete” button at the right side of screen
3. Click on “Yes” button on the pop-up window to confirm customer product mapping scheme deletion
View and Search for Customer Product Mapping Details
1. On top left of screen enter search parameter to filter the result, i.e. type in the customer product mapping code in the search textfield box
2. Result can be sorted alphabetically by clicking the fields’ columns

3. Double click on customer product mapping scheme to view full details of the scheme, it will bring up the details on the screen
4. On bottom left of screen enter search parameter to filter the “Product Mapping Lines” result, i.e. type in the customer product number in the search textfield box